Create To Communicate
Create To Communicate
LESSON 5
STORIES AND SEQUENCES
Accordion Stories
Objective: Students will be able to use linking adverbials to follow and give directions about a process.
Level: Intermediate
Materials: Recycled thin cardboard (food or tissue boxes), cardstock, paper (long pieces if possible), pencils, glue, and scissors. Optional: colored paper or decorative paper, crayons, markers, colored pencils, tempera paint, and paintbrushes.
Teacher Preparation: 1. Prepare materials for an accordion book. Cut white paper into long, narrow pieces. Each piece of paper should be the same size and length. A length of about 30 inches (70 centimeters) and a width of roughly 10 inches (25 centimeters) works well, but these dimensions can be quite different depending on the desired size of books. Cut enough so that each pair of students will have one piece. *TIP: It may be difficult for younger learners to make an accordion-folded paper. To save time, prepare the folded papers before the activity for young learners. 2. If possible, make an accordion booklet ahead of time to show students as an example. 3. Prepare sets of pictures and linking adverbials (seven pictures and six linking adverbial words) for the activity in Part Three. Pictures and words should all be cut apart. Each group of three students should have one set.
Art Options: There are many different types of books that can be made and used in the language classroom: recycled paper journals, flip books, pop-up books, scrolls, and so on. Use the Internet resources listed at the end of this section for ideas and instructions about how to make other types of books with students.
INSTRUCTIONS
Part One: Making a Paper Airplane
- Explain the importance of giving and following clear instructions when making something. Emphasize that certain words can be used to make the process clearer.
- Write the following linking adverbials on the board.

- Assign students to pairs. Tell them they must stay with their partner throughout the activity.
- Label three corners or areas of the room beginning, middle, and end with a sign or by writing on the board. *NOTE: This should be done before the class begins if possible.
- Have students stand with their partner in the middle of the room. (Move classroom furniture or items as necessary.) Tell students that when you say one of the words on the board, they should decide with their partner if it is for the beginning, middle, or end of a process or story and then go together to the area of the room labeled for that part.
- After pairs have gone to one of the three locations, reveal the correct answer.
- Keep playing the game until students understand where each linking adverbial belongs — in the beginning, middle, or end.
- Assign one student in the pair to be “A” and one to be “B” and give each pair a piece of paper. Pairs should work together to make the airplane. Person A should follow Steps 1–4 while Person B provides advice. Person B should follow steps 6–8 while Person A gives advice.
- Slowly read the directions below for making airplanes to the students. Emphasize linking adverbials such as first, second, next, last, and finally. Point at the word on the board and demonstrate each step in the process as you read. Allow time between steps for partners to provide advice.
Directions for making airplanes1) Okay, Person A, start by picking up the paper.2) First, fold the paper in half, lengthwise and re-open the paper so that you have a crease in the middle of the paper.3) Second, fold the top left corner of the paper towards the center crease until the top edge of the paper is even with the center crease. Do the same with the top right corner of the paper.4) Now, starting at the tip of the point, fold both new top sides down to touch the center crease.5) Okay, please give the paper to Person B.6) Next, turn the paper over and fold it in half along the center crease.7) Now, fold each side of the paper airplane one more time, folding the outside edges of the airplane halfway over to the center edge and creasing the paper.8) Finally, hold the paper airplane by the paper in the middle and open the wings.
- Have pairs compare their results with another pair. Do all of the paper airplanes look the same? If not, how are they different? Encourage students to ask questions about the process if their airplanes do not look right. One good question is “Could you repeat the last step?”
Part Two: Making Accordion Books
- Tell students they are going to choose an interesting process and work with their partner to learn about and write out the process so someone else could follow it. Explain that they will have a chance to research the topic, so they don’t need to know how to do it before they begin.
- Use linking adverbials and simple English to explain the steps in the process, as in the following example:
a. First, you will brainstorm three topics.b. Next, you will ask two other pairs which topic they like best.c. Then, you will choose one topic.d. After that, you will use the Internet to learn about this process. Your process should be short, about six steps.e. Then, you will make an accordion book to write this process on. (Hold up an example if you have one.)
 f. Finally, you will read or listen to the processes made by other students.
 - Write a few examples of topics on the board such as the ones in the box. Encourage students to choose processes that most students in the class won’t know. It will be more interesting if students learn something new.
How to draw a cartoon character How to draw a cartoon character How to do a card trick How to make a braid - Have pairs work together to brainstorm three possible topics that they would like to learn and write the process for.
- Have pairs research the steps of their process. Direct them to use a resource available in your class (e.g., Internet or books). This step could be done at the library or as homework if necessary.
- Have pairs write out their process, and emphasize that they should have about six steps, and no more than eight.
- Pass out a long piece of paper to each pair. (See directions in the Teacher Preparation section at the beginning of the activity for preparing the paper.)
- Instruct the pairs to fold the paper into an accordion using the directions below. When finished, the paper should look like this:
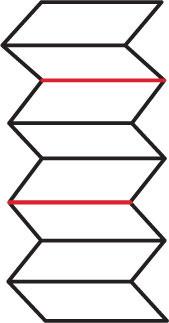
Encourage pairs to get help from each other and other pairs if they don’t understand the instructions. Provide plenty of time between steps in the process to allow students to help each other.a. To begin, hold the paper so the long edges are on the sides.b. Now, fold the paper in half by folding the bottom edge up to the top edge. Demonstrate how to fold the long narrow strip of paper in half.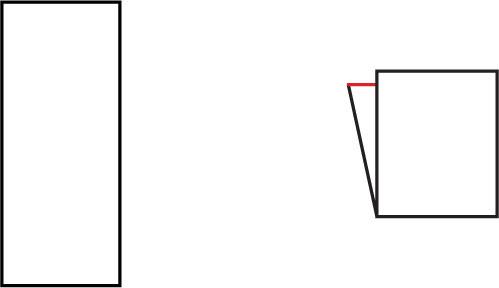 c. Next, take the top edge of the top half of the paper and fold the edge down to the bottom of the paper.
 d. Turn the paper over.e. Fold the top layer in half like you did to the other side of the paper.f. Now, open the paper. This will give an accordion fold with four equal-sized rectangles. Ask a few pairs of students who have done the folding correctly to hold up their papers for the other pairs to see.
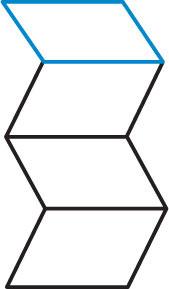 g. With the paper still open, fold the top fourth in half by folding the top edge of the paper down toward you to the nearest fold.h. Turn the paper over. Be sure to keep the long edges on the sides and the top up.i. Next, fold the top section down toward you along the first fold.j. Now, turn the paper over again.k. Fold the top section down towards you again.l. Continue turning the paper over and folding the top down toward you until all the fourths have been folded in half. Some of the folds created in earlier steps may be reversed during the process.m. You should have a paper folded to give eight equal-sized rectangles. Ask a successful pair to hold up their paper. Encourage successful pairs to help pairs that are still not sure what to do. If necessary repeat the verbal instructions.
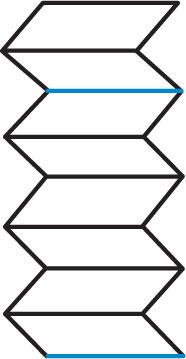
- Have pairs write the instructions for their process along with an illustration for each step on the pages of their accordion books. Provide pencils, colored markers, crayons, or another tool for drawing pictures.
- To finish the book, have students add a title and picture of the final product of the process on the back of the first page and their names on the back of the last page.
- Have pairs change partners with another pair and have them read their instructions to the new partner. The listeners try to guess what the process is. Have pairs switch partners and repeat.
- (Optional) Choose one or two processes that would be easy for the class to complete. A process that requires few materials, such as drawing a cartoon character, is usually best. Provide the class with the necessary materials for the process, and have the student pairs work together to try to follow the instructions for the process as the pair of students who created the process read the instructions out loud.
Part Three: Practicing with Linking Adverbials
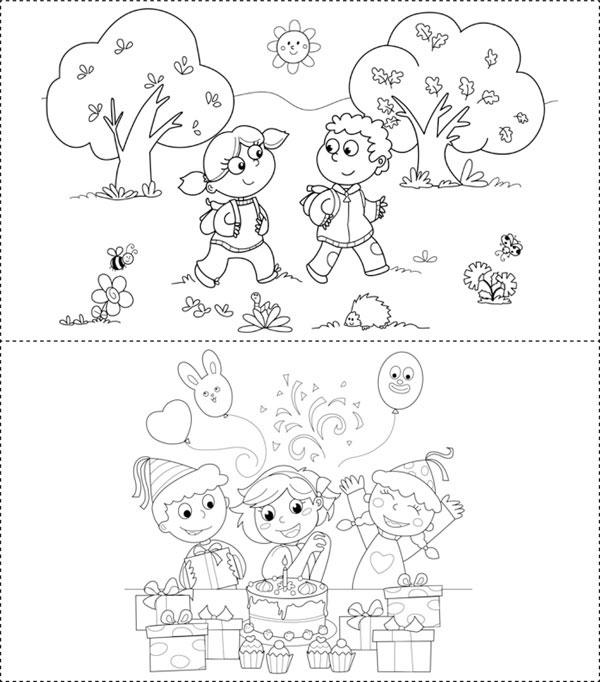
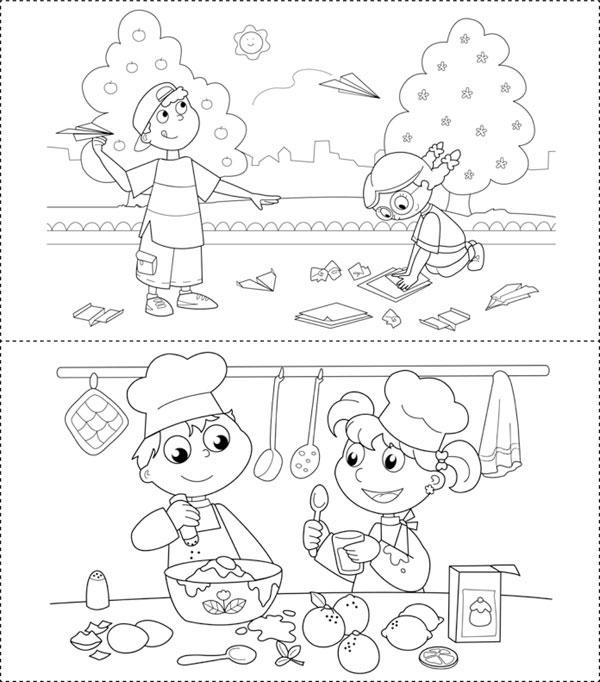
- Place students in groups of three and give each group a set of pictures and linking adverbials, found below.
Next
To begin
Then
Finally
After that
Later - Have the groups work together to create a story from the pictures. They should use six of the seven pictures to make the story. When they have agreed on a story, they should put them in order and put an appropriate linking adverbial below the picture.
- The three students should take turns telling parts of the story. Each person should talk about two pictures.
- Combine two groups of three students and have them share their stories with each other.
- Repeat the previous step by having groups of three tell their story to another group.
- (Optional) Ask for groups who want to volunteer to share their stories with the class.
- (Optional) Have the groups write their stories and put them on the classroom wall.
Part Four: Exit Ticket Closing Activity
- To review sequence words have students line up at the end of class.
- Tell students you will say “beginning,” “middle,” or “end” and they have to give you a sequence word that fits that category. Students cannot leave until they give you a correct word that fits the specified category.
Extension Activities:
Illustrate a Story
Instead of writing instruction steps, have students use the accordion-style book to write and illustrate a sequence of events from a story.
How-To Presentation
For higher level and older students, have students form groups to discuss and select a project in which they will produce a how-to book on a more complex process. Tell them that the process should be of interest or value to them, such as how paper or plastic is recycled, how to start a business, or how to apply to college or a scholarship abroad. The following steps can be used in the process.
- Place students in groups of three.
- Have groups brainstorm topics of interest.
- Have groups present their ideas to six classmates for advice. They should prepare a short survey which includes questions that will help them decide if they want to select the topic and then write down responses from the six people that they survey. Some possible questions are:
a. Which of our three topics do you like best? Why?b. Which of our processes do you already know how to do?c. Do you have any suggestions for how we could make our topic interesting?
- Have the groups tabulate the responses and decide which topic they want to learn about.
- Have the groups use available resources (e.g., books, Internet, movies, YouTube, magazines) to learn more about their topic. If necessary, provide some basic advice about how to search using one of these resources. For example, if the Internet is the resource of choice, demonstrate how to use a search engine for learning about a topic.
- They should write out the steps and provide an illustration on each page of their accordion books.
- Have the students put together a three-minute presentation of their how-to process. Each person should speak for about one minute. They should assign two or three pages for each member of the group to talk about.
- They should practice their sections in their group.
- Groups of three should be paired with another group of three and practice their presentations. They should provide each other with advice.
- The groups should revise their presentations based on the feedback they received from the other groups.
- Have groups present their processes to the class. If the materials are available, the audience can try to follow the process.
- (Optional) Have the groups place their accordion book processes on the wall.
Add Accordion Book Covers
Have students make front and back book covers for their how-to accordion books with recycled cardboard or cardstock. Cut the cardboard or cardstock to fit the size of the first and last folds of the paper book. Have students decorate the back and front book covers before gluing them to the accordion book. Students can decorate them by painting them, drawing on them with markers, or using collage materials and images. The covers can then be glued to the front of the first fold and back of the last fold.
Additional Resources:
Artist Susan Kapuscinski Gaylord’s website Making Books with Children demonstrates how to make accordion books as well as many other types of books. Click on the icon of an accordion book on the homepage. It is also possible to click on the Free Activities section of the website to see examples and instructions for a variety of different types of books that can be made with students. Many activities also include a link to a video tutorial that shows how to make the book, as well as links to printable instructions.
http://www.makingbooks.com/freeprojects.shtml
http://www.makingbooks.com/freeprojects.shtml
The National Museum of Women in the Arts online interactive website about art, books, and creativity provides access to additional online resources. Visitors can also see examples of various types of books, as well as watch videos on how to create different types of artist books.
http://www.artbookscreativity.org/
http://www.artbookscreativity.org/
ACTION CARDS