Create To Communicate
| Site: | CLASE CHINO |
| Course: | ENG |
| Book: | Create To Communicate |
| Printed by: | Guest user |
| Date: | Tuesday, 1 July 2025, 11:34 AM |
Description
Create To Communicate
Table of contents
- Cover
- Title
- Copyright
- Contents
- Art Tips
- Unit I: Drawing
- Lesson 1: About Me
- Lesson 2: Transportation
- Lesson 3: Travel
- Lesson 4: Outer Space
- Lesson 5: Shapes and Symbols
- Lesson 6: Dreams
- Unit II: Collage
- Lesson 1: Neighborhoods
- Lesson 2: Space
- Lesson 3: Earth
- Lesson 4: Jackets
- Lesson 5: Shelters
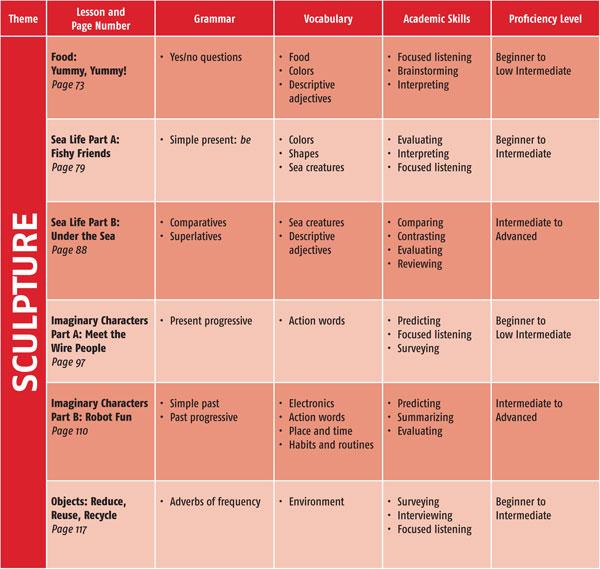
- Unit III: Sculpture
- Lesson 1: Food
- Lesson 2: Sea Life Part A
- Lesson 3: Sea Life Part B
- Lesson 4: Imaginary
- Lesson 5: Imaginary Characters Part B
- Lesson 6: Objects
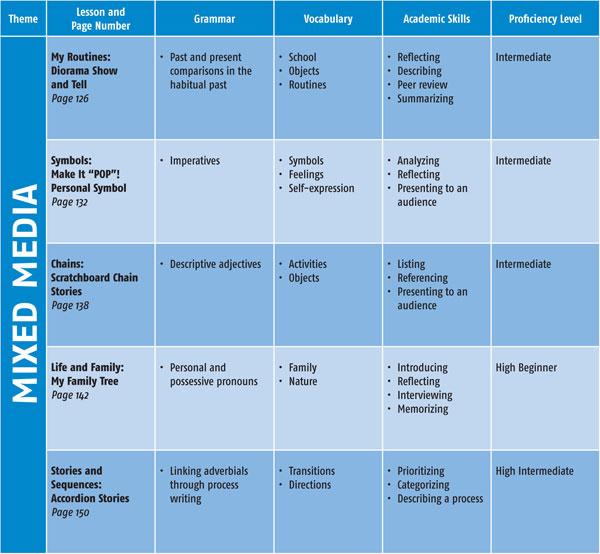
- Unit IV: Mixed Media
- Lesson 1: My Routines
- Lesson 2: Symbols
- Lesson 3: Chains
- Lesson 4: Life and Family
- Lesson 5: Stories and Sequences
- Glossary
- Appendix A
- Appendix B
- Appendix C
- Back Cover
Published by:
Office of English Language Programs
Bureau of Educational and Cultural Affairs
United States Department of State
Washington, D.C. 20037
Bureau of Educational and Cultural Affairs
United States Department of State
Washington, D.C. 20037
First Edition: 2013
| ISBN (print) | 978-1-624-25051-4 | |
| ISBN (PDF) | 978-1-624-25052-1 | |
| ISBN (ePub) | 978-1-624-25053-8 | |
| ISBN (mobi) | 978-1-624-25055-2 |
In this publication, there are many links to other websites. These links to websites do not constitute an endorsement by the U.S. Department of State of the site or the opinions presented therein.
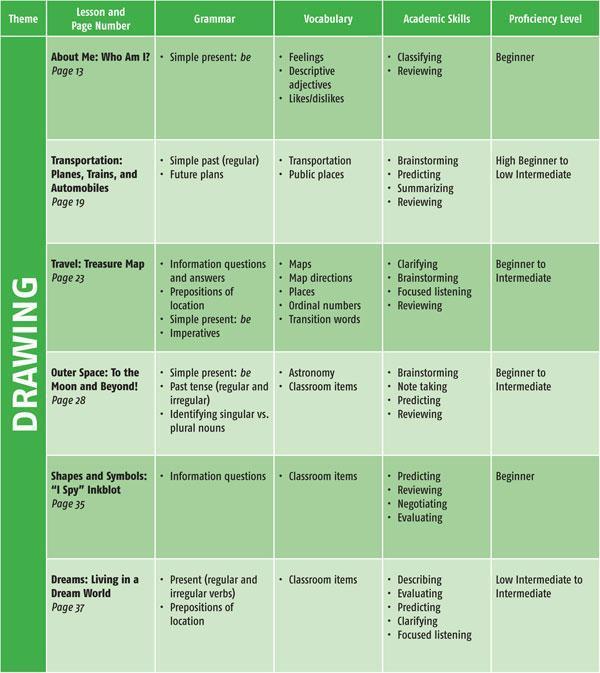
Contents
Rationale
There are unlimited advantages to using the visual arts for developing English language learning skills. The arts can be a source of inspiration, imagination, and motivation for learners. They can engage students in a variety of themes, subjects, and issues, as well as introduce learners to new ways of seeing the world. Most importantly, the arts can provide students with a voice in a world where they have limited English proficiency.
This activity book is intended for English language teachers who would like to reap the benefits that the visual arts provide, but are unsure of where or how to begin. By providing art ideas and guidelines, matched with language objectives, this book seeks to use the arts as a tool to build and strengthen English reading, writing, listening, and speaking skills and develop the confidence students need to take risks and explore within a new language. Designed to supplement regular coursework, the purpose of this book is not to provide art lessons, but rather to provide ideas of how to incorporate the arts into the language classroom to make English accessible and understandable to students.
Organization
The art and language activities in this book are designed for primary and secondary school students. Each activity lists a language objective and suggested skill level. There are four media explored in this book: drawing, collage, sculpture, and mixed media. The activities are designed to be used independently rather than sequentially, giving the teacher the flexibility to choose an activity that best fits the desired topic, language focus, and available art materials of the language classroom.
In addition to flexibility, an important design feature of this book is adaptability. While art materials, language objectives, and skill levels are listed for each activity, most activities can be adapted and modified in numerous ways. Look for modification suggestions at the beginning and end of each lesson labeled as Art Options or Extension Activities, or at the Additional Resources to supplement and enhance the lesson plans. These features enable the teacher to use, adapt, and modify an activity in various ways to best suit the needs of the students.
The below grid is a model of what will be found at the beginning of each lesson:
Objective: This is the language-learning objective for the lesson plan.
Level: This indicates the student level for the lesson.
Materials: This lists the materials needed for the art project.
Teacher Preparation: This is what the teacher will need to do to prepare for the lesson.
Art Options: This will list variations in case the materials listed above do not work in the teacher’s specific setting.
Selecting an Activity
There are three ways to select an activity to fit the needs of the students.
- Language Focus: The language focus of each activity is placed at the beginning of each activity. Most activities in this book are organized around an authentic communication goal and discrete language structures. These objectives are designed to be adapted and modified to best suit the needs of the students.
- Topic: In each chapter, the activities are organized under topic headings.
- Art Medium or Materials: Each chapter of this activity book is organized by art medium. This enables the teacher to easily search for an activity depending on what materials are available. However, most activities also offer suggestions for art material variations. The Art Options listed at the beginning of each lesson offers valuable suggestions on alternate materials. Likewise, adaptation and modification are encouraged.
Teaching the Lesson
There are no exact rules or steps for making art. The tips outlined below offer broad guidelines and suggestions to take into consideration when creating art with students.
- Choose an appropriate activity for the students.
Before beginning an art activity, read through the activity instructions, extensions, and variations to make sure the activity is suitable or adaptable for the age and language ability levels of the students. Most activities can be adapted and modified in numerous ways to fit the needs of students. - Collect the necessary materials, or alternate materials, needed to complete the activity.
Read the materials list and the instructions for each lesson before beginning the activity with students. If the resources listed in the beginning of the activity are not available, read the Art Options section at the beginning of the activity for ideas on other ways to complete the activity. - Help students plan the basic design of the artwork: the composition.
Most art activities require some planning. The amount and type of planning will depend on the age of the students, the specific activity, and the amount of time desired to spend on the activity. With both two-dimensional and three-dimensional artwork, students have a limited amount of space to work with. The teacher can help students plan how they will use the space provided by asking them to think about the organization or arrangement of the subject(s), the size of the subjects(s), and the desired colors and color combinations to be used. In many cases, the teacher can also show students how to organize the design of a piece of artwork by doing an example with the class, or by demonstrating with a student example.
Art Tips
Tips specific to each art medium can be found at the beginning of each chapter. Listed below are a few tips and suggestions that are common to all art media and activities included in this book.
- If possible, have students bring in old shirts or other old clothes that can be worn over their clothes to protect them from paint, glue, or any other messy art materials being used.
- If students are working with messy materials, try to cover and protect the surfaces students will be working on (desks, tables, and floor) with old newspapers or scrap (recycled) papers. By covering students’ workspace, the furniture in the classroom will not only be protected but clean-up will also be faster and easier.
- Old baking supplies such as muffin tins or metal baking sheets make good paint mixing trays or palettes.
- Recycled materials such as magazines, papers, cardboard, plastic containers, and glass jars are utilized in many art activities throughout this book. If possible, collect these items for use in the classroom or ask students and other teachers to collect such recycled materials to donate for art activities.
- Each chapter includes a materials list. The lists provided are broad suggestions of common materials used in art activities. They are intended to give the teacher an idea of possible materials that can be used with the art medium. Not all of the materials listed are needed to complete an activity. Feel free to adapt, modify, or add additional materials to any activity to best suit the resources available and the needs of the students.
- There is a glossary provided at the end of the book with definitions and images for art processes and materials that may be unfamiliar.
UNIT I: DRAWING
Drawing is the process of creating shapes or forms on a surface. The possibilities for drawing activities with English language learners are endless. Drawing can be done with very few materials and can be used to enhance a range of classroom topics, themes, or subjects. Drawing can reinforce vocabulary, practice grammatical structures, and provide a creative impetus for meaningful language use in oral conversation practice. Many different subjects can be exploited for use in the classroom in drawing from observation, such as food, plants, flowers, animals, people, household objects, insects, and local landscapes, or students can use their creativity and memories to draw from their imaginations.
Tips for drawing:
- Use the basic shapes of the subject(s) to create an outline of the drawing.
Any subject can be broken down into shapes that construct it. Help students draw a basic outline of their subject by first identifying and drawing the basic shapes that make it up. Once students have drawn the basic shapes in outline, the form, detail, and features of the subject can be added. - Drawing from imagination — there is no “right” or “wrong” way.
Drawing from imagination allows students to use and expand upon the vital resources most young people possess: imagination and creativity. Drawing from imagination differs from drawing from observation in that learners are not directly observing the subject or object; rather, they are using their memories and creativity. Make sure to stress to students that there is no “right” or “wrong” way to draw from imagination. - Adding color
For tips on adding color to drawings, including information about paints, primary, secondary, and tertiary colors, and color mixing, please refer to Appendix A.
Drawing Materials
These are some materials that can be used for the drawing activities in this book. Each lesson plan in this chapter will have a list of the specific materials needed to complete that particular project, with suggestions for variations in case different resources are on hand.
Required
- Drawing tool: pencil, pen, chalk
- Drawing surface: paper, chalkboard, whiteboard
Optional
- Chalkboard
- Colored pencils
- Crayons
- Paper
- Pens
- Pencils
- Markers
- Natural materials
- Sidewalk
- Whiteboard
DRAWING ACTIVITIES
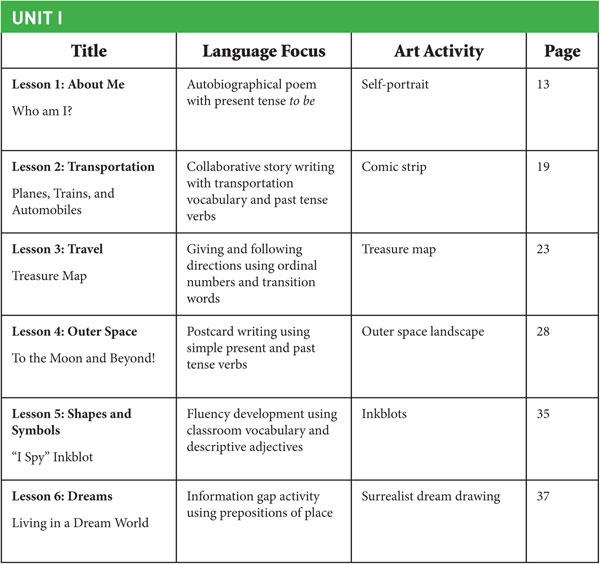
LESSON 1
ABOUT ME
Who am I?
Objective: Students will write an autobiographical poem and create a self-portrait using the present tense of to be.
Level: Beginner
Materials: Mirrors, paper, and pencils. Optional: sticky notes, crayons, markers, or colored pencils.
Teacher Preparation: 1. Ask students to bring in small mirrors before beginning this activity. Students can use the mirrors to help them draw their self-portraits. 2. Duplicate the appropriate pages in the Reproducible Worksheets section.
Art Options: This portrait activity can be completed with several different media. If you have tempera or watercolor paints available, students can paint their self-portraits. If you have collage materials available, students can make a collage portrait, or they can create a mixed media portrait that involves drawing and collage. If you have access to a camera, you can use photography to have students create portraits.
INSTRUCTIONS
Part One: “I am, He/She is” Adjective Memorization Game Warm-Up Activity
- To have students practice using the present tense conjugation of the verb to be with adjectives, play the “I am, He/She is” memorization game.
- Have students sit in a big circle so that each student can see one another.
- Tell students to think of an adjective to describe themselves.
- One student in the circle should start by saying his or her name and one adjective to describe himself or herself. For example: “My name is Josie. I am happy.” The person next in the circle repeats what the first student says and then adds his or her own introduction. For example: “This is Josie. She is happy. My name is Raul. I am funny.”
- The game keeps going around the circle with each student repeating what has been said by changing the verb tense of to be and then contributing his or her own introduction.
- Tell students they cannot repeat an adjective already used.
Part Two: Portraits
- A portrait is a work of art that shows a person (usually the person’s face). Show students examples of portraits. Examples are provided on page 17.
- Tell students they will be drawing their own self-portraits. Ask students to think about how a self-portrait can reflect different moods or attitudes. To provide examples, show students the images at the end of this lesson. Ask students how each of these images differ and what each one conveys.
Optional Extension:a. If available, bring mirrors to the classroom, or ask students to bring small mirrors from home, and place them around the classroom for students to look at and study their features before they begin drawing.b. Elicit from students vocabulary for facial features, such as eyes, nose, ears, lips, cheeks, and teeth.c. Have students draw their portrait on a piece of paper.d. If resources are available, have students add color to their portraits with crayons, markers, or colored pencils.
Part Three: The Portraits Speak! (Speech Bubbles)
- When students are finished with their portraits, divide the students into small groups.
- Tape the drawings on the board or classroom wall.
- Assign each group three or four drawings to look at. Students should consider the mood of the person displayed in the portrait and then write speech bubbles for their assigned portraits.

- Have students write their speech bubble on a piece of paper, cut it out, and tape it to the portrait. Refer to the speech bubble example to the right. If available, use sticky notes for this activity.
- Have students walk around the room reading the speech bubbles the other groups have added to the portraits.
- Take down the speech bubbles and assign each group new portraits to create speech bubbles for.
Part Four: “I Am” Bio-Poem
- Tell students they will create an “I Am” bio-poem to accompany their portrait. They should not write their names on this poem.
- Write questions on the board to help students brainstorm ideas for their bio-poem. Prompts might include:
What are three adjectives that describe you?
What are the names of your family members?
What are three things you like?
What are three things you dislike? - Have students answer the prompts orally.
- If desired, ask students to share or compare their answers to the questions.
- Next, show students the pattern for a bio-poem. Reproduce the pattern on the next page on the board for students to copy, or duplicate the blank pattern at the end of this activity in the Reproducible Worksheets section.
- If needed, review or teach the present tense conjugation of the verb to be.
To beI am
you are
he/she/it is
we are
you are
they are - With students, brainstorm a list of adjectives that describe people and that can be used with the verb to be. Tell students to think about adjectives that were used in the first activity, the “I am, He/she is” memorization game. The brainstormed adjectives can be used in “I Am” bio-poems.
Examples of Personality Adjectivesclean
messy
happy
sad
grumpy
rude
smart
hungry
young
old
funny
friendly
polite
selfish*NOTE: The adjectives above may not fit the level and needs of your students. Modify as needed. - Have students write their bio-poems.
Bio-Poem Pattern
Line 1: I am _______________, _______________, _______________, and ______________. (Write four traits that describe you. For example: kind, honest, playful, or serious.) Line 2: I like ________, ________, and ________. (Write three things, people, ideas, or places that you like.) Line 3: I feel ________, ________, and ________. (Write three emotions.) Line 4: I am afraid of ________, ________, and ________. (Write three things you are afraid of.) Line 5: I want to see ________, ________, and _________. (Write three things or places you would like to see.) Line 6: I live in _______________. (Write the place you live.) Line 7: I am _______________, _______________, _______________, and ______________. (Repeat the four traits that describe you. For example: kind, honest, playful, or serious.) Line 8: I am _______________. (Repeat Line 1). * Adapted from “Biopoem,” p. 51, Writing Simple Poems, by Vicki L. Holmes and Margaret R. Moulton - If needed, add or delete lines of the poem to make the poem suitable for the level of your students.
- Collect the bio-poems and then re-distribute them to each student, making sure that students do not receive their own poems.
- Have students read the poems.
- If necessary, review “Do you?” and ”Are you?” question prompts. Write these two phrases on the board. Have students practice these prompts with the person sitting next to them for two minutes.
- Have students go around the room to look for the person the poem describes by using the prompts above.
- Once students find their partners, have students make mini-presentations about their partner, practicing to be. (For example: “This is Jane. She is kind, honest, and playful.”)
- To complete this activity, have students take turns telling the teacher one thing they learned about someone else today.
Extension Activities:
Me — Then and Now
Write the bio-poem at the beginning of the school term or year. Save the poems students wrote and have them review or rewrite the poem again at the end of the term or school year. Students can compare their new and old poems to see if they have changed through the course of the term or year.
Portrait Gallery
Display students’ portraits and completed poems next to each other in the classroom or school. Students can have a “gallery opening” by bringing snacks to class, inviting other teachers, parents, or students, and talking to the invited guests about their portrait and poem.
Additional Resources:
The National Gallery of Art has a student and teacher resource: Who Am I? Self-Portraits and Writing.
http://www.nga.gov/education/classroom/self_portraits/index.shtm
http://www.nga.gov/education/classroom/self_portraits/index.shtm
The National Portrait Gallery
http://www.npg.si.edu/
http://www.npg.si.edu/
SKETCHES & PORTRAITS

ALL ABOUT YOU! BIO-POEM
Directions: Fill in the blanks using adjectives that describe you.
My Bio-Poem
I am ____________, _____________, ___________, and ______________.
I like ____________, ____________, and ____________.
I feel ____________, ____________, and ____________.
I am afraid of _________, _________, and _________.
I want to see __________, __________, and __________.
I live in _______________.
I am _____________, _____________, _____________, and _____________.
LESSON 2
TRANSPORTATION
Planes, Trains, and Automobiles
Objective: Students will write about an imaginary trip and draw pictures in a comic strip format using transportation vocabulary and past tense.
Level: High Beginner to Low Intermediate
Materials: Required: paper and pencils. Optional: crayons, colored pencils, or markers.
Teacher Preparation: 1. If possible, duplicate the template in the Reproducible Worksheet section of this activity. (Groups may need more than one sheet to draw their story.) 2. Cut out strips of paper for Part One.
INSTRUCTIONS
Part One: Collaborative Comic Strip Story
- Divide students into groups of three or four.
- Tell students to imagine they are taking a trip, and elicit from them various types of transportation that could be used. Write their responses on the board. Common modes of transportation, such as cars, trains, boats, and bicycles can be included, but encourage students to be creative and think past the traditional modes of transportation to include other forms, such as hot air balloons, hang gliders, parachutes, roller blades, submarines, or rocket ships.
Possible Modes of Transportationcar
airplane
train
donkey
helicopter
horse
kayak
on foot
boat
bicycle
motorcycle
bus - As a list is generated, have one student serve as class recorder and write each mode of transportation on a small strip of paper. Fold the strips of paper in half and place them in a basket or other small container.
- Have students brainstorm various destinations. Create a list on the board.
Possible DestinationsThe Moon
The Sahara Desert
The White House
Antarctica
The Pyramids of Egypt
The Swiss Alps
An island in the South Pacific
The Amazon
The Great Wall of China
The Earth’s core - As the list of destinations is generated, have another student recorder write each destination on a small strip of paper. Fold the strips of paper in half and place them in a different basket or into a small container.
- Have one member from each group choose two strips of paper, one from the destination basket and one from the mode of transportation basket.
- Once each group has chosen two strips, the group must create a character for their story. The group will create a story about how their character uses the mode of transportation they chose, to get to the destination they chose.
- Pass out the comic strip template found at the end of this lesson (one per group). Groups may need more than one sheet to draw their story.
- Each group member should contribute to the story in some manner. Group members can help develop the story and decide on the steps of the journey, help draw the pictures in the comic boxes, or help complete both tasks.
- Below is a basic outline students can follow if they need help structuring or drawing their story. Adapt or modify the outline as needed to suit the level of the students.
a. The first box should contain a drawing of the character at the beginning of the journey.b. In the next box, students should show some aspect of the trip.c. In the following box(es), students could show any problems, people, or places the character may encounter along the trip.d. In the last box, students should show their character arriving at the destination. Ask students questions to help them imagine their destination, such as “What would you find when you arrive? What does the landscape look like? Are there lots of people? Or are there no people? Are there any animals or plants? Is anybody there to meet you?”
- If possible, have students add color to the drawings with crayons, markers, or colored pencils.
Part Two: Re-Telling the Stories with Words
- Collect the comic strip stories when all groups are finished.
- Randomly pass out different comic strips to each group, making sure the groups do not receive their own comic strip.
- Instruct the groups to look at the pictures in the comic strip boxes and write a story to accompany the pictures on the lines provided beneath the pictures.
- Have students write the stories in past tense.
- Remind students that what they write should correspond to the picture.
- When every group is finished, have each group present the comic strip pictures and read the story they wrote to the entire class.
Part Three: 3-2-1 Closing Exercise
- To review what was learned and check students’ comprehension, have students do a 3-2-1 closing exercise.
- Tell students to write
- Three key terms they learned;
- Two interesting things they found out;
- One question they still have.
- Address any common questions or concerns students expressed in the 3-2-1 exercise.
Extension Activity:
Transportation Charades
First, make a list of the different types of transportation students included in their stories and drawings. Add any additional types of transportation students brainstormed as well. Write each type or form of transportation on a card or small piece of paper. If needed, review these modes of transportation with students to make sure they know and understand the vocabulary. The completed story drawings can be referred to for examples. Next, play charades by breaking students up into pairs. Each pair takes a turn picking a card or piece of paper. The group then has to act out that mode of transportation to the class. The group cannot use words, only movements, gestures, and sounds. The first group that correctly guesses the transportation vocabulary word gets a point. The group with the most points at the end of the game wins.
Additional Resources:
Here are two Internet-powered comic book creators that work in computer lab settings:
Read, Write, Think Comic Creator
http://www.readwritethink.org/files/resources/interactives/comic/index.html
http://www.readwritethink.org/files/resources/interactives/comic/index.html
Make Beliefs Comix
http://www.makebeliefscomix.com/Comix/
http://www.makebeliefscomix.com/Comix/
COMIC STRIP STORY
Directions: Draw the pictures for your story in the boxes. Then, write sentences for each drawing on the lines below the boxes.
LESSON 3
TRAVEL
Treasure Map
Objective: Students will write, give, and follow directions that correspond to a treasure map, using ordinal numbers, sequence words, and transition words to illustrate a treasure map.
Level: Beginner to Intermediate
Materials: Chalk and sidewalks or some other concrete surface. Variation: Chalk and a blackboard, markers and a whiteboard, or pencils and paper.
Teacher Preparation: Decide where students will construct their treasure map and prepare the materials needed.
Art Options: Several art variations are mentioned throughout this activity. If chalk, sidewalks, or concrete are not available, students can draw their treasure maps on paper or on the blackboard or whiteboard in the classroom.
INSTRUCTIONS
*NOTE: This activity is ideal for large surfaces, such as long stretches of sidewalks or other large concrete areas. By creating a treasure map on such materials, the treasure map becomes interactive. Students can not only draw the parts of the map and write the directions, but likewise walk through the treasure maps. This helps students connect the words to real movements. If these materials or spaces are not available, students can draw their treasure maps on a piece of paper or on the Treasure Map Worksheet provided at the end of this lesson. Another option is to turn the classroom into the treasure map, using classroom furniture as landmarks for the map.
Part One: “Simon Says” Warm-Up Activity
- Play “Simon Says” with students.
a. Have all students stand up.b. Move classroom desks or furniture out of the way if necessary.c. Tell students that when you say “Simon says…,” followed by directions, they have to do what the directions say. For example, if you say, “Simon says take two steps to the right,” students should take two steps to the right. If any students do an incorrect action, they are out and have to sit down. Also tell students that if you don’t say “Simon says” first, before the directions, they should not follow the directions. If they do, they are out as well. For example, if you say, “Take two steps to the right,” and someone takes two steps, he or she is out.d. Try to use directions in the game that students might incorporate into their treasure maps later to reinforce vocabulary. Example directions may include:Simon says take three steps backwards.
Simon says turn around in a circle.
Simon says walk two steps to the north.
Simon says hop once to the left.
Simon says take a giant step to the right.
Simon says skip forward twice.
Part Two: Treasure Map Designs
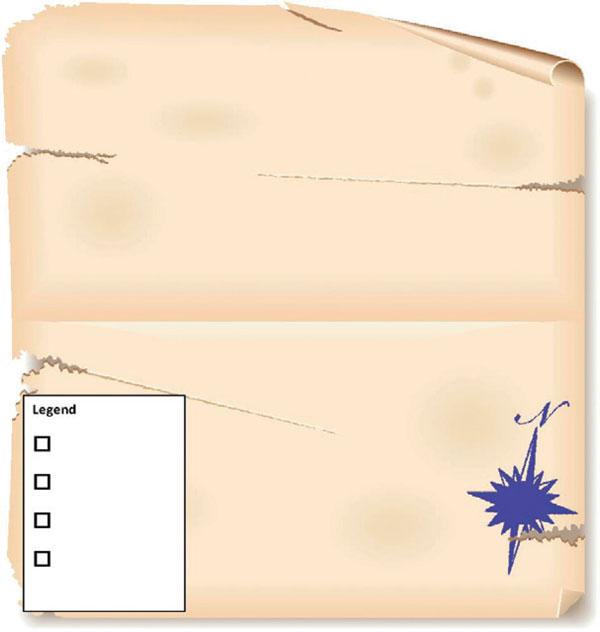
- Show students the example of the treasure map to the right (a larger version is located at the end of this chapter).
- If needed, explain what a treasure map is: a map that is used to find buried treasure (usually stolen money, jewelry, or other valuables).
*NOTE: The topic of pirates may come up. You could elicit from students the names of popular pirate movies and/or ask students to tell pirate stories. However, this may be culturally inappropriate in some locations due to the real risk factor of pirates along coasts. For more advanced classes, you could begin a discussion with students on the mythical, comic version of a pirate in comparison to modern-day pirates. - Review any unfamiliar vocabulary with students. Vocabulary might include “‘X’ marks the spot,” treasure, ship, gold, legend, or loot.
- Break students up into pairs or small groups of three.
- Tell each group they will be creating a treasure map that leads to a treasure, similar to the example above.
- Tell students they will first need to decide what the treasure is and what landmarks they will be drawing in their treasure map. Elicit from students the landmarks on the map and write these responses on the board.
- Have students draw a rough sketch of their treasure maps on a piece of paper first, so they can plan the layout and landmarks of the treasure map. Notice the example above has arrows going through the map to show the viewer how to get to the treasure. Students can also use arrows or dotted lines in their treasure map to try to trick the viewer to lead them the wrong way.
- Now it’s time to draw! Assign students a section of sidewalk or piece of concrete to draw their treasure maps. Make sure students draw the landmarks of the treasure map, the treasure at the end, and lines or arrows to follow through the treasure map, if desired. Ideally, have students draw these maps as large as possible. Make sure they include a legend on their maps.
- Once each group has drawn their treasure map, they need to write directions for it.
- If needed, review or teach ordinal numbers and sequence and transition words to students.
Ordinal Numbers and Sequence Words
first(ly) second(ly) third after afterwards as soon as in the first place at first at last before before long finally in the meantime later meanwhile next soon then - Make sure to tell students that their directions must match the drawings on the sidewalk or paper. They can try to trick other students by drawing arrows or lines that go the wrong way, but if other students follow the directions correctly, they should find the treasure.
- Once groups have completed drawing their treasure maps and writing directions, it is time to follow the directions to the buried treasure!
- Groups can exchange directions several ways:
- One group can read their directions aloud, while another group listens to the directions and follows what they hear on the treasure map. (Another possibility would be to walk through the treasure map if the map was drawn on a concrete surface outside.)
- Alternatively, groups can exchange the written directions of their treasure maps, reading the other group’s directions and following them through the treasure map.
- Each group should give their directions once and try to follow another group’s direction at least once. If possible, have groups switch treasure maps and directions with every other group.
- As a closure activity and to reinforce new vocabulary, ask each student to tell you a new word he or she has learned before leaving class. The word can be vocabulary related to treasure maps or an action verb used in their map directions.
Extension Activity:
Character Sketch
Have students create a character sketch about an imaginary person who buried the treasure. Depending on the level of the students, students can give their character a name and describe his or her physical characteristics and personality. Students can then draw a picture of their imaginary character and, if level appropriate, write a small story about him or her, where he or she has been, what he or she has done, and so on.
TREASURE MAP

GO FOR THE GOLD! MY TREASURE MAP
Directions: Draw your treasure map in the space provided below. Draw symbols in the boxes of the legend below.
Title: ______________________________
LESSON 4
OUTER SPACE
To the Moon and Beyond!
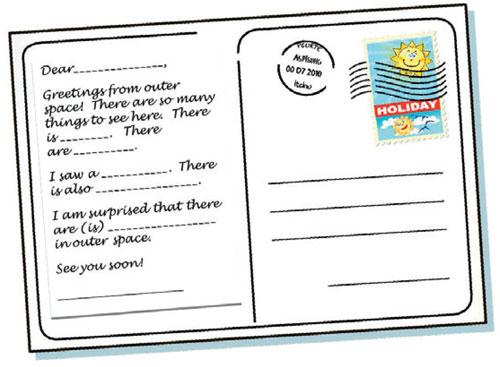
Objective: Students will design the front of a postcard and write a letter on the back using present tense to be and past tense verbs.
Level: Beginner to Intermediate
Materials: Paper, pencils. Optional: paint, crayons, colored pencils, or markers.
Teacher Preparation: Duplicate the postcard template in the Reproducible Worksheet section.
Art Options: If paints are available, students can use paint in their outer space scenes. Have students use crayons to draw the items in their outer space artwork. Then have students use black tempera paint diluted with water or black watercolor paint to paint the background of the picture. The crayon drawings should resist being covered by the paint because of the wax in the crayons, creating a nice effect.
INSTRUCTIONS
Part One: Outer Space Landscape Drawing
- Discuss with students the various things they might see or encounter in outer space. Ask students questions such as:
What do you see when you look at the sky at night?
What do you imagine is out there?
Have you ever seen a movie or read a book about outer space? - Brainstorm ideas with students and create a list of outer space items on the board. If needed, introduce or review the outer space vocabulary that is generated. Refer to the vocabulary box on the right if necessary. Use the images at the end of the section to provide examples of the vocabulary words for students.
Outer Space Vocabularyouter space
meteor
UFO
star
moon
rocket ship
galaxy
alien
sun
planet
comet
shooting star - Tell students they are going to draw an outer space scene. They can include whatever outer space items they would like in their drawings, real or imaginary.
- Pass out paper and pencils to students. If possible, students can use crayons, markers, or colored pencils to add color to their outer space drawings.
- If appropriate for your students, discuss the idea of perspective. First demonstrate the concept by having a shorter student stand in the doorway of the classroom, and a taller student stand outside or down a long hallway. Who appears bigger? The student standing in the doorway should seem bigger, because he or she is standing closer. Similarly, some elements of a drawing may appear bigger and closer while others may look smaller or farther away.
- To show perspective, ask students to look at the images below (also provided in reproducible format at the end of this chapter) and decide with partners which aspects of each image appear closer and which appear farther away.
Part Two: Listening and Drawing
- Display students’ drawings around the room. Ask students to look at the outer space drawings their classmates created.
- Demonstrate the target structure (there is/there are) to students by using a student’s drawing as an example and giving students a few examples of things that can be seen in the drawing. For example: “There is a large planet in this outer space drawing,” or “There are many stars in this drawing.”
- Continue to review with students how there is/there are constructions are used with singular and plural nouns by demonstrating the structure with classroom items. For example, you might say:
There are ten desks in the classroom.
There are two bookshelves in the classroom.
There is one door in the classroom.
There is one stapler in the classroom.Ask students if they notice a pattern. When do you use there is and when do you use there are? - Have students practice using there is and there are by holding up a student’s painting and asking the other students to describe what they see.
- When students are comfortable with the structures there is and there are, have students play a listening and drawing game, as demonstrated below:
a. Break students up into small groups. Students can play the game with paper and pencil, or chalk and a chalkboard, or markers and a whiteboard.b. Tell the student who will draw to close his or her eyes.c. Once the student closes his or her eyes, choose an outer space drawing to describe.d. The other students in the group then take turns describing something that is in the drawing using there is or there are. For example: “There is a rocket ship shooting through the sky,” or “There are five shooting stars.” The student with closed eyes has to listen to the descriptions and try to draw what he or she hears.e. When students have finished describing the picture, students should compare the blind drawings to the original artwork.
Part Three: Outer Space Postcard
- For writing practice, have students write a postcard from outer space. Beginning level students can continue to practice the structure there is/there are, while intermediate level students can write a postcard in the past tense, describing what they saw, the things they encountered, or the places they went in the outer space trip.
- Students can use their drawings or their classmates’ drawings as motivation for what to write about.
- If necessary, review the structure of a postcard. A sample postcard is shown below. A blank postcard is also available at the end of this activity in the Reproducible Worksheets section.
Example
Part Four: Closing Activity
- When students are finished writing their postcards, display the outer space drawings on the classroom board or wall.
- Collect the postcards and mix them up.
- Hand each student a postcard.
- Have students take turns reading them. Students should try to guess which drawing the postcard describes.
- If desired, have students complete this activity in small groups. Hand out a few postcards to each group.
Extension Activities:
Planet/Star Descriptions News Report
Practice speaking or writing with higher level students by having students look at an outer space drawing created by a classmate and imagine that they have landed on one of the planets or stars depicted in the drawing. Ask students to describe to people on Earth what they see. Students can pretend they are giving a news report to people on Earth from outer space and focus on details such as the color of the sky above them, how many moons or suns they see, the air temperature, how the air feels, what they are going to do there, if there are any animals or other creatures, if there is water, and if there are plants.
Outer Space Word Search!
Use one of the online resources below to create a word search to review the outer space vocabulary used in this activity.
Discovery Education Puzzlemaker: http://www.puzzlemaker.discoveryeducation.com/
A to Z Teacher Stuff Word Search Worksheets: tools.atozteacherstuff.com
TeAchnology Word Search Maker: http://www.teach-nology.com/web_tools/word_search/
Additional Resources:
Students can learn more about outer space and astronomy on this website while also practicing English. This online resource has word searches, hangman games, outer space jokes, as well as many more outer space-related activities.
http://www.kidsastronomy.com/
http://www.kidsastronomy.com/
NASA’s kids’ website is a great resource for teachers and students. The site has videos, games, and online storybooks about outer space. Likewise, the site has an educator’s section with classroom activities, images of Earth and outer space, and downloadable posters and space podcasts.
http://spaceplace.nasa.gov/en/kids/
http://spaceplace.nasa.gov/en/kids/
PERSPECTIVE IMAGES
Directions: Compare and contrast the four images. Which aspects of the pictures look NEARER to you? Which look FARTHER away from you? Discuss with your partner.
SPACE IMAGES FOR ACTIVE IMAGINATION

WRITING FROM SPACE POSTCARD
Directions: Write a postcard from outer space to one of your classmates.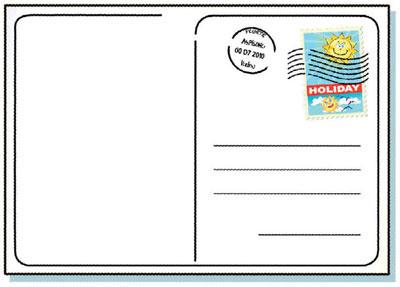
LESSON 5
SHAPES AND SYMBOLS
“I Spy” Inkblot
Objective: Students will describe what they see in an inkblot using descriptive adjectives.
Level: Beginner
Materials: Paper, pencils. Optional: paint, crayons, colored pencils, or markers.
Teacher Preparation: Practice making an inkblot with available materials before doing the activity with students.
Art Options: Paper, pencil, any medium that absorbs into paper and can be used to create an inkblot (e.g., coffee, tea, juice, or paint), newspaper, cloth or paper towels (for cleanup).
INSTRUCTIONS
Part One: “I Spy” Game with Inkblots
- Play the “I Spy” game with students. “I spy” means “I see.” To play “I Spy” one student finds a person or object to describe. The person or object needs to be something that everybody else playing the game can see as well. The student then describes the person or object without saying the name or what it is. Everybody else has to guess what is being described. For example, if playing this game in a classroom, a student might say, “I spy something red and square.” Other students might guess, “Is it that lunch box?” “Is it Karen’s notebook?” “Is it the stapler?” Students keep guessing until somebody identifies the person or object correctly.
- Continue playing the “I Spy” game in the classroom until students understand the game and the format.
- Tell students that they will be creating inkblots to use in the “I Spy” game.
- Have students cover their workspace with old newspapers or other scrap papers to protect the desks or tables from spills.
- Pass out a sheet of paper to each student. Have students write their names on the back of the paper in pencil.
- Demonstrate to students how to make an inkblot:
a. Drop a small amount of the liquid being used into the middle of the paper.b. Carefully fold the paper in half, using your fingers to flatten the paper. This will make the liquid spread out and absorb into the folded paper.c. Carefully open the paper back up to reveal the shape the liquid has created.
- After demonstrating, have students make their inkblots. Young students may need more assistance. If needed, help students to evenly fold their papers in half, spreading the liquid in between the folded halves, and carefully open the paper up again.
- Place the inkblots in a safe place to dry.
- When the inkblots are dry, use them to play the “I Spy” game.
- Tape the inkblots on the board or the classroom wall so that everybody can see them.
- Demonstrate the game. Pick one inkblot, and a shape or object that you see in that inkblot, and say to students, “I spy a…” Students then have to guess which paint inkblot is being described.
- Try to use vocabulary that you have recently used or taught in class. For example, if you have just covered animals, try to pick an inkblot that looks like an animal, such as an elephant, bat, or snake.
- Ask for student volunteers to come to the front of the class and be the “I Spy” observer. The students should pick something they see in one of the inkblots and describe what they see. Other students guess which inkblot is being described.
- Play the “I Spy” game in groups, with groups working together to describe what they see, or working together to guess which inkblot another group is describing. Points can be awarded to groups who guess correctly.
Extension Activity:
Inkblot Animal, Monster, or Insect!
After playing the “I Spy” game with the inkblot images, have students transform their inkblots into animals, monsters, or insects by drawing body parts, such as legs, arms, eyes, mouths, noses, or ears, on the inkblot. Once completed, have students develop a character for their inkblot animal, monster, or insect. Students can describe what the animal, monster, or insect likes to do or eat, what makes him or her happy, angry or sad, and so on. Students can work in groups and use their creature to create or act out a story.
LESSON 6
DREAMS
Living in a Dream World
Objective: Students will use prepositions of place to describe objects and draw what they hear to create a surrealist dream drawing.
Level: Low Intermediate to Intermediate
Materials: Paper and pencils.
Teacher Preparation: 1. Prior to this lesson, the teacher can have students keep a dream journal for a few days (see Part One, Step Five). This is not required to teach from this lesson plan, but can be a way to enhance long-term instruction. 2. Duplicate the chart and surrealist images included at the end of this activity for students to use.
Art Options: If tempera or watercolor paints are available, this activity can be completed as a painting activity. Instead of drawing their dreams in a surrealist manner, students can paint them. This activity can also be completed as a collage activity. Students can collect various images from magazines and other collage materials, organize them in a fantasy-like way, and glue the images onto a base to create a surrealist dream collage.
INSTRUCTIONS
Part One: Surrealist Dream Painting
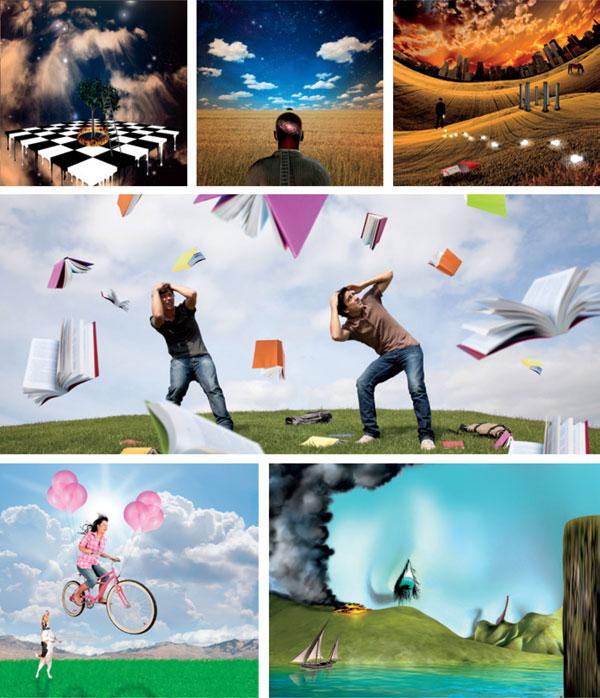
- Show students the images on page 41, or find artwork online from famous surrealist artists, such as Salvador Dalí, René Magritte, Joan Miró, or Max Ernst, to show students.
- Ask students to describe what they see in the artwork. What elements of the artwork are similar? What elements are different? What elements do not seem real?
- Introduce the concept of surrealism to students. Tell students that surrealism is a cultural movement in art, film, and literature that began in the 1920s. The surrealist style of art uses fantasy and imagination to create dream-like images.
- Tell students they will be creating their own surrealist drawings. Their drawings should express their dreams, imagination, and fantasies.
- One way to prepare is to have students keep a dream journal for a few days to a week. In the dream journal, students should write down what they remember from their dreams when they wake up in the morning. Some students may only remember fragments of dreams, while others may remember complete dreams. In any case, students should try to write down the things they remember dreaming about (people, places, and events). The dream journal will help students compose their surrealist dream drawing.
- Pass out paper and pencils to students.
- Tell students to begin drawing. Give students a minimum number of elements to include in their drawings, such as four or five different objects or people. The minimum number of elements will help make sure that students’ drawings contain enough objects to make the preposition of place language component of this activity successful.
- Remind students that their drawings do not need to “make sense” and that their drawings can be as “crazy” or “weird” as they like. Surrealist drawings are supposed to represent dreams, fantasy, and imagination.
Part Two: Prepositions of Place Warm-Up Scavenger Hunt
- Review or introduce prepositions to students. Prepositions are words that show the relationship between a noun and another word or element in the sentence. Prepositions can have many purposes, but generally they give information about a place, direction, or time. This activity will focus on prepositions of place.
- As a warm-up activity, hide classroom items in different locations around the classroom.
- Either write or say directions that students have to follow to find the hidden items.
- Use prepositions of place in the directions to find the hidden item. For example: “Walk between the rows of desks, near the classroom wall, check behind the door, and then above the filing cabinet.”
- Divide students into small groups. Each group should hide an item or two and then write directions to find the item(s), using prepositions of place. Groups should then switch directions and try to find the hidden items.
- To recap the prepositions of place used in this activity, have students act out the prepositions. Call out a preposition of place, and have students act out that preposition. For example, if you said “above,” they might point to the space above their heads.
Part Three: Prepositions of Place with Artwork, Jigsaw Activity
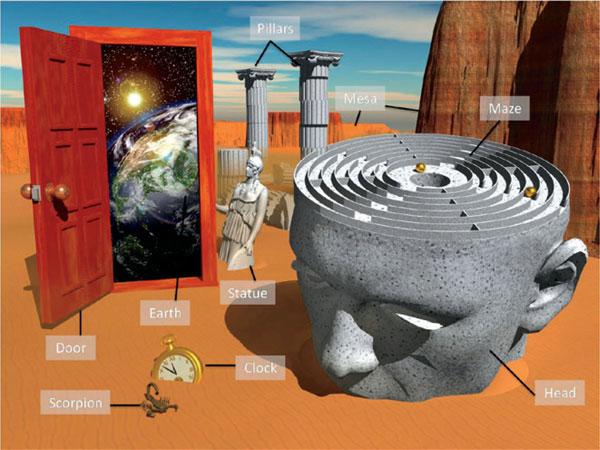
- With a partner, have students use their drawings to write sentences using common prepositions of place, with the help of the chart at the end of this chapter. Make copies of the chart or draw it on the board. *NOTE: There are six different prepositions of place included in the chart below. Modify the prepositions included in the chart if there are specific prepositions of place you would like students to work on. Other prepositions of place may include at, behind, below, beneath, beside, by, in, inside, near, opposite, or over.
Preposition Example Sentence with Preposition above The maze is above the eyes on the head. across The clock is across from the head. between The statue is between the door and the mountain. next to The statue is next to the door. on The maze is on the head. under The eyes on the head are under the maze. - Break students up into six groups, and assign each group one of the prepositions. Each group then has to use the image below to create two or three sentences using their preposition.
- Once each group has come up with two or three sentences for their preposition, have students form new groups. The new groups should have one student from each of the former groups, so that each group member will have created sentences for a different preposition.
- Each group member should take turns introducing his or her preposition and demonstrating the preposition with the surrealist image. Other group members should fill in sentences for the new preposition on their charts.
Part Four: Surrealist Painting Information Gap Activity
- Use students’ surrealist dream drawings to further illustrate prepositions of place.
- Have students find a partner. One student describes his or her surrealist dream drawing (the objects in the drawing, where the objects are located, etc.) to a partner, using prepositions.
- As one partner describes his or her drawing, the other partner tries to redraw the image based on the description. Once completed, they can compare the two drawings. This activity can also be completed in small groups.
Part Five: Artist Statement Closing Activity
- Have students write a paragraph to accompany their drawings.
- Students can describe where their ideas for the drawing come from, why they chose the images in the drawing, or what their feelings about the drawing are.
Extension Activities:
Creative Dream Writing
For more advanced learners, have students pick a surrealist dream drawing that is not their own. Instruct students to create and a write a story based on the drawing. Students can create a story about a dream and incorporate the various elements depicted in the drawing, or students can use the elements of the drawing for the setting, characters, or action of their story.
Dream Free-Writing
Display students’ artwork around the class. Have students pick a surrealist dream drawing that inspires, intrigues, interests, or attracts them. Have students use the drawing as inspiration to free write. Emphasize to students that their writing can be about anything. Another variation for the warm-up is to play instrumental music without vocals. Tell students to free write while listening to the music.
EXAMPLES OF SURREALISM
PREPOSITION PRACTICE!
Directions: Together with your partner, discuss your images using the prepositions listed below. Then write about your own drawing using these prepositions.
| Preposition | Example Sentence with Preposition |
| above | |
| across | |
| between | |
| next to | |
| on | |
| under |
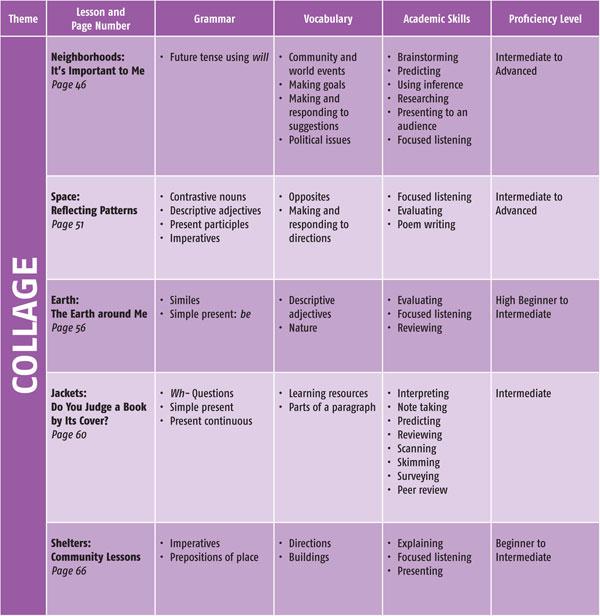
UNIT II: COLLAGE
A collage is a picture or design created by gluing different materials, objects, shapes, or colors onto a surface. Collage is a great tactile alternative to drawing and painting. When paired with a language focus, collage can generate enthusiasm and motivation for language use, engage students with English, and aid in the understanding of the target structure, vocabulary, or grammatical forms.
Tips for Collage:
- Gathering materials
Collages can be made from a wide range of materials, as the following lesson plans will show. Many recycled and free materials can be used to create collages. Look for and collect recycled paper, colored papers, magazines, cardboard, newspapers, postcards, old greeting cards, string, yarn, fabrics, and buttons to use in collage activities. - Bases and surfaces
Every collage project needs a base to create the collage on. The base can be anything that other materials can be glued or taped to, such as a piece of paper, cardboard, or poster board. If students are creating a small collage, with little layering, a piece of regular paper would be fine to use as the base. However, if students are creating a large collage or a collage with many different materials or many layers, the base should be something stronger and thicker, such as recycled cardboard, heavy paper, or poster board. - Building by layering
Layering materials is a common technique used to create collages. Have students start with the large forms or shapes of the collage first and then layer the smaller details last. For example, if creating a collage of a person, begin with the large parts of the person’s body first, such as the torso, legs, arms and head. Then use smaller pieces of paper or other materials to make the small details, such as the hands, feet, eyes, ears, nose, and mouth. - Using glue
Glue is a common material used in collage. There are several types of glue that can be used in collage activities: white glue, paste, or glue sticks. When using glue or paste, students can pour glue from the bottle, or paint glue onto the surface. To paint glue onto paper, first pour a small amount of glue on a piece of paper or in little jar. Then, use an old paintbrush to dip into the glue and paint it onto the surface.
Collage Materials
This is a list of all the materials that can be used to create collages. Each lesson plan in this chapter will have a list of the specific materials needed to complete that particular project, with suggestions for variations in case different resources are on hand.
Required
- Collage surface: paper, cardboard, or the classroom board or wall
- Material(s) to create the collage
- Glue or tape
Optional
- Brushes for glue or paint
- Colored pencils
- Crayons
- Fabric
- Greeting cards
- Magazines
- Markers
- Materials from nature: grass, straw, twigs, sand, small rocks, flowers, leaves, seeds
- Newspaper
- Paper
- Pencils
- Photographs
- Recycled materials
- Scissors
- String or yarn
COLLAGE ACTIVITIES

LESSON 1
NEIGHBORHOODS
It’s Important to Me
Objective: Students will create a collage poster about a social issue and give a presentation using will to talk about the future.
Level: Intermediate to Advanced
Materials: Paper for the base, any collage materials available (recycled magazines, papers, etc.), pencils, scissors, glue, paste, or glue sticks.
Teacher Preparation: 1. Find local posters to use as examples in Part One. 2. Gather and collect collage materials for students to use. 3. Ask students and other teachers to donate materials such as old magazines, recycled paper, or scraps of fabric.
Art Options: If collage materials are not available, this can also be completed as a drawing or painting activity. Students can draw or paint a social issue poster instead of using collage materials.
INSTRUCTIONS
Part One: Social Issue Poster
- Break students into pairs or small groups of three.
- Bring in examples of local posters to show students, or find poster examples online. Assign one poster to each group.
- Have students look at the poster and discuss as a group what the purpose of the poster is, what content the poster displays, and the design features of the poster. Does the poster advertise a product or event? Does the poster make a social or political statement? Is the poster used for decoration?
- Write the various categories of posters on the board, and have groups decide which category their poster should go under: advertisement, social or political statement, or decoration. Have groups tape their posters under the appropriate category.
- Discuss with the class the various categories and determine if groups put their poster in the correct category.
- Tell students they will be creating their own posters about an important issue facing their neighborhood, town, village, city, or school. Show students the Activity Example at the end of the lesson.
- Have groups brainstorm possible topics for the poster. Create a list on the board of the groups’ brainstormed responses. Each group should then pick a topic that is important or meaningful to them. Possible topics might include education, pollution, transportation, or health care. Topics might be more specific, such as trash around the school, bullying, or graffiti on school walls.
- If possible, have students research their issue or problem online. Ask groups to investigate whom the problem affects; what people, groups, or organizations are doing to help solve the problem; and what they can do to help spread awareness or help solve the problem. While researching, have one student from each group be the “secretary” and take notes in their journals.
- After researching the problem or issue, have groups plan their poster with collage materials. Ask students questions to help them plan what to depict on their poster:
What type of picture, image, or design can you create that relates to your topic?How will the image grab the attention of people viewing the poster?Will you use words in your poster? If so, what do you want say? If not, how can you convey your message without words?
- Groups should agree on a plan for their poster before they begin working. Tell students to lightly draw the layout or design of their poster first.
- Have students collect materials and make their collage posters. Invite students to bring in any materials from home or outside the classroom that might be useful for their collage poster. (Refer to the Optional Materials section in the beginning of this unit if needed.)
Part Two: Poster Presentations, Writing/Speaking Practice
- When all groups have finished their poster, tell students they will educate the other students in the class about their social issue or problem by giving a presentation.
- Groups should work collaboratively on their presentation. The presentation should have three parts:
a. Introduce and discuss the problem. (Groups can refer to their notes from researching the problem earlier.)b. Show and discuss the poster the group created. (Groups should discuss what images and text they used to create their poster and why or how the images and text relate to the problem.)c. Discuss the solutions the group came up to help solve the problem. (Groups will need to discuss how they can help solve the problem and what they will pledge to do in the future. Review the use of will to express actions in the future with the class. The language structure is outlined below.)
- Review the use of will to talk about things in the future.
WILL for the FUTUREForm: will + base of the infinitiveUse: To express future actions and predictions or assumptions
Examples: I will (I’ll) be a better student and study more. I will (I’ll) turn the lights off when I am not in a room to conserve energy. I will (I’ll) recycle plastic and paper more. - For example, if their poster is about littering, students might brainstorm solutions such as “I will pick up trash I see around the school,” or “I will organize a school clean-up day with my friends.”
- To help groups brainstorm solutions to the problem they depicted, ask students the questions below, or write the questions on the board.
How does this problem affect you and your community?What are some daily things people can do to help solve the problem?What are some weekly or monthly things people can do to help solve the problem?What will you do in the future to help solve this issue or problem?
- Give students time to practice their presentations.
- Have students give their presentation to the class. If possible, invite parents, teachers, or administrators to come to the class for the groups’ presentations.
a. If your class is large, you can have a “poster session” instead of a poster presentation. For a poster session, instruct half of the groups to display their posters around the classroom. The other groups, as well as any invited guests, circulate around the room, talking to the groups about their posters, the issues depicted, and the solutions the groups came up with. After a sufficient amount of time, have the groups switch roles.
- As a closing and assessment activity, have each student complete a survey about the social issues and problems that were presented. A sample survey is included at the end of this chapter. Adapt or modify this survey to fit the needs and level of your students.
- With permission, display the groups’ posters in the school or other community buildings to showcase the work students did and also bring awareness to the various problems or issues depicted.
Activity Example
 Image © Shutterstock.com; modifications © Amy Tarmey
Extension Activities:
Community Project
After the presentations, have students vote on an issue they would like to investigate further. As a class, design and implement a community project to address the problem. Have students brainstorm different ways in which they can help solve the problem and design a project that addresses the social issue, builds community awareness, and takes action to help solve the problem. For example, if the social issue is pollution and recycling, the class could design a project to hold a recycling event, collecting recyclable materials from the community and bringing them to the proper place to be recycled. If the social issue is hunger, the class could have a food drive, which is when people organize to collect food for others in need. Students and teachers could collect canned goods from students, teachers, and community members and distribute them to poor or homeless people in their community.
Letter to the Press — Community Project
With more advanced students, have students write an article or letter to the local or school newspaper about their community service project. The article can include a description of their planned project or activity, include a picture or copy of the poster they made for the event, or describe how the project and social issue have influenced the class. A follow-up report or article can also be sent after the project is completed, with photos taken during the event, and a description of the outcome of the project.
SOCIAL ISSUE PRESENTATION SURVEY
Directions: Complete this survey before the end of class and hand it to your teacher.
Name:______________________________________________
- Name one new fact about a social issue that you learned today.
- Whose presentation inspired you the most? Why?
- Which group’s poster design did you like the best? Why?
- Of the social issues that were presented today, which one do you think is the most important? Why?
- What did you learn that you can do to help solve the problem?
LESSON 2
SPACE
Reflecting Patterns
Objective: Students will write a Diamante poem using nouns, adjectives, and present participles to illustrate two opposing views, themes, or subjects.
Level: Intermediate to Advanced
Materials: Paper of two contrasting colors, scissors, pencils, glue, paste, or glue sticks.
Teacher Preparation: If needed for younger learners, cut pieces of colored paper ahead of time for students to use to create their reflected patterns collages.
INSTRUCTIONS
Part One: Opposites Warm-Up Activity
- This activity deals with opposite or contrasting ideas. Play an opposites game to warm students up. Two opposite game options are listed below.
a. Opposite Crossword Puzzle: Make a crossword puzzle online with the puzzle maker resource listed below. Create crossword prompts such as “The opposite of…” Example prompts are listed below. Students will have to write the answers for the crossword prompts in the crossword puzzle. Students can work on the puzzle individually or in pairs.Example Prompts:
The opposite of sunny The opposite of dry The opposite of rich The opposite of clean The opposite of fast The opposite of happy Discovery Education Crossword Puzzle Maker: http://puzzlemaker.discoveryeducation.com/CrissCrossSetupForm.aspb. Opposite Flash Cards: Write words with clear opposites on flash cards. Make several sets so that students can work in groups. Give each group a set of flash cards. Time this activity. When you say “go,” tell students to turn over one flash card at a time. Groups then have to write down the opposite of what is written on each card. When you say “stop,” the group that wrote the most (correct) opposites wins. Flash card words might include strong, light, cold, big, short, skinny, noisy, clean, good, high, empty, and sad.
Part Two: Reflected Patterns Collage
- Show students the example at the beginning of the activity of a reflected patterns collage.
- Tell students they will be creating their own reflected patterns collage.
- Pass out materials. Each student will need one large sheet of paper for the base, and a smaller rectangle of contrasting colored paper. The base sheet of paper should be twice the size of the smaller piece of paper.
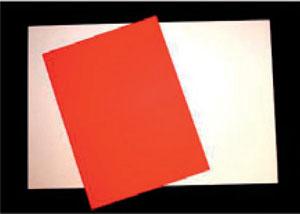
- Explain and demonstrate the steps below:
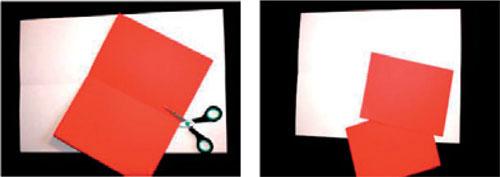
a. Fold the bigger piece of paper in half, lengthwise. If needed, draw a light line down the fold with a pencil. After the paper is folded, unfold it. The crease that the fold creates should be used as a guideline or marker of the center of the paper.b. Take the smaller piece of paper and fold it in half. Cut the rectangle in half along the fold, as in the pictures below.
 c. Draw shapes on the two pieces of colored paper. The shapes should touch, or come close to, one edge of the paper, as in the picture to the right.
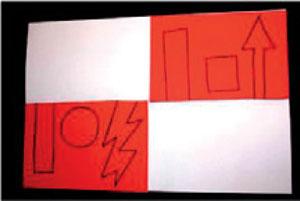 d. Cut the shapes out.e. Line up the colored pieces of paper with the shapes cut out with the center fold of the larger base paper. The two pieces of paper should be diagonal from one another, as shown on the right. Glue the colored rectangle to the base paper once the shapes are cut out.f. Arrange the cut-out shapes so that they lie opposite and reflect the spaces that they were cut out from.g. When the shapes are arranged correctly, glue the shapes to the paper.h. The finished product should be a reflected patterns collage.
 *NOTE: This activity can be made more detailed for older learners. To do so, students can use one large square of paper and cut out detailed and intricate designs from each side of the square. Students then reflect the cut-out shapes over each of the four sides of the square.
Part Three: Reflected Patterns Collage Listening Activity
- Once students are familiar with the format of the reflected patterns collage, repeat the activity again, but this time as a listening activity.
- Have students work with one or two partners. Have the pairs or small groups create another small reflected patterns collage and write the directions for making their collage. Students should emphasize the imperative form of the verbs used; for example: cut out a square or fold the paper in half.
- Students will then take turns giving their directions to the class. The rest of the class must follow the directions they hear to create another small reflected patterns collage. At the end, compare the collages students created with the group’s collage. To save time and allow every group to give their directions, students can use only one small sheet of paper instead of two. Another variation is that students could give their directions to one other group instead of the whole class.
Part Four: Diamante Poem
- Once students have completed their reflected patterns collages, have them write a Diamante poem. Diamante poems are diamond-shaped poems that involve two opposing ideas or topics. Students can use either the two different colors represented in their collage as the two topics of the poem, or whatever two opposing ideas you instruct students to use. Examples of other topics might include night and day, summer and winter, city and countryside, or chocolate and vanilla.
- Students will have to come up with contrasting nouns, adjectives, and present participles for their Diamante poems. If needed, allow students to use dictionaries or thesauruses.
- Have students follow the Diamante pattern listed on the next page to create their poem. Write the pattern on the board for students to refer to.
- (Optional) Create an example of a Diamante poem with the class to help the students see and understand the format of the poem.
- When students are finished writing their poems, have students share their poems with the class. Make a list of the contrasting nouns used in the poems; explain any unclear meanings or relationships to students.
- (Optional) If students write their Diamante poem about the two colors they used in their reflected patterns collage, display the collage, along with the Diamante poems, in the classroom or school.
Diamante Poem Pattern
Line 1: One noun
Line 2: Two adjectives related to the first noun
Line 3: Three participles related to the first noun (-ing words)
Line 4: Four nouns, two related to the first noun
and two related to the second noun (in Line 7)
and two related to the second noun (in Line 7)
Line 5: Three participles related to the second noun (-ing words)
Line 6: Two adjectives related to the second noun
Line 7: One noun — the opposite of the noun in Line 1
*Adapted from “Diamante” poem, p. 94, Writing Simple Poems, by Vicki L. Holmes and Margaret R. Moulton
Example Diamante Poem
Black
Mysterious, Dim
Searching, Covering, Warning
Darkness, Shadows — Daylight, Warmth
Blinding, Shining, Dazzling
Pure, Light
White
Part Five: “I have… Who has…?” Closing Activity
- Reinforce the contrasting nouns used in the poem by playing the “I Have… Who Has…?” game.
- Write the contrasting nouns used in students’ poems on notecards, one per card.
- Give each student a card. Students must find the students in the classroom that have the contrasting noun to the noun on their card.
- In order to play this game, students must first identify what nouns are opposite of what is written on their card. Then, they must circulate around the room, telling and asking students, “I have… Who has/Do you have…?” For example, if a student has the word “summer” written on their card, he or she should say to other students, “I have summer. Who has/Do you have winter?”
- For large classes, this game can also be played with groups. Give each group a set of cards, with equal numbers of contrasting nouns. Each group member gets one card. Group members must then work together to find the group member with the opposite noun on his or her card by asking, “I have… Who has…?” The first group to find all the matches wins.
Extension Activity:
Abstract Diamante
For more advanced students, have them write an additional Diamante poem about more abstract or philosophical subjects. For example, opposing topics for the poem could be love and hate, peace and war, or wealth and poverty.
LESSON 3
EARTH
The Earth around Me
Objective: Students will create a collage from natural materials and write similes using descriptive adjectives.
Level: High Beginner to Intermediate
Materials: Paper, pencils, glue or paste, elements found in nature (materials will vary).
Teacher Preparation: Collect materials from nature and divide the materials into groups. Try to have the same items for each group.
INSTRUCTIONS
Part One: Descriptive Adjectives Warm-Up Activity
- Collect materials from outside to bring into the class, such as rocks, grass, straw, leaves, pebbles, twigs, or branches.
- Divide the materials into four or five groups. Pass out a set of materials to each group.
- Tell students that each group needs to have one sheet of paper and a pencil. When you say “go,” each group has to write down as many adjectives as they can think of to describe natural materials.
- Give students about five minutes to look over the materials, feel the materials, and write their lists of descriptive adjectives.
- After you say “stop,” have one person from each group show the class each material while describing it.
- The group with the biggest list of accurate descriptive adjectives wins!
Part Two: Adjective Quiz Game
- Compile a class list of descriptive adjectives on the board. Each group should contribute to the list, and groups should add onto their group list any adjectives that they don’t have. Again, have students hold up the material the adjective describes. The list may include adjectives such as smooth, bumpy, rough, coarse, hard, soft, slippery, prickly, shiny, stretchy, and stiff.
- Once the class list is compiled, have each group pick two or three adjectives they would like to explore further. Make sure each group has different adjectives.
- Students should write each adjective on a different sheet of paper.
- Tell students that to explore the word further they should use dictionaries and thesauruses to find the definition of the word, other meanings the word may have, collocations for the word, and synonyms for the word.
- Students should write what they find on the piece of paper. Each group can also draw pictures to illustrate the adjective. For example, if a group is assigned the word bumpy, one student may draw a frog with bumps on its back, another student may draw a small picture of a bumpy piece of wood, or another student may draw a small picture of a bumpy road, with rocks and holes in it, all on the same sheet of paper.
- When every group is finished, tape the adjective papers to the wall, whiteboard, or chalkboard where students can see them.
- Have the groups present their adjectives to the whole class, giving the definitions and synonyms, and explaining the pictures if needed.
- Students can also act out or find examples in the classroom that demonstrate the adjectives they were assigned. For example, for the adjective slippery, students could pretend the floor is very slippery or that they are holding a slippery snake that won’t stay in their hands. For bumpy, students could pretend they are riding in a car on a very bumpy road.
- Now play “Adjective Quiz Game” with students. Students can stay in their groups, each student helping their group to come up with the correct answer. To play the game, you say the definition or synonym of one of the listed adjectives, and whichever group raises their hand first and answers correctly gets a point.
- Students should listen to the definition you say instead of trying to read the papers on the board.
Part Three: Nature Materials Collage
- Now that students are familiar with adjectives that describe materials found in nature, tell students they will be making a nature materials collage.
- Pass out a sheet of paper to every student. Instruct students to fold their paper two ways: first, fold the paper in half, widthwise, and then fold it in half the other way, lengthwise.
- Instruct students to look at the adjective papers hanging on the wall or board and choose four adjectives. Tell students to write the adjectives small, one in each box on their paper, in order to leave room for the collage materials. (For very young learners, you may have students only choose two adjectives.)
- Tell students the class will be taking a trip outside to find things from nature that demonstrate the adjectives written on their papers. Ask students to remember their four adjectives so they don’t have to carry their papers with them, or have students write their adjectives on a small piece of paper that they can put in their pocket.
a. If it is not possible to take students outside of the classroom to search for things from nature, assign this part of the project for students to do at home. Ask them to find small items that demonstrate their adjectives at home or on their way to school. For example:Rock — RoughBark — BumpyFlower — Soft
- Before going outside, brainstorm with students for things they might look for. Help students come up with ideas such as rough bark, smooth rocks or pebbles, shiny blades of grass, coarse sand, or bumpy leaves.
- If needed, give students bags, baskets, or plastic bags to collect their items in. Tell students to only collect one or two items that demonstrate each adjective. Students should be careful to not take too much so that the natural environment is not harmed.
- Go outside, as a group, for students to look for and collect their items.
- Once students have collected things and items that demonstrate each of their adjectives, have students glue those items in the boxes on the paper.
Part Four: Simile Game
- Once students have finished their nature texture collage, play a simile game.
- Demonstrate to students what a simile is by writing a few similes on the board. Examples might include “She is as fast as a horse,” “The shirt is as black as night,” or “He is as quiet as a mouse.”
- Review with students the definition and structure of a simile. A simile is an expression that compares a thing or person to something else using the words like or as. Give students more examples of similes if needed.
- To play the simile game, divide students into groups of three or four.
- Write the beginning of a simile on the board using the adjectives students have been working with in this activity, and the objects that students have collected for their nature collage.
- Each time you write the first part of a simile on the board the groups have to think of a noun to finish the sentence that demonstrates the adjective used in the sentence. For example, one group may come up with “The flower is as soft as velvet,” while another group may say, “The flower is as soft as a baby’s skin.”
- Have each group say their completed sentence. Ask the class if they agree with the group’s sentence. For example, if a group said, “The rock is as rough as a piece of glass,” the rest of the class should not agree that it is correct, because glass is usually smooth.
- Have each group think of and write the beginning of a simile on the board. The other groups then have to complete the simile.
Part Five: Closing Activity Options
- Review the main components of this lesson, descriptive adjectives or similes, with students. There are several ways to do this:
a. Hold up different nature materials used in the group work at the beginning of the activity. Each student has to say a descriptive adjective that describes a nature material before they can leave class.b. Say the beginning of a simile and have each student or group finish the simile with a correct noun before they leave class.c. Have each student write an “exit ticket.” On a small piece of paper, have students write a descriptive adjective and its definition. They have to hand you their “exit ticket” before they can leave class.
Extension Activity:
Nature Objects Guessing Game
Break students into pairs. Have students select a nature item without telling their partner what it is. (This can also be done as homework: have students bring in nature items from home.) Without showing each other their item, the partners give each other hints or clues about their items using descriptive adjectives.
For example, students might say:
It is smooth and red. I took it from a plant. (A flower petal)
It is rough and hard. I found this object on the ground. (A rock)
It is rough and hard. I found this object on the ground. (A rock)
In the end, have students show their nature item to each other to check their guesses. To play this as a game, have students keep track, or tally, their correct guesses to see who has the most correct guesses.
Activity Example
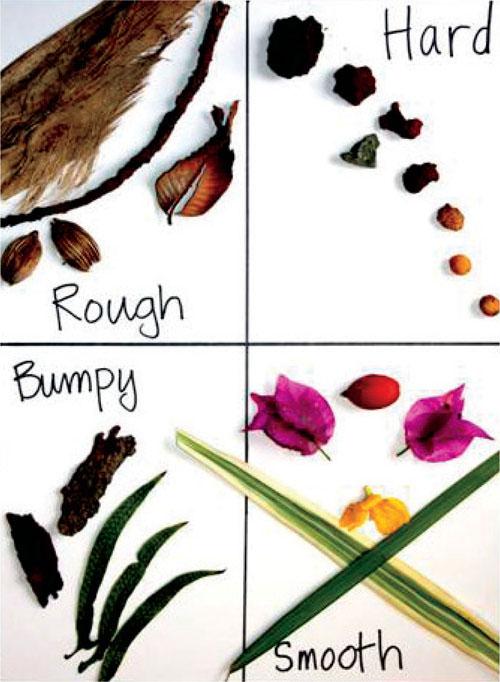
LESSON 4
JACKETS
Do You Judge a Book by Its Cover?
Objective: Students will create a collaged book cover, write a back cover paragraph for a book, and discuss their book in a book fair using Wh- questions.
Level: Intermediate
Materials: Recycled cardboard or poster board, any available collage materials (magazines, papers, postcards, etc.), pencils, scissors, and glue, paste, or glue sticks.
Teacher Preparation: 1. Collect materials, such as recycled magazines or papers, for students’ collage book covers. 2. Read the Art Variation section of this activity. If string or yarn is available, students can make a yarn collage book cover. 3. Find books to use as examples for Part One and Part Three.
INSTRUCTIONS
Part One: Do You Judge a Book by Its Cover?
- Explain that jacket here means cover. Demonstrate what “judging a book by its cover” means by using other examples.
- Find four or five books to show students. Show students the front covers only.
- Ask the class to vote on which book they would like to read.
- Tally the votes. Ask students why they think the chosen book won. Does this book have a more appealing design or image on the front cover?
- Have students explain what judging a book by its cover means in their own words.
Part Two: Collage Book Cover
- Assign students a story or book to work from, or have students pick a story or book that they are familiar with.
- Once students have a book or story to work from, tell students they will be creating a new front and back cover for their book.
- Have students identify a character or scene from the story that they would like to illustrate.
- Cut the cardboard or poster board to the appropriate size for students’ book covers. (The covers should be larger than a normal book cover, in order for students to have more room to make their collage.)
- If desired, students can draw the character, scene, or design on the poster board or cardboard with pencil first to create a basic outline of their collage.
- Students should collect collage materials and begin cutting and gluing the materials to create their new book cover.
- If possible, students can add extra details to their collages with collage materials such as beads, buttons, or fabric.
- After the glue is dry, students should erase any pencil marks that are showing.
Part Three: Back Cover Paragraph
- Once students have completed their front cover collage, they will need to write a paragraph for the back cover of their book.
- Provide students several books to look at. Have students work in small groups or pairs to determine what general information is included on the back cover of books.
- Explain to students that the back cover of the book is not a large space, so authors and editors need to try to provide essential information about the book, while also trying to grab the viewer’s attention, to make them want to read the book.
- Show students that you can often find quotes and opinions on the back book cover from people who have read the book.
- Select some books that your class has not read. Have students share books if needed, and read the back cover of the books. Ask students to vote on which book they would select after reading the back cover of the book and have them explain why.
- Tell students they need to write a short description for the back of their collage book cover, as well as a reviewer’s quote about their opinion or reaction to the book. (Adapt this step to fit the needs and ability level of your students.)
- To help students organize the key information to include on the back cover paragraph for their book, have them use a Five W’s graphic organizer. Draw the graphic organizer below on the board for students to copy, or photocopy the graphic organizer included at the end of this lesson.
WHO are the important characters in the book? WHAT happens in the book? What is the book about? WHY is this book special? WHERE does the story take place? WHEN does the story take place? - After students have completed the graphic organizer, have students use the information in the graphic organizer to write the back cover paragraph.
*NOTE: Not all of the information included in the graphic organizer should be included in the back cover paragraph. The purpose of the Five W’s graphic organizer is to help students remember the important information from the book in order to select what to write about for their back cover paragraph. - Next, have students write their reviewer’s quote for the book. If needed, review the use and purpose of quotation marks.
- Have students write or glue their paragraph and quote to the back cover. Students can also add collage images or designs to the back cover of the book.
- Have students bind the front and back covers together with three pieces of paper, yarn, or string. Cut each of the three pieces to the same size. Then, tape or glue one side of the paper, yarn, or string to the front book cover, at the top, middle, and bottom. Last, tape or glue the other side of the paper, yarn, or string to the back cover, at the top, middle, and bottom of the cover.
Part Four: Book Fair
- Tell students the class is going to have a book fair or book party to present their book and new book covers to the rest of the class. (If possible, invite other classes, teachers, administrators or parents to attend the book fair.)
- Divide students into two groups. One group of students should display their book and book covers on desks and tables around the classroom and stand next to them.
- The other group of students should circulate around the room, asking questions to the students standing next to their book. Tell students to ask the “five W” questions, questions about the students’ opinion of the book, and questions about the collage book cover design.
- After sufficient time, have the two groups switch roles.
Part Five: Book Fair Survey Closing Activity
- To check students’ participation in the book fair, while also reviewing students’ comprehension of the “five W’s,” have students complete a book fair survey. The survey can be found at the end of this chapter. Adapt or modify the survey to fit the needs and level of your students.
Extension Activity:
“Inside, Outside” Book Review Circle
Have students practice speaking and listening, and share information about their books, by doing an “inside circle, outside circle” activity. To begin, divide students into two groups. One group should form a circle in the classroom, facing outwards. The other group should form a circle around the first circle, facing inwards. The students should be equally matched up, each facing another student in the other circle. If there are an odd number of students, one student can be the student helper and help manage time or call “switch.” Tell the inside circle of students that their job is to talk about their books. The job of the outside students is to ask the inside students questions about their books. Remind the outside students to ask Wh- questions and questions about the students’ personal opinions about the book. Say “go” to start the activity. After a minute or two, tell students to switch (or have the student helper call “switch”). Tell the outside students to rotate one person to their right. Inside students stay where they are. Students are now matched up with a new partner to talk about their book with. Keep rotating students every few minutes. Then, change the directions. Have the outside students talk about their books, and the inside students ask questions.
Art Variation:
If yarn or string is available, students can create a yarn collage book cover. Students should first draw the character, scene, or design for their book cover with pencil. Students should then cut pieces of yarn to fit the different parts of the drawing. Next, have students glue the yarn to their drawings in several ways:
a. Gently squeezing glue onto the pencil lines and placing the yarn on top of it.
b. Pouring a little glue into a small container and using an old paintbrush to brush glue onto the yarn, and then placing the yarn over the pencil drawing.
c. Using an old paintbrush to brush the glue directly onto the pencil lines, and then placing the yarn on top of it.
BOOK COVER GRAPHIC ORGANIZER
Directions: Read the back cover of your book. Then, with a partner, complete this worksheet.
| WHO are the important characters in the book? | |
| WHAT happens in the book? What is the book about? | |
| WHY is this book special? | |
| WHERE does the story take place? | |
| WHEN does the story take place? |
BOOK FAIR SURVEY
Directions: After your art walk, complete this worksheet and hand it to your teacher.
BOOK FAIR SURVEY
Name:_______________________________________
- Whose book cover did you like the best? Why?
- What book would you like to read after hearing the book presentation in the book fair? Why?
a. Where does this story take place?b. When does this story take place?c. Who are the characters in the book?
- Which back cover did you like best? Why?
- What was your favorite part of this book fair?
- What was your least favorite part of the book fair?
LESSON 5
SHELTERS
Community Lessons
Objective: Students will use a community collage to give and follow directions using imperatives and prepositions of place.
Level: Beginner to Intermediate
Materials: Old magazines or images of community buildings, tape, glue, paper, pencils, crayons, or colored pencils. Optional: tempera paint, paintbrushes, or markers.
Teacher Preparation: 1. Collect magazine images of community buildings. 2. Find a large, flat surface to use for as a base. Cover the surface with paper. 3. Draw streets of the neighborhood on the paper, or have students draw the streets. Be sure to draw the streets so that students can place their building collages inside the map and along the streets. Also, make sure to give the streets names; students will use the street names to give directions later in the activity.
Art Options: If the materials above are unavailable, students can make a collaborative drawing instead. To make a collaborative drawing you will need a large sheet of paper or several small sheets of paper taped together. Hang the paper on the board or classroom wall. Draw streets on the paper and have each student contribute by drawing a building in the community. Students can then use the collaborative drawing to practice giving and listening to directions.
INSTRUCTIONS
Part One: Name that Place! Warm-Up Activity
- Brainstorm with students what makes up a community and create a list on the board of the different types of buildings, public offices, and businesses that can be found in a neighbor-hood or community. The list might include a school, grocery store or market, post office, hospital, police station, fire station, library, bank, town hall, gas station, stores, apartment buildings, houses, and office buildings.
- Break students up into groups.
- Have one student from each group write each place from the list on a strip of paper and then fold the strips in half.
- Put all of the strips of paper in the middle of the group.
- One group member should then choose a strip of paper and describe that place or building to the group without saying its name.
- Whoever guesses the place correctly gets to choose a strip of paper next.
- “Guess that Sketch” is a variation for this activity. Have students draw — instead of describe — the places that they chose. The first group member to correctly guess the place gets to draw next.
Part Two: Community Collage
- Tell students they will be creating a collaborative community collage. Each student will draw or construct a building to include in the collage.
- Have each student choose a different building to create from the neighborhood list. If your class is small, students may need to make two or three places from the neighborhood list.
- Help students find the right photos for their collages.
- After students complete the basic forms, have them add details such as doors, windows, and signs. These details can be added with crayons, markers, or paint and will help distinguish what types of buildings the sculptures are.
- When students’ collages are completed, have them place their buildings within the map along a street or on a street corner. (See the instructions for creating the map in the Teacher Preparation section of this activity.)
- Help students organize the buildings so that they are spaced evenly within the map.
- Once every sculpture has been added to the map, have students draw or paint any extra de-tails on the map. Extra details may include a park, trees or bushes, stop signs or traffic lights, or any other features of a neighborhood that students can think of. See the illustrations of neighborhood blocks below as examples of how the collaborative community might look.
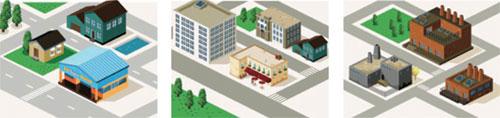
Part Three: Prepositions of Place and Imperative Statements with Directions
- When the community collage is complete, review prepositions of place that are associated with giving directions.
- Write a list of prepositions on the board. Add or modify the list as needed to suit the ability level of your class.
across
at
behind
beside
between
near
next to
on
opposite
far - Use the community collage to demonstrate prepositions of place by describing the location of one of the buildings. For example: “The grocery store is across from the post office.”
- Have students work in their groups and choose five prepositions. For each preposition, students should use the community sculpture to write statements and questions to ask another group. For example, “This building is located behind the post office and across from the market. What is it?”
- Groups should then exchange their statements and questions with another group.
- Groups then read the statements and questions and try to locate the correct building in the community sculpture.
- Next, review imperative commands that are used to give directions with a physical response activity.
- Have students stand up. Tell students you will say commands. Students must listen to what you say and then do it. For example, if you say “Turn left,” students should turn to their left.
- Use imperative commands such as turn left, turn right, go straight, or stop.
Part Four: Giving and Listening to Directions
- To practice listening to and giving directions, break students up into pairs.
- Write the names of the buildings in the community sculpture on strips of paper. Make two sets or use the strips of paper used from Part One.
- Tell each pair to pick two strips of paper. Make sure they do not pick the same place twice.
- Students must then use the community sculpture to give directions from one place to an-other. For example, if they picked grocery store and library, they might say:
To get from the library to the grocery store turn left on _______ street and go two blocks. Then, turn right on __________ street, and the grocery store is on the corner of ________ and ___________ streets.
- Have the pairs of students continue to pick two different locations and give directions from one place to another place.
- Once all students have practiced, have them take turns presenting their community maps to the class.
Part Five: Exit Ticket
- Have students write three sentences on a small piece of paper using the prepositions learned in this lesson to turn in before they leave the class.
Extension Activity:
Community Pamphlet and Tour
Have each student design a pamphlet and tour for people visiting the imaginary neighborhood. A pamphlet is a piece of paper or small book that gives information about something. To create a pamphlet, fold a sheet of paper in half. Tell students to make up a name for the community and write it on the cover. On another side of the pamphlet students can create imaginary facts about the community, such as the population, the year the community was established, or what the weather is generally like. On the third side of the pamphlet students can draw pictures depicting various aspects of the community. Finally, on the last side of the pamphlet have students write directions for a walking tour around the community, including the various landmarks that will be seen on the tour (such as the market, post office, or school). The directions should match the locations in the community sculpture. If appropriate, have students exchange pamphlets and follow the directions of their partner’s tour to ensure the directions are accurate. The completed pamphlets can be displayed with the community sculpture.
Additional Resources:
Visit the Housing and Urban Development Kids Next Door website to visit places virtually, get ideas for volunteering in your community, participate in online scavenger hunts, play interactive puzzles, and build virtual communities.
http://www.hud.gov/kids/
http://www.hud.gov/kids/
Visit the EL Civics for ESL site to learn more about housing in the United States.
http://www.elcivics.com/housing_lesson_1.html
http://www.elcivics.com/housing_lesson_1.html
Visit the Internet TESL Journal site for conversation questions about communities.
http://iteslj.org/questions/home.html and http://iteslj.org/questions/community.html
http://iteslj.org/questions/home.html and http://iteslj.org/questions/community.html
UNIT III: SCULPTURE
A sculpture is a three-dimensional work of art. Sculptures can be created from a variety of different materials. They can be big, small, abstract, or representational. Sculpture provides students with a great tactile alternative to drawing or painting. Kinesthetic learners particularly benefit from the process of working with their hands. Similar to all art media, sculpture can help students make associations and deepen connections between any topic and the target language, English. In addition, sculptures students create in the language classroom can be used as a platform for conversation, description, comparison, and meaningful language use.
Tips for Sculpture
- Materials
Traditionally, sculptures have been made from materials such as clay, stone, and wood. However, the activities in this book utilize recycled materials such as paper, cardboard, or plastic. Look for and collect old magazines, recycled cardboard, and recycled plastic bottles and containers to use for the sculpture activities. *NOTE: Make sure plastic containers used in the activities are rinsed with water and clean. Do not use plastic containers that once held dangerous or harmful substances. - Using glue and tape
Glue and tape are common materials used to construct sculptures. For more information about using glue with students, refer to the “Using Glue” tip in Unit II: Collage. In addition to glue, many different types of tape can be used to construct sculptures: duct tape, masking tape, electrical tape, or office tape. Stronger tapes, such as duct tape or electrical tape, can be used for plastic or cardboard. Office tape or other thin tapes can be used for paper. - Making sculpting dough
Sculpting dough is a fun and versatile material that can be used to create numerous forms. Similar to clay, most sculpting dough is elastic and can be stretched, rolled, pulled, and molded into different shapes. Sculpting dough can be purchased in stores or made from simple recipes at home or in the classroom. Recipes for making sculpting dough are included in Appendix C.
Sculpture Materials
This is a list of all the materials you and your students can use to create sculptures. Each lesson plan in this chapter will have a list of the specific materials you’ll need to complete that particular project with suggestions for variations in case you have different resources on hand.
Required
- Adhesive: glue or tape
- Paper
- Pencil
- Recycled cardboard
Optional
- Brushes for glue and paint
- Crayons
- Glue: paste, white glue or glue sticks
- Magazines
- Markers
- Materials from nature: rocks, grass, straw, twigs, sand, small rocks, flowers, leaves, seeds, snow, ice
- Paper: cardstock, cellophane, colored paper, construction paper, poster board, recycled papers
- Recycled plastic: plastic soda, juice or water bottles, used laundry detergent containers, any other recycled plastic containers
- Scissors
- String or yarn
- Tempera paint
SCULPTURE ACTIVITIES

LESSON 1
FOOD
Yummy, Yummy!
Objectives: Students will ask questions and respond with answers in a food guessing game and will use descriptive adjectives in an information gap drawing activity.
Level: Beginner to Low Intermediate
Materials: Sculpting dough (various colors if possible), pencils, paper, and tape. Optional: markers, crayons, colored pencils, or images or samples of fruits and vegetables.
Teacher Preparation: 1. Photocopy the fruit and vegetable images on page 77. Cut each fruit or vegetable picture out and tape it to a note card. Another option is to find your own fruit and vegetable images to use, or draw fruits and vegetables on note cards. Each note card should have only one fruit or vegetable on it. Make sure there are enough cards for every student in your class. 2. If possible, make sculpting dough for students to use in this activity. Sculpting dough recipes are included in Appendix C. (If materials for sculpting dough are not available, students can complete this activity as a drawing activity.) 3. If possible, duplicate the mind map template in the Reproducible Worksheet section. 4. Prepare the signs for the human graph activity in Part Four.
Art Options: If sculpting dough is not available, this activity can be completed as a drawing or painting activity. Students can draw a fruit or vegetable with pencils, crayons, markers, or colored pencils. If tempera or watercolor paints are available, students can make a fruit or vegetable painting.
INSTRUCTIONS
Part One: Fruit and Vegetable Warm-Up Activity
- Make fruit or vegetable cards before playing this game. See the instructions in the Teacher Preparation section.
- Depending on the level of your students, review the names of the fruits and vegetables, adjectives that might describe the fruits or vegetables, and the words for colors, shapes, or sizes of the fruits and vegetables.
- Mix the cards up and tape one fruit or vegetable card on the back of each student.
- Tell students that when you say “Go!” they must walk around the classroom and find a partner. The pair should then ask yes/no questions to try to figure out which fruit or vegetable is taped on their backs. Possible yes/no questions may include the following:
Is it a vegetable? Is it bitter? Is it sweet? Do you eat the vegetable (or fruit) with a fork? Is it salty? Do you eat it with a spoon? Is it red? Does it grow in the ground? Is it a small fruit (or vegetable)? Does it grow on a tree? Is it large? - When one student answers “no” to a question, it is the other student’s turn to ask questions about the fruit or vegetable card on his or her back. If both students get a “no” answer, the students must continue walking around the classroom to find different partners.
- Students should continue asking questions until they can figure out which fruit or vegetable is taped to their backs.
Part Two: Fruit and Vegetable Mind Maps and Sculptures
- Break students up into small groups.
- Use the fruits and vegetables note cards from the previous activity and assign a fruit or vegetable to each group. (If possible, bring in actual samples of different types of fruits and vegetables.)
- Tell each group they must brainstorm adjectives to describe their fruit or vegetable. Students can focus on describing its size, shape, color, and taste.
- Groups should create a mind map to record their brainstormed answers. Groups can use the mind map template included at the end of this section, or they can create their own.
- After the groups have finished filling out their mind maps, have them switch mind maps and fruit or vegetable cards with another group.
- The new group should add any additional descriptive adjectives they can think of to the mind map.
- If desired, repeat the activity and have groups fill out another mind map for a different fruit or vegetable.
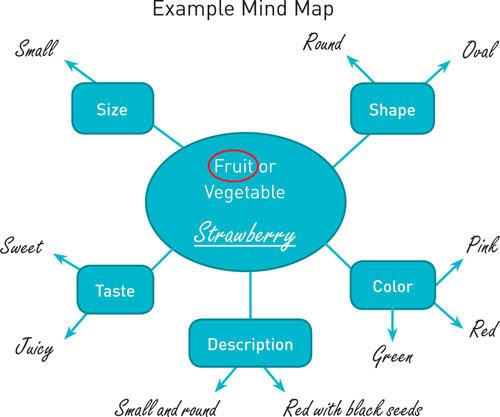
- Tell students they will be creating a small sculpture of one of the fruits or vegetables they have described.
- Demonstrate to students how to create a food sculpture. For example, to create a strawberry, use red sculpting dough and form the dough into a small round shape. Next, you could take a small amount of green sculpting dough and roll it into a skinny rectangle to use for the stem. You could then flatten a piece of green dough to make a little leaf and attach it to the base of the stem. Lastly, you could use a pencil to poke holes into the strawberry to represent the seeds, or stick small pieces of sculpting dough to the strawberry for the seeds.
- Pass out sculpting dough to students and have them begin working.
- Tell students to refer to their mind maps or fruit and vegetable cards if needed.
Part Three: Information Gap Drawing Activity
- To further reinforce descriptive adjectives, do an information gap drawing activity with students:
a. When students are finished with their sculptures, ask them to place their sculptures on one central desk or table.b. Tell students to find a partner. One person in the pair should be the describer, while the other person is the drawer.c. The describer should pick one fruit or vegetable sculpture from the central desk and bring it to his or her desk, without showing it to his or her partner.d. The describer should then begin describing the fruit or vegetable sculpture to his or her partner. The partner should draw what he or she hears. Remind the describer to explain the primary shapes of the item first and the small details of the item last.e. If crayons, colored pencils, or markers are available, the describers can also use color in their descriptions.f. When they are finished, students can compare their drawings to the sculptures.g. Have partners switch roles and choose a new fruit or vegetable sculpture to describe.
Part Four: Human Graph Closing Activity
- To poll which fruits and vegetables students prefer the most, have students make a human graph as a closing activity.
- Before starting the activity make five signs. The signs should say Love it, Like it, It’s okay, Don’t like it, and Hate it.
- Review what each sign means with students. Use gestures and facial expressions to demonstrate the meanings.
- Tape the signs in five different locations around the classroom.
- Tell students that when you hold up a fruit or vegetable sculpture they must walk to the sign that expresses how they feel about that fruit or vegetable: Love it, Like it, It’s okay, Don’t like it, and Hate it.
- When each student has chosen a sign, ask students under the different categories why they love, like, or hate that particular fruit or vegetable. Students should naturally use some of the previously brainstormed descriptive adjectives. For example, “I love strawberries because they are sweet and juicy.”
- Keep repeating the activity by holding up a new fruit or vegetable sculpture. Students must move again to the sign that best describes how they feel about that item. Again, keep asking different students about their feelings.
- For each fruit or vegetable sculpture that is held up, count how many students are standing under each category. Students can then make graphs that show which fruits or vegetables the class likes the best and least.
Extension Activity:
Alphabet Food Poem
Have students write an alphabet poem about fruits, vegetables, or other foods. An alphabet poem follows the order of the alphabet, listing a word or phrase that begins with the corresponding letter. Alphabet poems can be simple and can be used with beginning learners to reinforce vocabulary and the alphabet, or they can be made more difficult for intermediate learners by instructing students to list adjectives that describe food. See the examples below. Students can work in pairs, groups, or together as a class to complete the poem.
Using Foods
Apple
Banana
Carrot
Dates
Eggplant
Fish
Garlic
Hamburger
etc.
Banana
Carrot
Dates
Eggplant
Fish
Garlic
Hamburger
etc.
Using Food Adjectives
Aromatic, acidic, appetizing
Buttery
Crunchy, crispy, creamy
Delicious, dry
Edible
Fragrant, flavorful, fruity
Good
Hot
etc.
Buttery
Crunchy, crispy, creamy
Delicious, dry
Edible
Fragrant, flavorful, fruity
Good
Hot
etc.
Internet Resources:
Fruit and Vegetable Word Search
Create a word search with the fruit and vegetable vocabulary used in this activity. Word searches are a fun way to reinforce vocabulary words and their spellings. You can easily create word searches on the website below.
Discovery Education Puzzle Maker: www.discoveryeducation.com/puzzlemaker/
Learn About Healthy Eating!
Visit the U.S. Government’s Food Plate website for information, activities, multimedia and more on healthy eating. http://www.choosemyplate.gov
EAT YOUR FRUITS AND VEGETABLES!

MIND MAP
Directions: Describe your fruit or vegetable using the mind map below.

LESSON 2
SEA LIFE PART A
Fishy Friends
Objective: Students will create fish sculptures and use these to participate in a description game using descriptive adjectives.
Level: Beginner to Intermediate
Materials: Large recycled plastic bottles, string, stapler, scissors, markers. Optional: tempera paint, paint brushes.
Teacher Preparation: 1. If possible, duplicate the fish cards included in the Reproducible Worksheets section of this activity, or find other fish images to use. 2. Ask students, other teachers, or parents to bring in recycled plastic bottles. Cut the bottoms off the plastic bottles with scissors or a razor. 3. Cut pieces of string, two or three feet long, one for each student.
Art Options: If recycled plastic bottles are not available, this activity can be completed as a drawing or painting activity. Students can draw their fish with pencils, crayons, markers, or colored pencils, or if tempera or watercolor paints are available, students can paint their fish.
INSTRUCTIONS
Part One: “I Spy Something…” Warm-Up Activity
- Before groups begin playing the “I Spy” game, introduce vocabulary words associated with fish body parts: fins, gills, eyes, mouth, and scales.
- Show students the pictures of fish parts on page 84 and the fish cards on pages 85–87.
- Have students play the “I Spy” game in groups:
a. Tape the fish cards in the Reproducible Worksheets section on the board or someplace where all students can see them.b. Demonstrate the game to students. Pick one card, and start to describe it, saying “I spy something…”
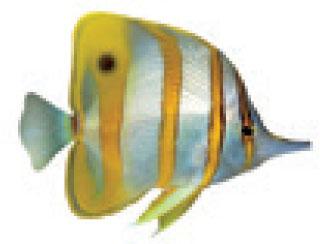 For example, if you pick the card below you might say:I spy something yellow.
I spy something yellow and white.
I spy something yellow and white with a long, skinny white mouth.c. Students should guess which picture is being described.d. When students play the game in their groups, the student who guesses correctly then becomes the describer.
Part Two: Recycled Fish Sculpture
- After playing the “I Spy” game, tell students they will be creating their own fish. Students can create any type of fish they would like, real or imaginary, as long as the fish has eyes, a mouth, and fins.
- Have students make a quick drawing of their fish and discuss their fish with a partner or with the teacher. For example, a student might say, “I want to make a blue fish with big eyes and small fins.”
- Begin the fish sculpture by passing out a plastic bottle to each student. (The plastic bottle should already be pre-pared for the activity; see the Teacher Preparation instructions at the beginning of the activity.)
- Have students poke a hole in the top of the plastic bottle close to the center with scissors. For young learners, do this step for students ahead of time.
- Pass out a piece of string to each student. Have students pull the string through the hole on the top of the plastic bottle. Tie a small bead, twig, or small piece of cardboard onto the end of the string inside the bottle. This will secure the string to the bottle and allow students to hang their fish sculptures when they are completed.
- Students should next staple together the ends of the plastic bottle to create the tail fins. Younger learners might need help in stapling the two sides of the plastic together. The top or opening of the plastic bottle will be the mouth of the fish.
- Once students have created the tail fins, they can begin coloring their fish and adding designs with markers, or, if you have tempera paint available, by painting the plastic bottle.
- Tell students to look at the fish cards for ideas and inspiration.
- Once students have colored or painted the plastic bottles, they can begin to draw details on the bottle: fins, gills, eyes, and other designs. If students used markers, have students draw the fish details with a black marker so the details stand out against the colors. If they used paint, make sure the paint is completely dry before they begin adding details.

- When the sculptures are finished and dry, hang them around the classroom or school.
Part Three: Information Gap Activity
*NOTE: The information gap activity can be conducted with either the fish cards provided in this activity or the sculptures that students created. If you would like to use students’ sculptures for the activity, substitute them for the fish cards in the instruction below.
- To begin, hold up different fish cards for the class to see, and ask students for adjectives to describe the fish. Specifically ask about the shape of the body, size of the body, color(s) of the fish, and details about the fins, eyes, or mouth.
- Make a list of the adjectives on the board for students to refer to. See the example chart below.
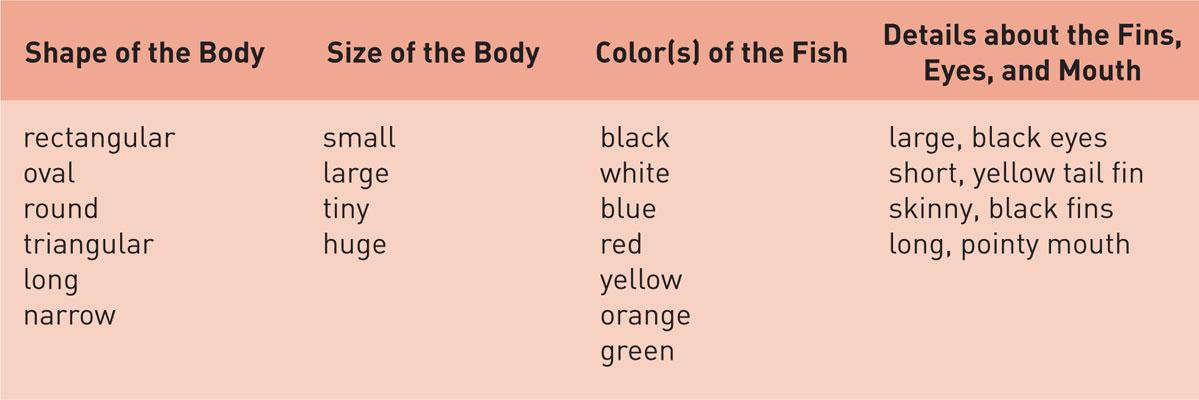
- To increase students’ understanding of the adjectives, draw pictures next to the words or over the fish pictures to help students remember their meaning. For example, if you have a list of adjectives under the category “Shape of the Body” you might have the word rectangular, and then a picture like this:
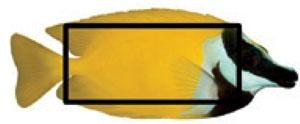
Add the word oval, and then a picture like this:
- Depending on the level of students, leave the chart or list on the board for students to refer to while playing the information gap game.
- Demonstrate the game to the class before students begin playing.
a. Put the fish cards in a pile, with the images facing down, so that the pictures cannot be seen. (If using the fish sculptures, place or hang them in a location where every student can see them.)b. Pass out a piece of paper and pencils to students. Optional: Use crayons and markers as well if they are available.c. The student who will be describing the fish should pick one card.d. He or she should begin by describing the basic shape of the fish and details about the fish on the card that he or she picked.e. The other students should be listening to the description and drawing what they hear. Make sure the student who is describing the fish goes slowly, so that the other students have time to listen, think, and draw. For example, if the student picks the card below, he or she might say:
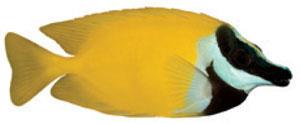 The fish has a long, rectangular body.
The body is yellow.
The fish has a short, yellow tail fin.
The fish has a long, pointy mouth that is black.
The fish has a small black eye.
The fish has a white stripe underneath its eye. - After this, have students compare their drawings to the fish card.
- This activity can be completed in pairs or small groups. Stress to students that their drawings do not need to be perfect or complete.
- Make sure that students switch roles and get a chance at being both the describer and drawer.
Part Four: Exit Ticket Closing Activity
- Have students line up before leaving class.
- Give students a category used in describing the fish cards and sculptures. The category could be shape of the body, size of the body, colors, or details about the fins, eyes, or mouth.
- Tell students they have to say an adjective from the specified category before leaving class. Students cannot repeat answers.
Extension Activity:
Go Fish!
To play the game Go Fish, you will need to make a deck of fish cards from the Reproducible Worksheets at the end of the section. Duplicate each sheet twice so that there is two of every card. Have students cut out the cards. Three to four students can play with one deck of cards. (If you need more than one deck of cards, duplicate the fish card worksheets as many times as necessary.) Pass out two cards to each student playing. Students should not show their cards to anybody else. The remaining cards go in a pile in the middle of the students, face down, so that students cannot see the pictures. One student begins by asking another student if he or she has the match to one of their cards. The student asking has to explain what the card looks like. For example, if the first student was looking for the match to the fish card above, he or she might say “Do you have a fish that has an oval body with a yellow mouth and white spots?”
If the answer is yes, the second student has to give his or her card. If the answer is no, the second student says, “Go fish!” This means that the first student gets to pick one card from the pile to find the match. When students can make a match, they should display the two cards in front of them. Students take turns asking questions and trying to find the matches for their cards until the cards in the middle run out. The student with the most matches wins.
Additional Resources:
The Monterey Bay Aquarium has many ocean and sea life resources on their website: animal fact cards, matching games, “I Spy” games, coloring pages, memory games, online books, crossword puzzles, tic-tac-toe, bingo, songs with lyrics, and information about science careers, animals, sea life, and the ocean.
http://www.montereybayaquarium.org/lc/kids_place/


http://www.montereybayaquarium.org/lc/kids_place/
On the National Oceanic and Atmospheric Administration’s (NOAA) website you can find many ocean and sea life resources for students and teachers. They have facts and information about the ocean, fish, and reefs, as well as coloring pages, games, puzzles, word searches, and stories.
http://www.education.noaa.gov/socean.html
http://www.education.noaa.gov/socean.html
The Smithsonian’s Ocean Portal is an amazing site for teachers and students. Visit this site for further lesson plans, photo journeys, multimedia, and more!
http://ocean.si.edu/
http://ocean.si.edu/
GET TO KNOW YOUR FISHY FRIENDS!
SOMETHING SMELLS FISHY! FISH CARDS
SOMETHING SMELLS FISHY! FISH CARDS
SOMETHING SMELLS FISHY! FISH CARDS
LESSON 3
SEA LIFE PART B
Under the Sea
Objective: Students will create a sea life mobile, participate in an art critique, and write a compare-and-contrast poem using comparatives and superlatives.
Level: Intermediate to Advanced
Materials: Paper plates, paper, pencils, wire coat hangers, flexible wire, string, glue, tape, and fish images from previous activity (Lesson Two). Optional: crayons, markers, or colored pencils.
Teacher Preparation: 1. Duplicate the underwater scene included at the end of this section. Make enough copies so that each group can have one. 2. Choose a type of mobile depending on what materials you have available and what is most appropriate for your students. Prepare those materials before the activity. 3. Duplicate the sea life survey located at the end of this activity.
Art Options: If mobile materials are not available, this activity can also be completed as a drawing or painting activity. Students can draw a sea life scene, with sea plants and animals using pencils, crayons, markers, or colored pencils. If tempera or watercolor paints are available, students can paint a sea life scene. The drawing or paintings can be used as motivation for the art critique and contrast poem.
INSTRUCTIONS
*NOTE: A mobile is a sculpture made by assembling objects together and balancing or arranging them in a manner in which they can move freely.
Part One: “I Spy” Group Contest Warm-Up Activity
- Give each group a copy of the underwater cartoon scene from the Reproducible Worksheets section.
- When the teacher says “go,” tell each group to list as many sea animals as they can from the underwater picture. Students can use bilingual dictionaries if they like.
- Give groups a specific amount of time (no more than three minutes) and then call “stop.”
- Have groups compare answers to see which group named the most underwater items. Possible answers are listed below:
fish
shark
whale
octopus
crab
squid
clam
starfish
turtle
eel
shark
whale
octopus
crab
squid
clam
starfish
turtle
eel
Part Two: Sea Life Mobiles
- Use the underwater scene and answers that students brainstormed in Part One to think of more animals, fish, and vegetation found in the ocean. Have students create a mind map on the board with their answers. Groups can take turns coming to the board to add an item to the mind map. Possible items might include whales, sharks, dolphins, turtles, squid, octopus, jellyfish, starfish, sea horses, eels, fish, sea shells, seals, penguins, sea lions, and coral reefs.
- Use the images provided at the end of this lesson to demonstrate the meaning of the vocabulary words generated in the mind map.
- Tell students they will be making their own sea life mobile.
- As specified in the Teacher Preparation section, choose a type of mobile depending on what materials you have available and what is most appropriate for your students. The mobiles students create should demonstrate various aspects of life in the ocean. Below several mobile types are described.
Mobile Types
Paper Plate MobilesDraw a spiral on a paper plate, starting at the outside and spiraling into the center of the plate, and cut along the spiral. Next, tell students to draw pictures of the sea life they would like to include in their mobile. Use whatever drawing materials you have at your disposal: pencils, crayons, or markers. Attach string to student’s drawings, and hang them from various points of the paper plate spiral. If magazines with images of sea life are available, students could cut images out to include in the mobile instead of drawing them.Coat Hanger Mobiles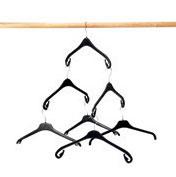 In this method of creating a mobile, have students draw or find images of various types of sea life similar to the paper plate mobiles. However, instead of hanging the images from a paper plate, hang them from a coat hanger. Attach the drawings or images to the coat hanger with string of varied lengths so the drawings hang at different heights.Wire Mobiles
 For wire mobiles, flexible wire is needed (such as a wire coat hanger). Students first create a base for the mobile. The base can be any shape or form as long as other parts of the mobile can be added to it. Students should then bend wire into different sea animal, fish, and plant shapes. Next, attach the sea life to the base of the mobile with wire or string. See the image at the beginning of the activity for an example.
 - Tell students how to make their mobiles, using the directions listed above and showing the example mobile.
- When students have finished their mobiles, hang the mobiles around the classroom.
Part Three: Art Critique with Comparative and Superlative Adjectives
- Give students time to walk around the classroom and look at their classmates’ artwork.
- Have students fill out a survey worksheet while they are looking at the mobiles. A survey worksheet is included at the end of this section. Modify the survey as needed to fit the needs of your class.
- Tell students that artists often have art critiques, where they talk about their artwork with other people. In art critiques, artists can talk with each other about things they like about the artwork and areas where they think need improvement. Artists then compare and contrast the various works of art with each other to gain perspective and feedback.
- Demonstrate to students how to compare sea life mobiles. Use comparative and superlative adjectives. See the chart on the next page for suggestions.
- Ask for student volunteers to compare and contrast two sea life mobiles. See if students use or know how to use -er and -est or more or most for the comparative and superlative adjective forms. If students are having trouble using the correct form, provide explicit instructions on comparatives and superlatives.
One-Syllable Adjectives
COMPARATIVE: Construct the comparative form of a one-syllable adjective by adding -erSUPERLATIVE: Construct the superlative form of a one-syllable adjective by adding -est
Two-or-More Syllable Adjectives
COMPARATIVE: Construct the comparative form of a two-or-more syllable adjective by adding more before the adjectiveSUPERLATIVE: Construct the superlative form of a two-or-more syllable adjective by adding most before the adjective
- Have students continue to compare and contrast the sea life mobiles using comparative and superlative adjectives. Students can use their surveys to help compare sea life mobiles.
Part Four: Sea Life Compare-and-Contrast Poem
- To reinforce comparative adjectives and adjectives used to describe sea life, have students write a compare-and-contrast poem. The poem requires students to use adjectives to describe a topic and compare and contrast two different items.
- Have students choose two sea animals, plants, or fish to write about in their poem. Students can refer to their sea life mobiles if needed.
- Give students time to research information about their sea life topics either on the Internet or with print materials such as books or magazines.
- Show students the pattern of a compare-and-contrast poem and do a class example on the board for students to see, using the example below as a model. If needed, review the use and construction of the comparative form of adjectives.
- Next, brainstorm with students a list of adjectives to use in the poem.
- Give students time to write their poems.
- When students are finished, break them into pairs.
- Tell students to read their contrast poems to their partners, but delete one of the sea animals or plants from the poem. Their partner has to guess what the missing sea animal or plant is.
- Ask for student volunteers to read their poem to the class, omitting one sea animal or plant from the poem. The class then has to guess the missing sea animal or plant.
Basic Pattern: Compare-and-Contrast Poem
Line 1: A is [comparative adjective] than B, Line 2: but B is [comparative adjective] than A. Line 3: While A is [adjective], B is [comparative adjective]. Line 4: They are both [adjective] and [adjective], Line 5: but neither is [adjective] or [adjective]. Example of a Compare-and-Contrast Poem:A shark is meaner than a dolphin,
but a dolphin is cuter than a shark.
While a shark is smart, a dolphin is smarter.
They are both magnificent and majestic,
but neither is ugly or lowly.
Part Five: Exit Statement
- To assess students’ learning and knowledge of comparative and superlative adjectives, require an exit ticket closing activity with students before they leave class.
- Have students line up.
- Give each student a different adjective. The student should tell you the comparative or superlative form.
Extension Activity:
Sea Animal Poster Presentation
Have students create a poster about a sea animal they used in their compare-and-contrast poems. Students should research characteristics of the sea animal, its habitat, what it likes to eat, and other unique qualities about the sea animal. Next, they should draw the sea animal or use an image from a website, magazine, or other print publication to include on their poster. When students present their posters, they can use the images to talk about their sea life animal. When students are finished constructing their posters, have a poster presentation. For the presentation, divide the class into two groups. Tell both groups to hang their posters up around the classroom. To begin, one half of the class will be the presenters, while the other half will be the audience. The audience should circulate around the room and ask the presenters questions about their posters and the sea animals depicted in them. The presenters should refer to the pictures and the images on their posters to answer the questions from the audience. After sufficient time, have the two groups switch roles. If needed, make surveys or sea life scavenger hunt worksheets to give students a framework for information they should be looking for during the presentation.
Additional Resources:
Enchanted Learning’s art mobile resource page: see examples, images, and instructions for different types of mobiles.
http://www.enchantedlearning.com/crafts/mobiles/
http://www.enchantedlearning.com/crafts/mobiles/
The Monterey Bay Aquarium has many ocean and sea life resources on their website: animal fact cards, matching games, “I Spy” games, coloring pages, memory games, online books, crossword puzzles, tic-tac-toe, bingo, songs with lyrics, and information about science careers, animals, sea life, and the ocean.
http://www.montereybayaquarium.org/lc/kids_place/
http://www.montereybayaquarium.org/lc/kids_place/
On the National Oceanic and Atmospheric Administration’s (NOAA) website you can find many ocean and sea life resources for students and teachers. They have facts and information about the ocean, fish, and reefs, as well as coloring pages, games, puzzles, word searches, and stories.
http://www.education.noaa.gov/socean.html
http://www.education.noaa.gov/socean.html
The Smithsonian’s Ocean Portal is an amazing site for teachers and students. Visit this site for further lesson plans, photo journeys, multimedia, and more!
http://ocean.si.edu/
http://ocean.si.edu/
UNDERWATER CARTOON
Directions: With a partner, identify as many ocean creatures as you can.

SEA LIFE
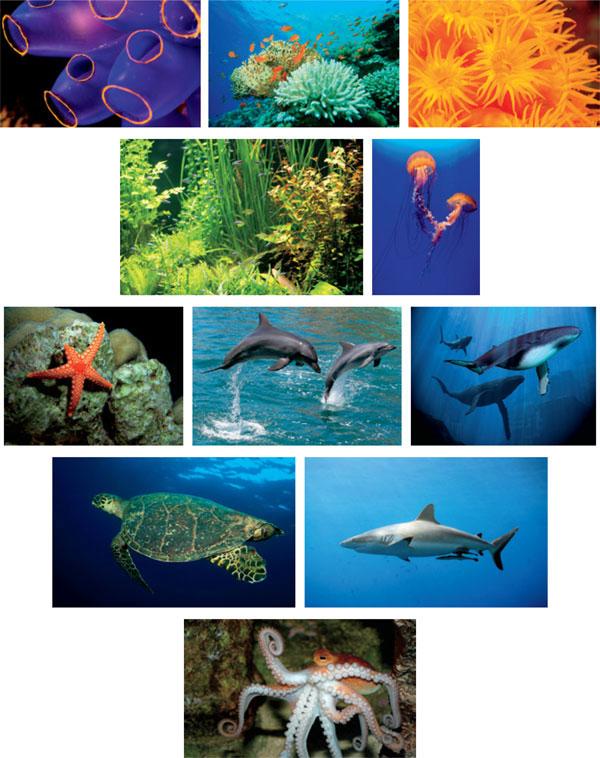
THE SURVEY SAYS…
Teacher Directions: Reproduce this page and cut in half. Provide a survey to each student. Have them look at all the mobiles and then judge them with this survey sheet.
| Sea Life Mobile Survey | |
| Category | Student’s Name |
| Most Colorful | |
| Biggest Variety of Sea Plants | |
| Biggest Variety of Sea Animals | |
| Most Creative | |
| Most Interesting/Intriguing | |
| Other: ________________________ | |
| Sea Life Mobile Survey | |
| Category | Student’s Name |
| Most Colorful | |
| Biggest Variety of Sea Plants | |
| Biggest Variety of Sea Animals | |
| Most Creative | |
| Most Interesting/Intriguing | |
| Other: ________________________ | |
LESSON 4
IMAGINARY CHARACTERS PART A
Meet the Wire People
Objective: Students will be able to use the present progressive verb tense to describe present actions.
Level: Intermediate
Materials: Flexible wire or pipe cleaners, paper, pencils, photos of actions, glue or tape, scissors, and poster board or large sheets of paper.
Teacher Preparation: 1. For the warm-up activity, prepare two sets of cards. One set of cards has an image of the action. The second set of cards has the corresponding verb in the present progressive. Prepare enough cards for each student to have one card. Images are provided at the end of this lesson. 2. For Part Two, photocopy the pictures from the end of this lesson. Cut out each card, keeping them in their respective categories. Prepare the wire to be used to make the wire people like the ones in the example at the end of this lesson.
Art Options: If wire or pipe cleaners are not available, students can complete this activity as a drawing activity. Instead of sculpting an action with wire, students can draw an action with pencil, crayons, colored pencils, or markers.
*NOTE: Look for the complementary lesson plan on page 110.
INSTRUCTIONS
Part One: Finding a Match
- Begin this activity by explaining to students that they will receive a card with either an image of an action or a verb in the present progressive. The goal of this activity is for each student to find the match to his or her card. For example, if a student has an image of a child biking, then the student needs to find the other student who has the card with the corresponding sentence: The child is biking.
- Before matching cards, students will walk around exchanging cards to mix the cards up before they are matched. This makes the game more challenging and fun as students should get a new card with a new action each time.
- Begin the game by saying “Go!” Students should walk around the room trading cards with each other. After the cards have been mixed up, say “Stop!” Students should stop trading cards and stand still.
- When everyone has stopped moving, call “Match,” and students should circulate around the room to find the person who has the match to their card. If they have a picture on their card, they need to find the student with the corresponding present progressive verb written on a card. If they have a verb written on their card, they have to find the student with the picture that demonstrates the verb.
- When every student has found their match, call “Go!” again and the game continues with students exchanging cards in order to mix them up.
- Mix-and-Match variation: If there is an odd number of students, there are a few options to play the game. One option is to have the extra student be the assistant, calling “Go,” “Stop,” and “Match.” Another option is to make enough cards so that all students have a card (resulting in an odd number of cards). Whoever is the last person to find a match, after “Match” is called is out. Each round one student should be out until there is one student left.
Part Two: Making Wire Sculptures
- Review the form and function of the present progressive tense with students. Hold up a picture and have students say what is happening (e.g., She is dancing).
The Present Progressive
This tense is used to show actions or events which are in progress and are NOT finished.Do NOT use the present progressive with non-action verbs (e.g., I am liking).BE + Base form of action verb+ -ing I am listening to music. We are eating. She is studying. The baby is sleeping. They are painting. - Put students into four groups. Give each group a set of pictures with a common theme, for example, sports, outdoors, eating, or school activities. Ask groups to create a sentence for each picture using the present progressive tense (e.g., She is dancing).
- Once groups have had enough time to write their sentences, have each group share their sentences with the class. Make a list on the board of all the sentences.
- Review the list as a class. To reinforce the vocabulary, ask student volunteers to act out the verbs for the whole class.
- Assign students to pairs.
- Tell students to each choose one verb from the class-generated list to create a wire sculpture.
- Demonstrate to students how to bend the wire or pipe cleaners to make the main part of the body, the torso, and then to create the head, arms, and legs. Details, such as feet and hands, should be constructed last. (If needed, review parts of the body with students.)
- Show students the pipe cleaner sculpture examples included in the Examples of Wire People section at the end of this lesson.
- Pass out wire or pipe cleaners to students. Give students time to experiment with using this media.
- Students can then focus on bending the wire or pipe cleaners to demonstrate an action. Have students model their partner’s action to see what the arms, legs, or body looks like while performing that action.
- After pairs have finished making their wire sculptures, put students into new groups of four and pass out more pipe cleaners to each group.
- Each student will give instructions about how to make his or her wire sculpture to the other three students in the group without letting the group members see his or her wire sculpture. The other group members should follow the directions to re-create the wire sculpture.
- Repeat Step Twelve until all students in each group have the opportunity to instruct their group members in the creation of a wire sculpture and to create three new wire sculptures.
- After each student has given instructions on how to create his or her wire sculpture, all students should share what their original sculpture looks like.
- Students can compare the original and their sculptures and write down the main differences.
- Groups should then choose one of the sculptures made by their group that they think is most interesting. The student who made this sculpture should then show it to the class and have other members of the class guess what the sculpture is doing.
- The class can then vote on which of the sculptures presented by the group is the most interesting.
Part Three: Practicing Present Progressive with Charades
- When students have completed their action sculptures, have students play present progressive charades. This activity can be done in groups or as a class, depending on the class size.
- To play charades, write the actions depicted in the students’ sculptures on strips of paper. If your class is small, you may want to add some additional action prompts to give students more options. Prompts may include laughing at a joke, eating a sandwich, painting a picture, conducting an orchestra, drinking tea, playing the piano, or swatting a fly.
- Have one student pick a prompt. The student must act out the prompt.
- The student’s group members take turns guessing the action in the allotted amount of time. (You could start with two minutes.) If the group guesses the action correctly in the time limit, they get a point. If the group does not guess the action correctly, the other groups may guess. The first group to correctly guess the action gets a point.
- Repeat Step Four with other groups until all prompts have been used. The group with the most points wins.
Part Four: Exit Ticket Closing Activity
- Have students line up before leaving class. Say a present progressive verb to each student. The student then has to quickly demonstrate or act out the verb to show he or she knows the meaning. Tell students they can say “pass” once, if you give them a verb they do not know or they don’t want to act out the verb.
Extension Activities:
Guess that Sketch Game Using Present Progressive
After students have completed their wire sculptures, write the actions depicted in the students’ sculptures on strips of paper. If your class is small, you may want to add some additional action prompts to give students more options or to incorporate new vocabulary. Paper and pencils, pens, or markers should be provided for students to draw. One by one, students take turns choosing a strip of paper and then drawing the action. This drawing should only be a quick sketch to give the other students a general idea. After the drawing is finished, the rest of the group guesses what action is being depicted. Students must give guesses in a complete sentence: She is dancing. This game can also be played competitively: Divide the class into two teams. Students from each team take turns drawing the action for their team. If the team whose student is drawing is unable to provide the correct answer, the other team gets a chance to guess. Give one point for each correct answer and keep track of these points. When all the sentence strips have been used, the team with the most points wins.
Creating a Group Story
Have the students use pipe cleaners to create any shape, animal, or other object that they want. Put them in groups of five or six and have them try to guess what each other’s creations are. Have groups try to put all of the creations together to create one scene and develop some way to connect the objects into a story. One student can begin by saying a sentence about his or her object. The next student can connect his or her object to the previous students’ idea. For example, the first student could say, “This is my dog.” The second student could say, “Your dog bit my star.” Put two groups together and have them tell each other their stories. Optional: Reassign groups and have students repeat the activity.
K-W-L-S
Have students write four categories on a piece of paper: K-Know, W-Want to know, L-Learned, S-Still want to know (or unsure of). Students should write present progressive verbs under each of these four categories. The K-W-L-S activity is a good way for students to reflect on their learning and also a good assessment tool for you to see which present progressive verbs students are still struggling with.
Additional Resource:
For more mature learners, there are many ideas for creating more complicated wire figures. Here is a good website that provides a description of how to make more complex wire figures. Students can work in small groups to create more sophisticated wire figures.
http://www.bartelart.com/arted/wiresculpture.htm
http://www.bartelart.com/arted/wiresculpture.htm
ACTION CARDS PART ONE
Teacher Directions: These images are for Part One. Cut out these photos and paste each photo on a note card. On a separate note card, write the action that is occurring using the present progressive. For example: She is listening to music.

ACTION CARDS PART ONE
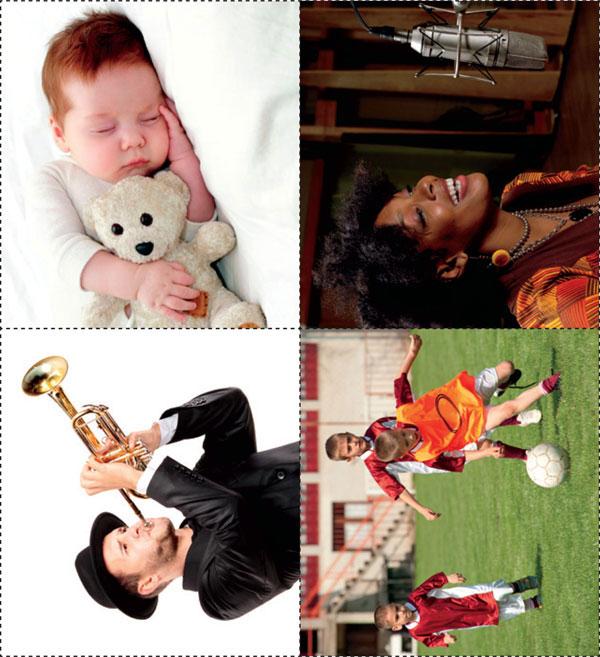
ACTION CARDS PART TWO
Teacher Directions: Keeping these photos in their respective categories, cut out the images and give each group a set of pictures. Students are to create a sentence using the present progressive for each image and then present their images and sentences to the class.
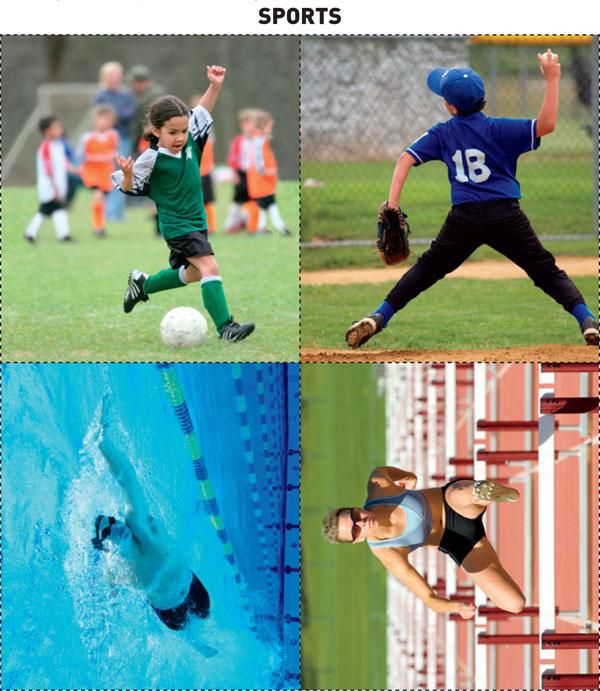
ACTION CARDS PART TWO
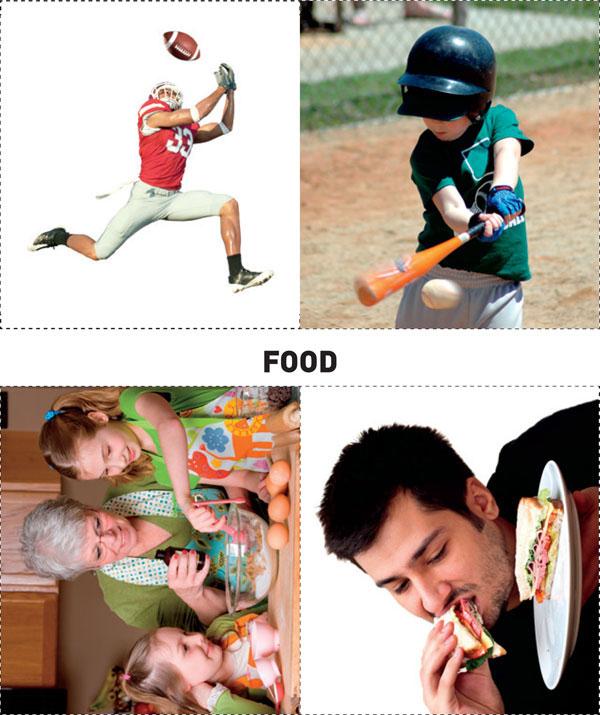
ACTION CARDS PART TWO

ACTION CARDS PART TWO
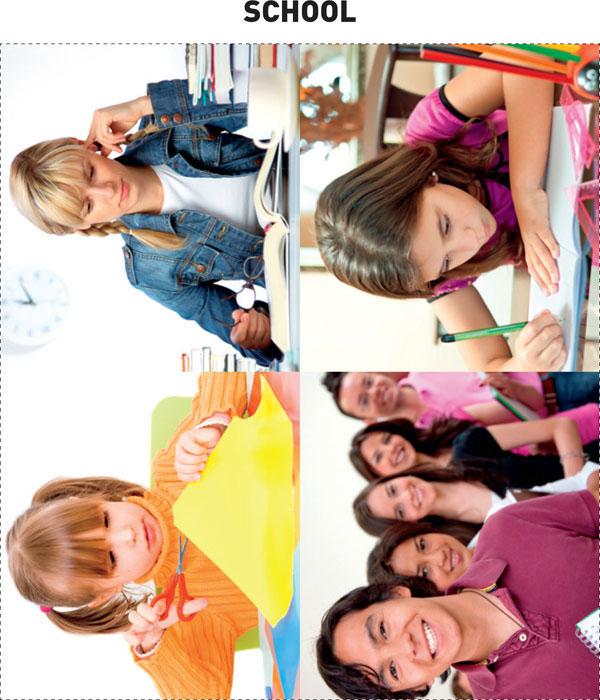
ACTION CARDS PART TWO
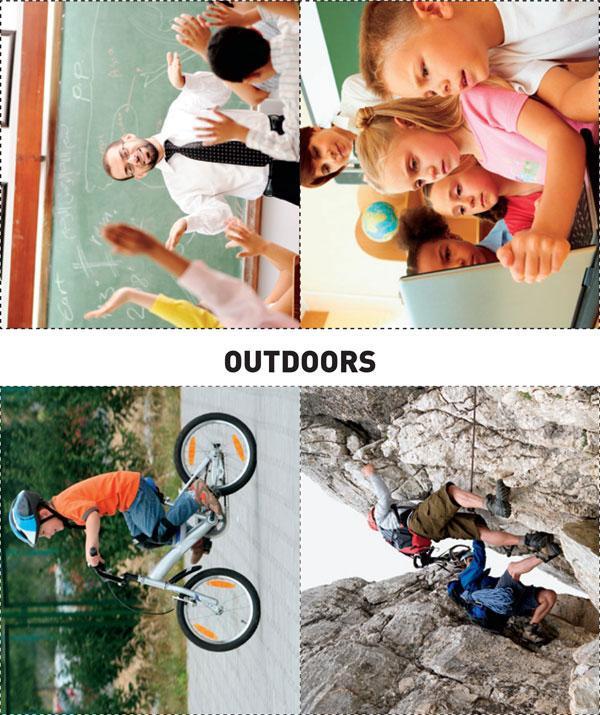
ACTION CARDS PART TWO
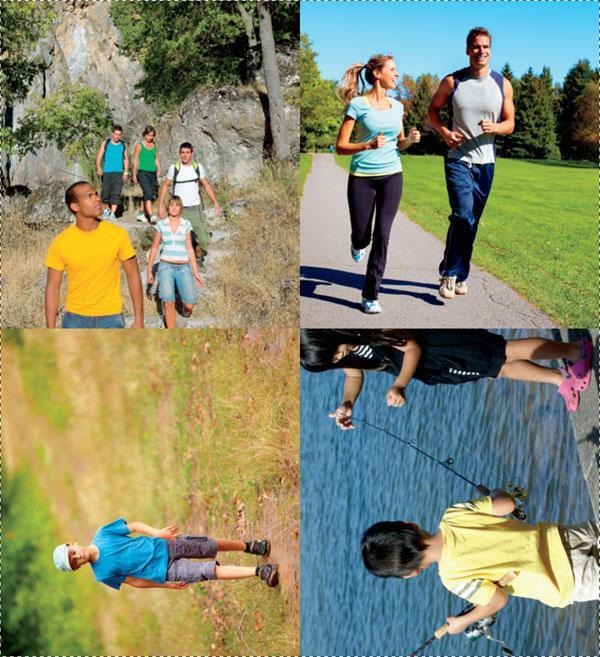
EXAMPLES OF WIRE PEOPLE
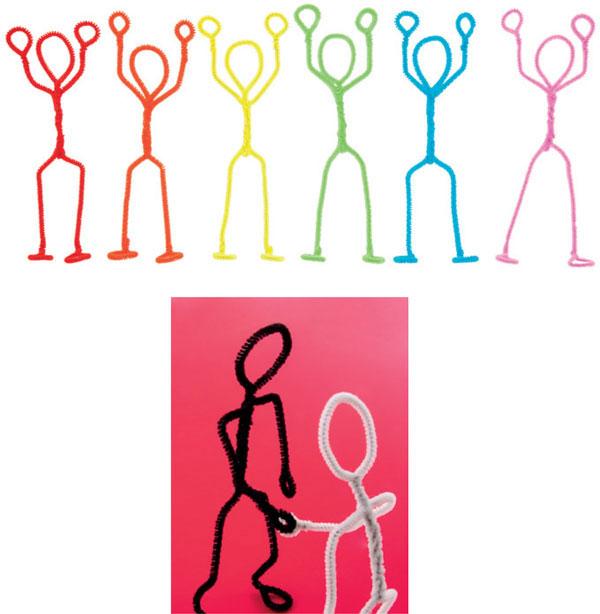
LESSON 5
IMAGINARY CHARACTERS PART B
Robot Fun
Objective: Students will create a robot using recycled materials and use this to write a story using personality characteristics, simple past tense, and past progressive.
Level: Intermediate to Advanced
Materials: Glue and recycled cardboard for the base and various recycled items. Materials can include, but are not limited to, old CDs, wires, recycled computer or electronic parts, nails, screws, washers, bolts, buttons, plastic bottles, and coins.
Teacher Preparation: 1. Gather materials to be used for the activity. If necessary, ask students or other teachers to bring in recycled materials from home. 2. Cut cardboard pieces into uniform sizes. Each student will need a flat piece of cardboard to use as the base for their recycled robot (if students are creating three-dimensional robots). 3. Duplicate the blank character cards included in the Reproducible Worksheets section of this activity, or create your own. One card is needed for every student. 4. Duplicate or create your own place/time cards and event cards. 5. Create a model based on the art instructions below to show students.
Art Options: If recycled electronic or construction materials are not available, this activity can be completed as a drawing, painting, or collage activity. Students can use the robot pictures at the end of this lesson as inspiration to design, draw, or paint an imaginary robot, or if collage materials are available, students can cut out various objects and arrange them to create a robot collage.
INSTRUCTIONS
Part One: What Would a Robot Do? Acting Warm-Up Activity
- Introduce or review the word robot with students. Ask students if they have ever read any books or have ever seen any movies about robots. Questions to ask might include:
What did the robots look like?
How did the robot act?
Could the robot talk?
What did the robot do in the book or movie?If needed, explain to students that a robot is a machine or device that operates and performs various functions either automatically or by remote control. - Show students the robot images included at the end of this lesson.
- Break students up into small groups. Write robot prompts on strips of paper. Prompts may include a robot playing soccer, dancing, cooking, or playing tennis.
- Have each group pick a prompt. Tell groups to act out the situation listed on the prompt. Re-mind them that robots generally move in a stiff or mechanical manner.
- After a few minutes, have groups act out their prompts in front of the class. The class has to guess what action is being depicted.
- If time permits, have groups pick new prompts and act them out again. Alternatively, have each group write a prompt. Groups can then switch prompts with another group and act out the situation.
Part Two: Constructing the Recycled Robot
- After seeing robot images and acting like a robot, students will create their own robots using recycled materials. If a model robot has been made prior to teaching this lesson, show this to the students.
- Display materials for the project on a desk or table. Have students take turns selecting materials for their recycled robot.
- Demonstrate to students how materials can be arranged in various ways to make the body, arms, legs, and head of a robot.
- Students can use the robot images on page 113 for ideas and inspiration.
- Hand out a cardboard base to each student. Advise students to experiment with arranging their materials in different ways before they decide on a design they like best. Remind students that their robots should have a head, torso, arms, and legs. If needed, review parts of the body with students.
- Ask students to think about which smaller materials they can use for details such as facial features or accessories.
- When students decide on their robot design, they can begin gluing the parts of their robots to the cardboard base. (In some instances strong glue may be required.)
- If students are creating a three-dimensional robot with recycled plastic and cardboard, they can use tape or glue to connect the robot parts together.
- Have students put their recycled robots someplace safe for the glue to dry.
Part Three: Storytelling with the Robots
- Once students have completed their recycled robots, have students fill out a character card about their robot. (A character card worksheet is provided at the end of this lesson, or you may create other character cards for students to use.) The character card will be used with the place/time cards and event cards to develop the framework of a creative story.
- Ask students to brainstorm adjectives that describe personality traits and compile a list on the board. The list might include shy, outgoing, nervous, proud, aggressive, passive, or silly. In some cases, students may have already determined the personality of their robot by the design. For example, if a student designed his or her robot to have a mean look on its face, then the student could write mean or aggressive under the personality trait category on his character card; if a student made a funny-looking robot, the students might write silly or goofy for the personality trait.
- When students have completed their character cards, collect them and place them in a pile.
- Make a second pile of the place/time cards and a third pile of the event cards. (See the Teacher Preparation instructions at the beginning of this lesson plan.)
- Demonstrate to students how to create a framework for a story. Pick one card from each pile (a character card, a place/time card, and an event card) and use them as a basic structure for telling or writing a story.
- Have students break up into their groups. Tell groups to pick one card from each pile. Instruct the groups to then tell or write a story about something that happened in the past, using the cards they chose. For example, if a group chooses the story cards a goofy robot, at a rock con-cert, and aliens start attacking, those phrases should help organize the story and must appear in it.
- Remind students to use the simple past or past progressive tenses.
- Ask for volunteers from the groups to share their stories with the whole class. If desired, group members can act out the story while one group member narrates.
- If time permits, have groups pick new cards and create a new story.
Part Four: If I Had a Real Robot… Free Writing Closing Activity
- As a closing activity, ask students to imagine what they would have their robots do and then free-write about this. For example, students might write about having their robot do their chores, such as clean their bedroom, wash the dishes, or take out the garbage; or students might want their robot to do their homework, play tricks on their brothers or sisters, or play video games with them. Remind students that their free writing will not be graded, that it is just practice in writing creatively.
Extension Activity:
Class Robot
For another activity, you will need a student to volunteer to be the class robot. Provide a blindfold or have the student close his or her eyes. The other students should provide oral directions, such as walk straight, turn right, reach down, pick up the chalk, or write two words on the blackboard.
Additional Resources:
Enchanted Learning’s robot resource page provides other robot activity ideas and robot worksheets. http://www.enchantedlearning.com/themes/robot.shtml
The Smithsonian’s National Air and Space Museum website is a good place to look for robot-related materials.
http://www.nasm.si.edu/
http://www.nasm.si.edu/
AMAZING ROBOTS!

CONVERSATION CARDS
Teacher Directions: Make copies of the cards, then cut them out and place them in an envelope for each group. Each envelope should have a set from each category.
Place/Time Cards:

Other place/time ideas: stuck in an elevator, at the zoo, in a taxi, on a date, etc.
CONVERSATION CARDS
Event Cards:

Other event ideas: A tiger escaped from the zoo. A picture came to life. Hearing laughter coming from a strange place.
CONVERSATION CARDS
Character Cards: (To be completed by students about their individual robots.)

LESSON 6
OBJECTS
Reduce, Reuse, Recycle
Objective: Students will create a recycled magazine bowl and then conduct an interview using adverbs of frequency.
Level: Beginner to Intermediate
Materials: Old magazines, cardboard sticks one inch wide by twelve inches long, clear tape, and glue.
Teacher Preparation: 1. Collect cardboard and old magazines to use for this activity. 2. Cut cardboard into sticks one inch wide by twelve inches long. Cut enough so that each student has a stick. 3. (Optional) Make a magazine bowl to show students as an example.
Art Options: If magazines are not available, this activity can be modified by having students draw or paint posters about reducing, reusing, or recycling. The posters can outline steps to recycling plastic or metal, offer suggestions on how to reuse certain goods, or generate ideas for reducing waste and consumption.
INSTRUCTIONS
Part One: Reduce, Reuse, Recycle Warm-Up Activity
- Introduce or review these words: reduce, reuse, and recycle with students. Reduce means to make something smaller in amount, size, or price. Reuse means to use something again. Recycle means to put materials or objects through a process to be used again.
- Make a sign for each word: reduce, reuse, and recycle.
- Put the three signs in different locations in the classroom.
- Tell students you will read an example that demonstrates the meaning of reduce, reuse, or recycle. Students must decide which word the sentence demonstrates and then go stand under, or next to, that sign. For example, if you say, “I cut up old t-shirts and use them as cleaning rags,” students should stand under the sign that says reuse.
- Example sentences that can be modified, added to, or omitted to fit the needs of your students could be:
I turn the water off while brushing my teeth. (Reduce)
I never throw away old batteries. I find a business that will take them. (Recycle)
I cut up old paper into squares and make small notepads with them. (Reuse)
I ride my bike to work instead of driving my car. (Reduce)
I always bring my own mug, or travel mug, when I go to a coffee shop. (Reduce)
I donate unwanted or old clothes to charities. (Reuse)
I always turn the lights off when I leave a room. (Reduce)
I separate cans and plastic bottles from the garbage. (Recycle) - When students choose a sign to stand under or next to, ask specific students to explain their choices.
- Reveal the correct answer to students and discuss why the sentence demonstrates reducing, reusing, or recycling.
Part Two: Making Magazine Bowls
- Tell students they will be reducing waste in this project by recycling and reusing magazines.
- Pass out magazines to students and have students tear out the pages. Tell students to try to rip out the whole sheet of magazine paper and not rip the pages in half or pieces. Also, ask them to rip out pages with bright, vibrant colors.
- Demonstrate to students how to wrap the paper around the cardboard stick. Place the stick at a corner of the magazine page and wrap the paper around the stick. Crease and fold the magazine paper each time you turn the stick. Continue wrapping the paper around the stick until there is no more paper. Then, pull out the stick and tape the corner of the rolled piece of paper so that it does not unroll. See Diagram A below.
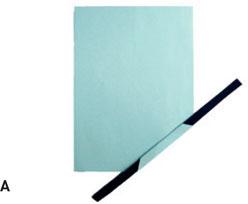
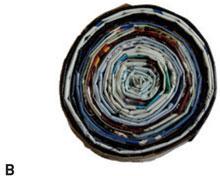
- Roll the wrapped sheet of magazine paper into a coil. Make sure the strip is rolled very tight. Tape the end of the coil so that the paper does not unravel. See Diagram B above.
- Wrap another sheet of magazine paper around the cardboard stick (Diagram A) and add it to the coil of magazine paper where the last magazine strip ended (Diagram B).
- Repeat Step Five until you have a large coil of wrapped magazine paper.
- Begin to shape the coil into a bowl by pushing the middle of the coil down and pulling up the sides.
- Pour glue into small containers. (Choose a type of glue that dries clear.) Have students use old paintbrushes to brush glue over one side of the magazine bowl. When the glue dries, turn the bowl over and brush glue onto the other side. The glue helps protect and hold the magazine bowl together, while also creating a glossy finish.
Part Three: Adverbs of Frequency Interview
- Review the vocabulary introduced in Part One: reduce, reuse and recycle. If needed, demonstrate the meaning of the words by giving students examples of ways to reduce, reuse, and recycle.
For example: I reduce my time in the shower to save water. I reuse old t-shirts by cutting them up and using them to clean. I recycle plastic bottles and cans by turning them into art. - Review adverbs of frequency with students. Organize them on the board to illustrate to students that always usually refers to something that happens 100% of the time and never usually refers to something that happens 0% of the time.

- Use the adverbs in sentences to help students comprehend their meaning.
For example: I always recycle plastic bottles. I sometimes conserve electricity and remember to turn off the lights when they are not needed. I never litter or throw garbage on the ground. - Next, break students up into pairs. Tell pairs that they will interview their partners about how often they reduce, reuse, or recycle, using the questions provided in the Reproducible Work-sheet.
- One student should ask questions while the other student answers the questions using the appropriate adverb of frequency. The student who asks the questions should record his or her classmate’s answers.
- Have partners switch roles after all questions have been asked. Adapt or modify the questions in the worksheet as needed.
- When students have each had a turn being the interviewer and the interviewee, ask students to report their findings. Draw the chart on the following page on the whiteboard or chalkboard. Have students take turns going up to the board and putting a tally mark for the adverb of frequency their partners used in each question.
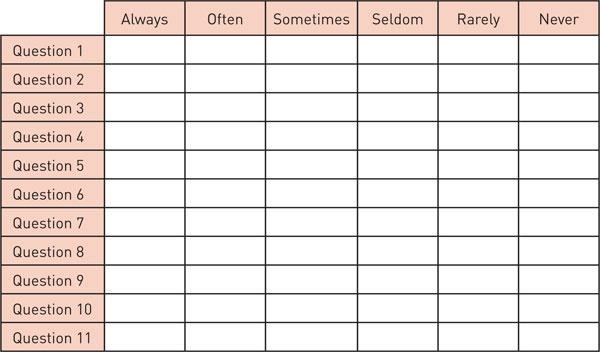
- When each student has reported his or her findings, use the chart to help students draw conclusions about reducing, reusing, or recycling. For example, if there are four tally marks under always and six tally marks under sometimes for question one, you would say, “Four people in this class always recycle newspapers, but six people in this class sometimes recycle newspapers.” Demonstrate this structure a few times.
- Have students work in small groups to make their own conclusions from the chart. Ask each group to share with the class the most interesting or surprising conclusions they made.
- For questions that have a lot of tally marks for rarely or never, have groups brainstorm ideas and things they can do to encourage students to reduce, reuse, or recycle more.
Part Four: Free Writing Closing Activity
- As a closing activity, ask students to reflect and write about reducing, reusing, or recycling. Ask students to write about which question in the interview is most important to do and why.
Extension Activity:
Recycle! Persuasive Speech or Poster
Brainstorm ideas with students about things they can do to help the environment. Create a list with the ideas students provide. Some examples include conserving energy or recycling newspapers, plastic items, or aluminum cans. Afterwards, students can write a persuasive speech or essay that encourages the audience to reduce, reuse, or recycle, or students can make posters to hang up around the school, or in public buildings, to bring awareness to the problem(s).
Additional Resources:
Visit the Environmental Protection Agency’s Recycle City website to learn more about recycling in your community.
http://www.epa.gov/recyclecity/
http://www.epa.gov/recyclecity/
Learn more about your global carbon footprint by visiting the Global Footprint Network’s website.
http://footprintnetwork.org/en/index.php/GFN/
http://footprintnetwork.org/en/index.php/GFN/
REDUCE, REUSE, RECYCLE!
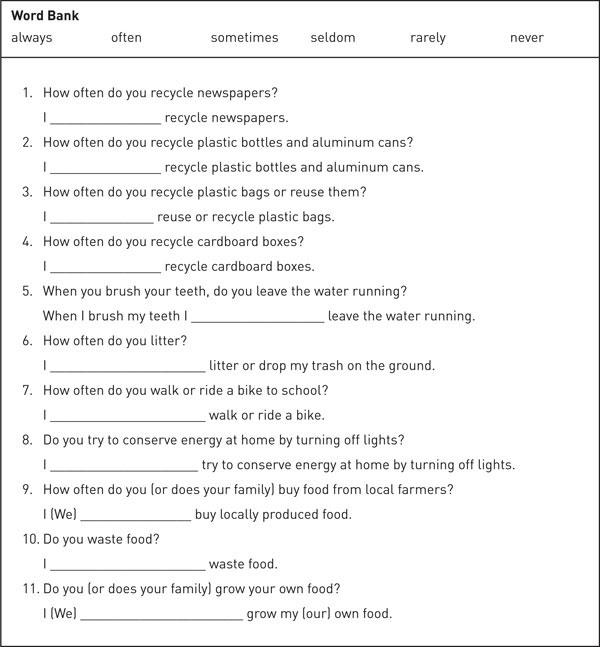
UNIT IV: MIXED MEDIA
Mixed media refers to an art technique that combines two or more art media. For example, a mixed media artwork can combine painting and collage or painting and sculpture. By combining art media and techniques, students are provided with many avenues for expression, exploration, and experimentation while using English.
Tips for Mixed Media
- Combine materials.
There are limitless opportunities for combining and mixing art media or materials. Several possibilities are suggested throughout this chapter. Feel free to adapt, alter, or modify the suggestions listed in each activity depending on the materials at hand. Each activity also provides options for completing the activity with minimal materials. Some ideas for mixed media artwork include:- Collage, plus incorporating details on the collage with pencils, markers, or paint.
- Paint, with collage elements glued or pasted to the painting.
- Bookmaking, with drawings inside the book.
- Printmaking with simple tools such as hard vegetables or sponges. (Information on printmaking is included in Appendix B.)
- Use recycled materials.
Recycled materials — items that have been used before and can be repurposed — can be utilized in many mixed media art projects. Teachers may collect some from personal belongings or ask students to bring in recycled materials to use in the mixed media activities. Recycled materials can include cardboard, shoe boxes, cereal boxes, brown paper bags, recycled papers and magazines, or recycled containers such as glass and plastic jars.
Medium
Various: Drawing, Painting, Sculpture, Printmaking, Collage
Mixed Media Materials
This is a list of all the materials that can be used in working with mixed media. Each lesson plan in this chapter will have a list of the specific materials needed to complete that particular project with suggestions for variations in case different resources are on hand.
Required
- Adhesive: glue or tape
- Paper
- Pencil
- Cardboard (recycled)
Optional
- Brushes
- Colored pencils
- Crayons
- Magazines (old or recycled magazines)
- Markers
- Materials from nature: grass, straw, twigs, sand, small rocks, leaves, etc.
- Newspaper
- Recyclable materials
- Glass or plastic jars
- Scissors
- Sponges
- Tempera paint
- Vegetables
MIXED MEDIA ACTIVITIES
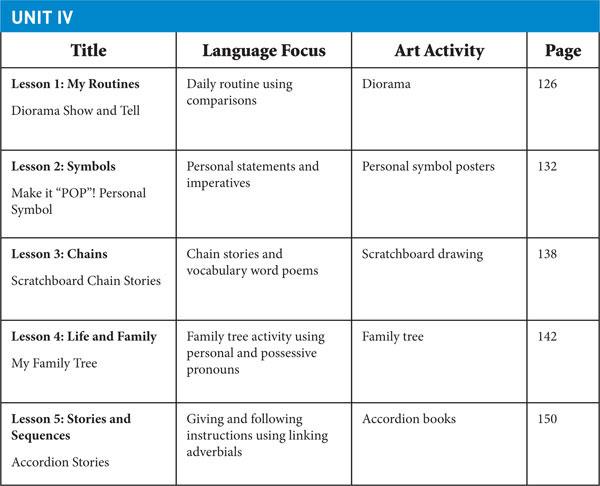
LESSON 1
MY ROUTINES
Diorama Show and Tell
Objective: Students will create dioramas and use them to discuss daily routines that happened in the past using past and present comparisons with used to and would.
Level: Intermediate
Materials: Recycled cardboard boxes such as shoe boxes, cereal boxes, or tissue boxes (one for each student), scissors, glue or tape, and any collage materials available, such as recycled magazines, photographs, and materials from nature.
Teacher Preparation: 1. Make a model diorama to bring to class, following the instructions in Part Two. 2. Bring in recycled boxes for students to use for their dioramas. Each student will need a box. Ask students and other teachers to bring in recycled boxes for the project as well.
Art Options: If recycled boxes are not available, this activity can also be completed as a collage activity. Instead of making a diorama, have students make a collage about their daily lives on a piece of paper or other flat surface.
INSTRUCTIONS
Part One: Activity Log and Inside-Outside Circle Warm-Up Activity
- Tell students they will be making a diorama. A diorama is a three-dimensional picture or scene and can incorporate a wide variety of materials. Show students the example provided at the beginning of this activity.
- Tell students the topic for the dioramas is “A Day in My Life.” Their dioramas should show scenes from their daily lives.
- To brainstorm ideas and items to include in the dioramas, have students write a weekly log of their activities prior to making the diorama. (A log of a few days is fine if a weekly log is not possible.) The activity log will help students see patterns in their daily lives, while also practicing the past tense.
- Ask students to record what they do for one week. Students should write the time and type of activity in their logs using past tense verbs. Below is an example activity log:
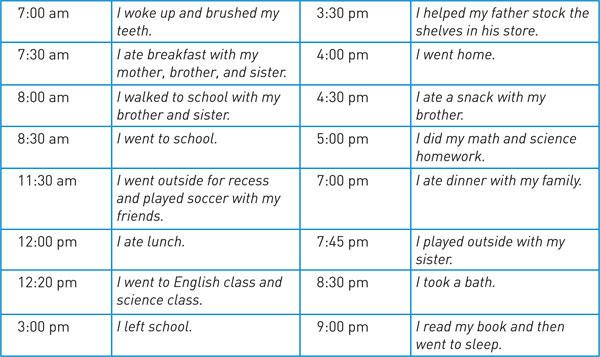
- After writing a log of their activities for a few days to a week, ask students to look for patterns in their daily activities. Ask students to think about the questions below:
What do you do every day?
What do you do every couple of days?
What parts of your daily routine do you enjoy the most?
What part of your routine do you not enjoy?
Which things in your daily routines are most important to you?These questions will help students brainstorm and choose what to include in their “A Day in My Life” dioramas. - To refresh students’ memories, you could draw on the board a continuum using adverbs of frequency:

- To practice speaking and listening with these questions, do an inside-outside speaking activity with students, as explained below.
a. Divide the class in half. If you have an odd number of students, one student can be your helper.b. Have one group form a circle, facing outwards. The other group then forms a circle around the first circle, facing inwards. The two circles should create pairs of students, facing each other.c. Tell the inside circle that they will be asking the questions. They should use the questions about patterns in students’ daily activities from Step Five. If needed, write the questions on the board for students to refer to.d. The outside circle has to answer the questions posed by their partners on the inside circle.e. After a few minutes, have students change partners by having the outside circle move one person to the right. The inside circle does not move.f. Continue having the students change partners every couple of minutes, with only the outside circle moving to the right. The students on the inside of the circle should always be the ones to ask the questions.g. After an appropriate amount of time, have the inside and outside circles switch roles. The outside circle should ask questions, while the inside circle answers them. When changing partners, the outside circle still moves but the inside does not.
Part Two: “A Day in My Life” Diorama
- Tell students the next part of the activity will be to construct their dioramas. Ask students to bring in items from home to include in their dioramas. Items may include pictures of their family members, pictures of pets, memorabilia from sports teams, small tokens from hobbies, or small toys.
- Have students also cut out images from magazines, draw pictures, or create collage scenes to include in their dioramas.
- After students have collected items and created or found images to include in their dioramas, have students begin constructing their dioramas by preparing the recycled boxes.
- One side of the box needs to be open to view the diorama. If using shoeboxes, simply take the lid of the shoebox off and lay the shoebox on its side. If using a cereal or tissue box, have students (or help students) cut off one of the broad sides of the box. See the example on the right.

- Have students decorate or add designs to the background and sides of their diorama. If paints are available, students can paint the background and sides. If collage materials are available, students can cut out colored papers or pieces of magazines and glue them inside the box to create a background. If markers are available, students can color the sides and back of the box.
- Students can then add their drawings, images, or objects to the inside of the box. Tell students to experiment with arranging the items in different ways before they tape or glue the items in the box.
- Remind students to use all of the space of the box and to overlap and layer diorama items. Refer to the project example at the beginning of the activity.
- Add any finishing touches to the diorama.
Part Three: Practice with Used to and Would
- Once students have completed their dioramas, ask students to compare things that are part of their daily lives now (as depicted in the dioramas) to things that they used to do, or that used to be a part of their lives.
- Demonstrate the use of used to and would by telling students things about yourself. If you made a diorama example, you could refer to the diorama and say the following:
I used to drink a lot of coffee, but now I drink tea.
When I was younger, I would go for a run every day, but now I prefer going for walks. - Review or teach the use of used to and would. Use the chart and information below if desired.
Used to and would refer to past actions and habits that are no longer true.Used to is used in two ways:
- To express a past action that happened repeatedly but is no longer done
- To express a past fact that is no longer true
Would is used one way:- To express a past action that happened repeatedly but is no longer done
Would is used only for actions:For example:When I was young I would hate vegetables. Not correct.
When I was young I used to hate vegetables. Correct!
When I was young I would grow vegetables. Correct! - Play a “Used to or Would” game:
a. Break students up into groups. Tell students that one group member should begin the game by saying one thing he or she used to or would do. For example: I used to ride my bike to school every day… Then, another group member finishes the sentence: …but now I take my private limousine.b. Encourage students to create funny or entertaining endings to the sentences, but remind students their sentences should still be grammatically correct.c. The person who completed the sentence now starts the beginning of another one: I used to…d. The game keeps going around the group until every group member has contributed.

Part Four: Journal Writing Closing Activity — Reflecting on Me, Then, and Now
- Once students have practiced using used to and would, have students write in their journals comparing their life now to what they used to do or used to like. Students should use the things depicted in their diorama as the motivation for their writing. Some examples of topic starters are included below.
I used to ride my bike to school every day. Now, …
I used to play soccer on the weekends with my friends. Now, …
I used to spend time on the computer every day. Now, …
When I was young, I would play in the park. Now, …
In the past, I would go swimming. Now, … - If possible, display students’ dioramas in the classroom or school for other students to see and to generate conversation.
Extension Activities:
Guessing Game
To prepare, on note cards write down 20 to 30 activities that can easily be acted out. In class, divide the students into two teams. Have one person from each team come up and act out one of the actions. Then, have the teams guess what the action is. At the end of the card stack, whichever team has the most points wins.
I Wish…
For more advanced students, introduce another use of would, with the verb wish. Wish is a verb used to express something you want to happen but is not true now. When you use wish about a future event, will changes to would, and can changes to could. Have students compare their daily lives to things they wish they could do.
Expressing Wishes in the Future
| I have to go to English class after school. I can’t go to the mall tomorrow. | I wish I could go to the mall tomorrow. |
| I won’t eat vegetables. | My mom wishes I would eat vegetables. |
Have students practice expressing things they wish, using would and could. Students can work in groups or pairs to come up with sentences to share with the group. For example:
I wish it would rain tomorrow.
I wish I could go to the beach this weekend.
I wish I could finish my homework faster.
I wish I could go to the beach this weekend.
I wish I could finish my homework faster.
Making Inferences

Explain to students that an inference is the process of making a guess based on an observation or fact. Demonstrate to students how to make an inference. Use the diorama provided in this lesson (shown on the right) as an example, or choose a student’s diorama. If the example diorama is used, here are some inferences that could be made:
From the diorama, I think this person takes the bus every day. This person also probably uses his or her phone and computer every day. I think this person reads books and likes to drink coffee. I also think this person dreams about going to the beach.
Take turns using students’ dioramas as examples and have other students draw inferences about that student.
What We Have in Common
Have students put their dioramas together in a line so the class can see the entire collection. Students can then look at all of the dioramas and make statements about what they have in common, or students could count how many people have the same item in their dioramas and make a bar graph, circle graph, or chart of the common activities in the class. Students could then use expressions of quantity to comment on the results of the graph or chart. They might come up with sentences such as “Many people in our class play soccer. Several people like to read and some people play tennis.”
LESSON 2
SYMBOLS
Make It “POP”! Personal Symbol
Objective: Students will create modern art posters and use these to discuss personal statements using imperatives.
Level: Intermediate
Materials: Paper, pencils, note cards, and pieces of paper. Optional: paint, paintbrushes, water containers, crayons, markers, glue, old magazines, or other collage materials.
Teacher Preparation: 1. Photocopy the symbols in the Reproducible Worksheets. Cut each symbol out and tape it to a note card or draw the symbols on note cards. Then write what each symbol expresses on a separate note card. Make sure that for every note card with a symbol there is a note card that lists what the symbol expresses. Make enough note cards so that every student in your class has one card, with either a symbol or symbol explanation on it. Add more symbols to the game if desired. 2. Read the various mixed media options for this activity in Part Two, Step Six. Choose an art option depending on the available materials and needs of your class. Prepare the materials for the activity.
Art Options: If these various art media are not available for this activity, choose one medium to use. This activity can be completed solely as a drawing, painting, or collage activity.
INSTRUCTIONS
Part One: Symbols and Imperatives, Mix-and-Match Warm-Up Activity
- Have students work in groups. Show groups the symbols below. The symbols are provided in a larger format in the Reproducible Worksheets section at the end of this lesson.
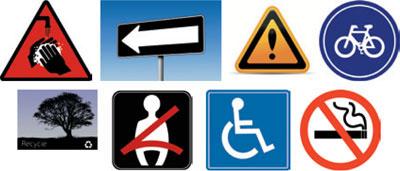
- Give students time to look at the symbols and discuss what the symbols express. Group members should help each other clarify symbol meanings.
- Explain the mix-and-match game to students. Tell students that everybody will get a card with either a symbol or a symbol explanation on it. When you say “Go!” students should walk around the room trading cards with each other. When you say “Stop!” students should stop trading cards and stand still. When everybody has stopped moving, call “Match,” and students have to find somebody who has the match to their card. If they have a symbol on their card, they need to find the student with the correct meaning. If they have a meaning written on their card, they have to find the student with the correct symbol. When every student has found their match call “Go!” again and the game continues.
- Mix-and-match variations: If you have an odd number of students there are different options for playing the game. One option is to have the extra student be the assistant, calling “Go,” “Stop,” and “Match.” Another option is to give all students a card. Whoever is the last person to find their match after you call “Match” is out. Each round one student should be out until there is one person left. (This option requires you to make a card for every student.)
- After playing the game, tell students to get back into their groups again. Ask the students if the symbols above differ from the symbols that represent the same actions or things in their country; if so, have groups discuss the similarities or differences between the symbols. Which symbol do they think is better? Why?
- Tell students that the ideas symbols express are often verbalized or written using imperatives (the infinitive form of the verb without to, which is used to express a request, a command, an order, or instructions).
- Emphasize to students that the symbols above are public symbols that express an order or something that you have to do. (This distinction is important because students will be using imperatives for a different function in Part Three.)
- Ask groups if they can think of any other symbols that express imperative commands. Have groups take turns coming up to the board and drawing the symbol, while other groups guess the imperative command it expresses.
Part Two: Pop Art Personal Symbol
- Show students the images at the end of this lesson. These images are examples of the Pop Art style. Examples of Pop Art can also be found online by searching for artwork of famous Pop artists such as Andy Warhol, Jasper Johns, Roy Lichtenstein, or Claes Oldenburg.
- Ask students what similarities they see in the Pop Art examples. Students may come up with answers such as bright colors and common or everyday objects.
- Explain to students that Pop Art is an art movement that started in the 1960s in the United States and the United Kingdom. Pop Art uses common objects, cultural symbols, and bright colors and lines to create a work of art.
- Tell students they will be creating a personal symbol in the Pop Art style to represent themselves.
- Have students first draw their ideas for their personal symbol. A personal symbol could be anything from a peace sign to a cell phone to a paintbrush to a soccer ball. Stress to students that their personal symbol should have personal meaning and purpose. Offer students advice on creating their symbols such as:
- Keep the symbol simple. Pop Art uses simple and easily recognizable forms.
- Design a symbol that has personal meaning. Students’ symbols should represent their interests, passions, beliefs, or personality in some way.
- Once they have a basic design for their symbol, they should think about how they can make it “Pop Art.” What colors and other design features can they use to make it stand out?
- Give students time to make their symbols. If only paper and pencils are available, students can draw their personal symbols. If other materials are available, some mixed media options for completing this activity are listed below:• Use pencil, crayons, colored pencils, or markers to draw the symbol and the background.
- Use collage materials for the background, but paint the actual symbol and then cut it out and add it to the collage background.
- Paint the background and use collage techniques and materials to make the symbol.
- Paint the symbol and the background, but use dark markers or crayons to accentuate the design or add details once the paint is dry.
Part Three: What Does Your Symbol Say?
- When students are finished creating their personal symbols, have students return to their groups.
- Collect the symbol artworks, and pass them out among the groups, making sure no group has one of their own artwork.
- Remind them of the symbols looked at earlier in the activity and the imperative commands that express each symbol.
- Tell students they need to use imperatives to describe each of their classmate’s symbol artworks. Each group should brainstorm an imperative phrase to represent each piece of artwork and write down the imperative phrase they decide upon. For the personal symbols, the imperative statements should encourage an idea or action rather than an order or command.
- Provide students with examples: If a student painted a soccer ball flying through the air as her personal symbol, another student might write “Play hard” as the imperative sentence to represent that artwork. If a student who loves to talk creates a Pop Art personal symbol like the below image, an imperative sentence could be “Talk more!”
- Make sure students understand the difference between the two uses of imperatives in this activity. When contrasting imperative statements like “Wash your hands” and “Talk more,” emphasize that the first sentence is a command while the second sentence encourages an action.
- Have groups work on creating an imperative statement for each piece of artwork they have and then have groups switch artwork. They should do the same again. Groups should continue switching until several imperative phrases have been generated for each artwork. The imperative phrases should vary depending on different reactions and interpretations of the symbol artwork.
- Hold up one piece of artwork at a time. Have each group read the imperative phrase they wrote to represent that artwork. The artist of the artwork can choose the phrase he or she likes the best.
- Have students write the imperative statement they chose for their symbol with large words and display the artwork together with the imperative statement in the classroom or school.
Part Four: 3-2-1 Closing Activity
- To wrap up this activity, have students do a 3-2-1 closing activity.
- Tell students to write the following in their journals or on a separate sheet of paper:
- Three things they learned. (The three items can relate to any component of the activity; for instance, symbols and their meanings, imperative words or statements, or Pop Art.)
- Two things they liked about this activity.
- One thing they disliked about this activity.
Extension Activity:
Community Pop Art
Have students create Pop Art symbols on a theme of improving their community. Students might come up with themes such as “keep the streets clean,” “obey traffic rules,” “be nice to the environment,” or themes that are related to an upcoming event or important community topic. Students should also write English statements or slogans to accompany their symbols. If possible, have the students display their community Pop Art symbols around the school or other public location in the community.
Additional Resources:
Keith Haring is a famous contemporary American artist. His artwork transforms everyday images into bold symbols and statements. See examples of his artwork, as well as browse online activities and an online database of lesson plans, on his children’s website.
www.haringkids.com
www.haringkids.com
Art Lex is an online art dictionary with great art definitions, images and quotations. Search “Pop Art” for a definition and examples of Pop Art and Pop Artists.
www.artlex.com
www.artlex.com
MAKE IT POP!

THE SIGN SAYS
Directions: Look at the images below. What do you think they mean? What do you call these images?
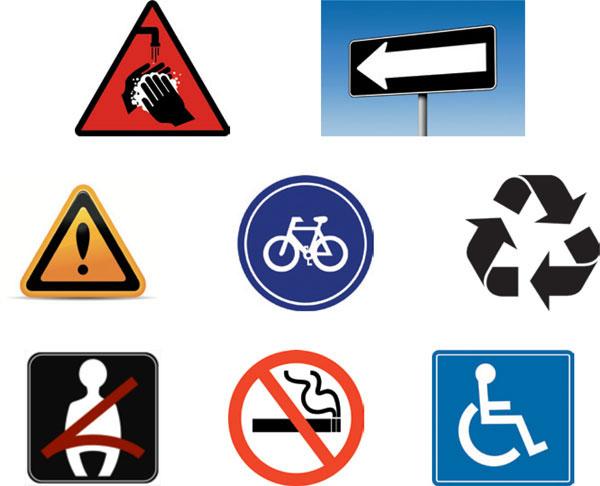
LESSON 3
CHAINS
Scratchboard Chain Stories
Objective: Students will use descriptive adjectives by creating scratchboards to improve their vocabulary.
Level: Intermediate
Materials: White paper, crayons, black tempera paint, liquid dish soap, paint brushes, water containers, old newspapers, pencils, and paperclips, toothpicks, or wood skewers.
Teacher Preparation: Prepare the materials listed above for making the scratchboards.
Art Options: This activity can be completed as a drawing or collage activity if the materials for making a scratchboard are not available. Students can draw pictures with pencils, crayons, markers, or colored pencils, or use magazine papers to create collage images of the specified vocabulary words.
INSTRUCTIONS
Part One: “Name Six” Vocabulary Game Warm-Up Activity
*Adapted from Games & Activities for the ESL/EFL Classroom, a project of the Internet TESL Journal:
http://iteslj.org/games/
http://iteslj.org/games/
- Choose an appropriate topic or theme for the vocabulary game and scratchboards. The topic can relate to previous work completed in class or a theme of an upcoming activity, but make sure that the topic chosen relates to a vocabulary domain that you would like students to learn and uses words that are appropriate for their level. Possible vocabulary topics for this activity may include:
Food {pasta, apple, pizza, noodles, etc.}
Weather {sun, clouds, rain, snow, hail, etc.}
Sports {basketball, soccer, polo, swimming, etc.}
Hobbies {photography, sewing, playing the guitar, jewelry making, etc.} - Have students form groups of six people. (Groups can be larger or smaller depending on the size of your class.) Tell groups to sit in a circle facing each other.
- Find or bring in items that groups can use to pass around the circle: stuffed animals, for example, or classroom items like a stapler or chalkboard eraser.
- Tell students the vocabulary domain or topic for the game.
- When you say, “Go,” students should begin passing the item around the circle. Tell students that when “Stop” is called, the student who has the item in his or her hands has to then name six vocabulary words from the topic you specified at the beginning of the game. While the student names those words, he or she must pass the item around the circle again. He or she has until the item gets back around to name six things from the vocabulary topic.
- The game then starts again. Students keep passing the item until you say “Stop.” The new student who is holding the item now has to name six vocabulary words in the topic before the item gets back around to him or her. He or she cannot repeat any vocabulary words that have already been said.
Part Two: Making the Scratchboards
*NOTE: Students will need to make a scratchboard to use for their artwork. (A scratchboard is a piece of paper that a drawing or image can be scratched into to reveal colors underneath.)
- Pass out a white sheet of paper and crayons to students.
- Have students write their names with pencil on the back of the paper.
- Tell students to fill the entire space of the paper with crayon shapes, patterns, and designs. No space on the paper should be left blank. The darker the color is applied the better it will show up on the scratchboard. See the example for this step below.
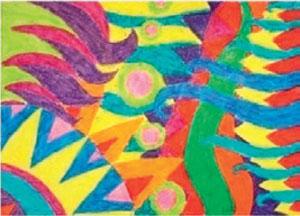
Scratchboard design without paint - Once students have filled in the entire space of their paper with crayon designs, tell students to paint over the crayon with black tempera paint. Students should cover the entire surface of the paper with paint. *TIP: Add a small amount of liquid dish soap to the tempera paint so that it will stick to the crayon wax.
- Have students put their papers somewhere safe to dry.
Part Three: “Drawing” on the Scratchboards
- Remind students of the vocabulary topic used in the “Name Six” vocabulary game. Tell students to choose something from that category to draw on their scratchboard. For instance, if the topic was food, students could draw a pasta dish, an apple, a slice of pizza, or perhaps a bowl of noodles. Students should have a number of ideas to choose from after playing the vocabulary game. If needed, refresh students’ memories by asking them to name words said in the game.
- To draw on the scratchboard, students will need a pointed object to scratch away the top layer of paint. Various materials can be used for this, including bent paperclips, toothpicks, chopsticks, sticks, or wood skewers.
*TIP: Wood skewers that are traditionally used for cooking work well for this activity. They are long so that students can hold them like a pencil when they draw. - When students press the tool on the surface of the scratchboard, the mark will scratch the black paint away, revealing the color from the crayon underneath.
- Tell students to scratch out their drawing carefully because they cannot “erase”: once the paint is scratched away it cannot be replaced.
- Give students time to finish their drawings on the assigned topic.
Part Four: Developing the Vocabulary with Chain Stories
- Once students have finished their scratchboards, have students display their artwork together on a wall or board in the classroom.
- Have students look at the scratchboard artwork and say the vocabulary word the artwork demonstrates.
- Compile a list of the vocabulary words on the board.
- Emphasize to students that the collection of words all belong to a related group or category.
- Discuss any confusing words or meanings with students.
- If your class is small, and you have a short list of words, add additional words to the vocabulary list on the board.
- Break students into groups of three or four.
- Tell students each group must create a chain story that uses every vocabulary word listed on the board.
- One member in the group should start the story, saying a sentence or part of a sentence that contains a vocabulary word. The next person in the group then continues the story, finishing the sentence, adding to the sentence, or starting a new sentence with another vocabulary word. Each group member should contribute to the story until the story reaches an end and all of the vocabulary words from the board are used.
- If there is enough time, have students do the activity again, creating a different chain story that utilizes the same vocabulary words.
- Ask for groups to volunteer to re-tell their stories and share them with the class.
Part Five: Vocabulary Word Poems Closing Activity
- Have students write a vocabulary word poem as a closing activity. Students can work alone, with a partner, or in a small group.
- Students select one of the vocabulary words from the list to use for their word poem.
- Students should then write the word vertically, along the column of their papers.
- Tell students to then write a word, phrase, or sentence for each letter of the word poem (choose an appropriate option depending on students’ level). See the example on the next page.
- Have students share their word poems with the class.
Example Word Poem:
Noodles are my favorite food.
Oh, they’re so delicious!
On a cold day, hot noodles make me warm.
Don’t ask me to share my noodles, because I won’t!
Little noodles or big noodles, I like them all.
Every time my grandma makes noodles, I’m so happy!
Slurp, slurp, slurp… I ate every last bite!
Extension Activity:
Crossword Puzzles and Word Searches
Create crossword puzzles or word searches to reinforce the vocabulary words from this activity. Listed below are some online resources that make crossword puzzles or word searches.
Edhelper.com: http://edhelper.com/crossword_free.htm
Puzzlemaker.com: http://puzzlemaker.discoveryeducation.com/
Edhelper.com: http://edhelper.com/crossword_free.htm
Puzzlemaker.com: http://puzzlemaker.discoveryeducation.com/
LESSON 4
LIFE AND FAMILY
My Family Tree
Objective: Students will introduce a classmate’s family using personal and possessive pronouns and will create a family tree using mixed media.
Level: High Beginner
Materials: Paper, pencils, scissors, and glue. Optional materials depend on which option you choose for Part One, Step Four: photographs of family members, old magazines, tempera paint, paint brushes, containers for water, and crayons.
Teacher Preparation: Look at the various options for making a family tree in Part One, Step Four. Choose an option suitable for your class depending on the materials you have available. Prepare materials for the activity ahead of time if needed.
Art Options: Many different materials can be used for this activity. The activity instructions list various options that utilize a combination of drawing, painting, collage, or printmaking techniques. However, this activity may also be completed solely as a drawing, painting, printmaking, or painting activity, depending on the materials available.
INSTRUCTIONS
Part One: Family Tree Artwork
- Discuss with students what a family tree is. A family tree is a chart that shows the relationship of family members in tree structure.
- (Optional) Make a family tree to show students as an example, or show students the template provided in this activity.
- If needed, introduce or review tree vocabulary words (see below). Add more words if desired and use the images on page 148 as visual aids.
tree
branch
forest
pine tree
limb
leaf/leaves
trunk
bark
root - Students first need to create a tree. There are many art options for creating a tree. Some suggestions are listed below. Feel free to combine, alter, or modify the suggestions to best suit the materials available as well as the age and needs of your students.
a. Draw a tree from observation. If possible, take students to an area outside of the classroom where they can directly observe trees. If paints or crayons are available, students can paint or color their tree when they are back in the classroom.b. Create a collage tree. Students can create a tree using collage by cutting out brown and green paper and gluing it together to create the trunk and leaves.c. Use printmaking to create a tree. Have students draw the outline of a tree first. Then, have students paint or color the tree trunk and branches brown. If using paint, let the tree trunk paintings dry. Next, have students cut leaf shapes out of old sponges or carve leaf shapes into hard vegetables, like potatoes. Tell students to lightly dip the sponge or vegetable stamp into green paint and then press the stamp onto the trunk and branches of their tree. Have students repeat dipping their stamp into paint and pressing it onto their papers until they have created the leaves for their tree. *TIP: Use various colors of green paint for the leaf prints. Refer to the color mixing section in Appendix A if needed.
- Have students put their artwork in a safe place for the paint or glue to dry.
Part Two: Family Tree Construction
- Show students the structure of a family tree. Draw a family tree chart on the board for students to copy, or use the template below, available in the Reproducible Worksheets section at the end of this lesson. Add extra boxes for brothers, sisters, aunts, or uncles as needed.
- Tell students to research the names for their family tree artwork. Students may need to ask their parents the names of their grandparents, great-grandparents, aunts, uncles, or other extended family members. Younger students may not be able to provide much information about their extended family and may only be able to make a family tree of their immediate family.
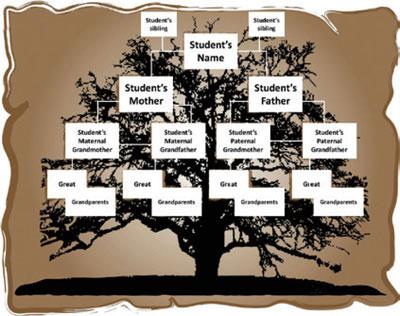
- Once students have researched the names for their family tree, have students add names to their family tree artwork.
- Students can add names to their family trees several ways. Four options are listed below. Choose an option most appropriate for your class or allow students to choose an option they prefer.
a. Students can draw name boxes and write their family members’ names directly on their artwork.b. Students can write the names of family members on white paper boxes, cut the boxes out, and glue them in the correct place on the tree artwork.c. Students can bring in photos from home, cut the family member out of the photograph, and glue the photo in the correct position on the family tree. Make sure students then write the name of the family member under the photo.d. Students can create small drawings of their family members and glue them to the correct position on their family tree, writing the names of their family members below the drawings.
Part Three: Practice with Personal Pronouns, Memorization Game
- Review or teach pronouns (a word that can substitute for or replace a noun) to students. If needed, use the chart below as a resource tool.
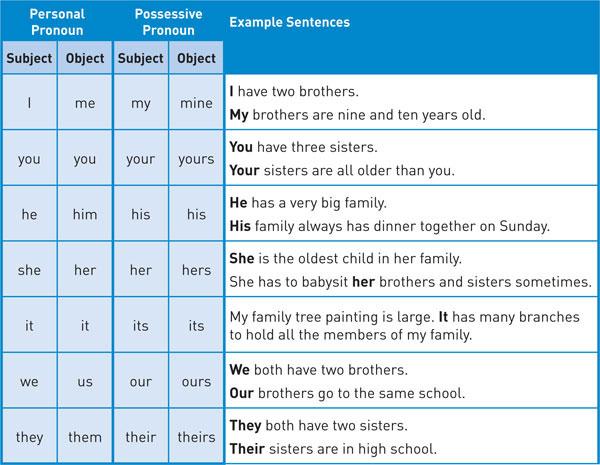
- Once students have a good understanding of personal pronouns, play a pronoun memorization game.
a. Have the class sit in a big circle, facing each other.b. One student starts by introducing himself or herself, and then saying something about his or her family. For example: “My name is Amira. I have three brothers.”c. The next student in the group then introduces himself or herself and says something about his or her family. The second student also has to repeat what was said by the previous student in the circle, changing the personal pronouns. For example: “My name is Tim. I am an only child. This is Amira. She has three brothers.”d. The game keeps going around the circle, getting harder each time because more information is added and has to be repeated with the correct personal pronoun.
Part Four: Family Introductions
- After reviewing personal and possessive pronouns in the circle memorization game, have students find a partner. Tell students to choose somebody they do not usually work with.
- Choose one family tree picture to use as an example.
- Tape the student’s family tree picture on the board. Use the picture to model how to talk about what is depicted in the family tree artwork. For example, you might say:
She has a very big family.
She has three brothers and two sisters.
Her grandmother’s name is Mary.
Her grandfather has the same name as her father. - Have students look at their partner’s family tree picture. Tell students to ask questions about their partner’s family tree and practice introducing their partner and his or her family. Remind students to use personal or possessive pronouns.
- Encourage students to ask questions about the family that is being introduced (specifically questions that require the use of personal or possessive pronouns in the answer). For example, ask questions like:
What does your brother like to do?
Possible answer: He likes to play soccer.
What is your favorite thing about your grandmother?
Possible answer: She is a good cook. - Have students listen and keep a tally of the similarities among students’ families. After each student’s family has been introduced, students could then report their findings. For example: Ten people in our class have a brother. Two people in our class have great-grandparents.
Part Five: Exit Ticket Closing Activity
- To review personal pronouns, have students line up at the end of class. Show them a picture of a boy, girl, or animal, or point at yourself or them, and have them indicate which personal pronoun would be used. They can leave when they say the correct pronoun.
Extension Activities:
Find Someone Who…
Play the Find Someone Who game! Make worksheets with the chart below. To play the game students have to move around the classroom and practice English by turning the statements on the worksheet into questions and asking other students the questions. The first statement, Has an older brother, would be turned into the question Do you have an older brother? When a student finds someone who can answer yes to the question, he or she should write that student’s name next to the statement.
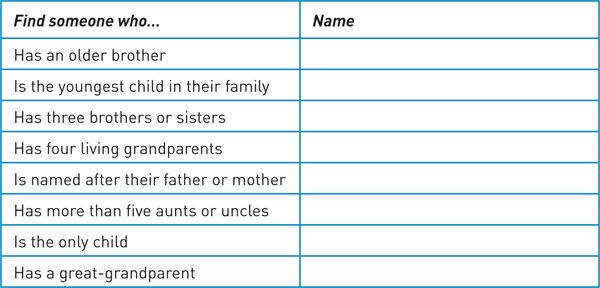
Family Timeline
For higher level students, have students interview their family members about major events in their immediate and extended family’s history. Students should record events as far back in the past as they can. Students can then write a timeline of their family history, using the past tense. If desired, students can also draw pictures or use collage to incorporate images into the timeline. Below is an example:
If possible, have students compare events that took place in their families and find out what happened in their families around the same time.
Interview a Relative
Have students interview a relative in their family to find out more about their life history. Students can compile a list of questions together in class, such as:
When were you born?
Who were your friends in school?
What were your hobbies when you were a child?
What type of music did you like?
Who were your friends in school?
What were your hobbies when you were a child?
What type of music did you like?
Have students take notes when they interview their relative and then report their findings about their relative to the class.
Additional Resources:
A website for building family trees is available through Family Tree Magazine.
http://kids.familytreemagazine.com/kids/default.asp
http://kids.familytreemagazine.com/kids/default.asp
USA.gov has many resources for genealogy.
http://www.usa.gov/Citizen/Topics/History-Family.shtml
http://www.usa.gov/Citizen/Topics/History-Family.shtml
Family tree templates can be found here.
http://www.familytreetemplates.net/
http://www.familytreetemplates.net/
TREES
MY FAMILY TREE
Directions: Complete the family tree below.
LESSON 5
STORIES AND SEQUENCES
Accordion Stories
Objective: Students will be able to use linking adverbials to follow and give directions about a process.
Level: Intermediate
Materials: Recycled thin cardboard (food or tissue boxes), cardstock, paper (long pieces if possible), pencils, glue, and scissors. Optional: colored paper or decorative paper, crayons, markers, colored pencils, tempera paint, and paintbrushes.
Teacher Preparation: 1. Prepare materials for an accordion book. Cut white paper into long, narrow pieces. Each piece of paper should be the same size and length. A length of about 30 inches (70 centimeters) and a width of roughly 10 inches (25 centimeters) works well, but these dimensions can be quite different depending on the desired size of books. Cut enough so that each pair of students will have one piece. *TIP: It may be difficult for younger learners to make an accordion-folded paper. To save time, prepare the folded papers before the activity for young learners. 2. If possible, make an accordion booklet ahead of time to show students as an example. 3. Prepare sets of pictures and linking adverbials (seven pictures and six linking adverbial words) for the activity in Part Three. Pictures and words should all be cut apart. Each group of three students should have one set.
Art Options: There are many different types of books that can be made and used in the language classroom: recycled paper journals, flip books, pop-up books, scrolls, and so on. Use the Internet resources listed at the end of this section for ideas and instructions about how to make other types of books with students.
INSTRUCTIONS
Part One: Making a Paper Airplane
- Explain the importance of giving and following clear instructions when making something. Emphasize that certain words can be used to make the process clearer.
- Write the following linking adverbials on the board.

- Assign students to pairs. Tell them they must stay with their partner throughout the activity.
- Label three corners or areas of the room beginning, middle, and end with a sign or by writing on the board. *NOTE: This should be done before the class begins if possible.
- Have students stand with their partner in the middle of the room. (Move classroom furniture or items as necessary.) Tell students that when you say one of the words on the board, they should decide with their partner if it is for the beginning, middle, or end of a process or story and then go together to the area of the room labeled for that part.
- After pairs have gone to one of the three locations, reveal the correct answer.
- Keep playing the game until students understand where each linking adverbial belongs — in the beginning, middle, or end.
- Assign one student in the pair to be “A” and one to be “B” and give each pair a piece of paper. Pairs should work together to make the airplane. Person A should follow Steps 1–4 while Person B provides advice. Person B should follow steps 6–8 while Person A gives advice.
- Slowly read the directions below for making airplanes to the students. Emphasize linking adverbials such as first, second, next, last, and finally. Point at the word on the board and demonstrate each step in the process as you read. Allow time between steps for partners to provide advice.
Directions for making airplanes1) Okay, Person A, start by picking up the paper.2) First, fold the paper in half, lengthwise and re-open the paper so that you have a crease in the middle of the paper.3) Second, fold the top left corner of the paper towards the center crease until the top edge of the paper is even with the center crease. Do the same with the top right corner of the paper.4) Now, starting at the tip of the point, fold both new top sides down to touch the center crease.5) Okay, please give the paper to Person B.6) Next, turn the paper over and fold it in half along the center crease.7) Now, fold each side of the paper airplane one more time, folding the outside edges of the airplane halfway over to the center edge and creasing the paper.8) Finally, hold the paper airplane by the paper in the middle and open the wings.
- Have pairs compare their results with another pair. Do all of the paper airplanes look the same? If not, how are they different? Encourage students to ask questions about the process if their airplanes do not look right. One good question is “Could you repeat the last step?”
Part Two: Making Accordion Books
- Tell students they are going to choose an interesting process and work with their partner to learn about and write out the process so someone else could follow it. Explain that they will have a chance to research the topic, so they don’t need to know how to do it before they begin.
- Use linking adverbials and simple English to explain the steps in the process, as in the following example:
a. First, you will brainstorm three topics.b. Next, you will ask two other pairs which topic they like best.c. Then, you will choose one topic.d. After that, you will use the Internet to learn about this process. Your process should be short, about six steps.e. Then, you will make an accordion book to write this process on. (Hold up an example if you have one.)
 f. Finally, you will read or listen to the processes made by other students.
 - Write a few examples of topics on the board such as the ones in the box. Encourage students to choose processes that most students in the class won’t know. It will be more interesting if students learn something new.
How to draw a cartoon character How to draw a cartoon character How to do a card trick How to make a braid - Have pairs work together to brainstorm three possible topics that they would like to learn and write the process for.
- Have pairs research the steps of their process. Direct them to use a resource available in your class (e.g., Internet or books). This step could be done at the library or as homework if necessary.
- Have pairs write out their process, and emphasize that they should have about six steps, and no more than eight.
- Pass out a long piece of paper to each pair. (See directions in the Teacher Preparation section at the beginning of the activity for preparing the paper.)
- Instruct the pairs to fold the paper into an accordion using the directions below. When finished, the paper should look like this:
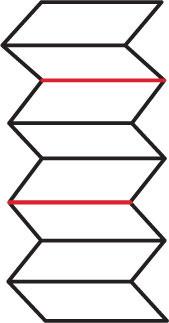
Encourage pairs to get help from each other and other pairs if they don’t understand the instructions. Provide plenty of time between steps in the process to allow students to help each other.a. To begin, hold the paper so the long edges are on the sides.b. Now, fold the paper in half by folding the bottom edge up to the top edge. Demonstrate how to fold the long narrow strip of paper in half.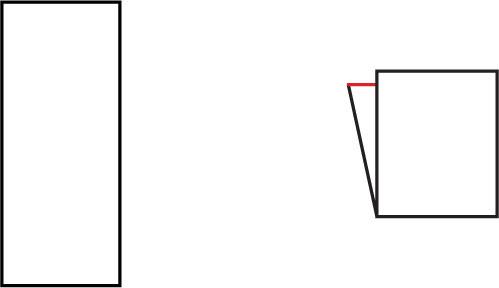 c. Next, take the top edge of the top half of the paper and fold the edge down to the bottom of the paper.
 d. Turn the paper over.e. Fold the top layer in half like you did to the other side of the paper.f. Now, open the paper. This will give an accordion fold with four equal-sized rectangles. Ask a few pairs of students who have done the folding correctly to hold up their papers for the other pairs to see.
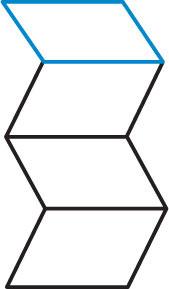 g. With the paper still open, fold the top fourth in half by folding the top edge of the paper down toward you to the nearest fold.h. Turn the paper over. Be sure to keep the long edges on the sides and the top up.i. Next, fold the top section down toward you along the first fold.j. Now, turn the paper over again.k. Fold the top section down towards you again.l. Continue turning the paper over and folding the top down toward you until all the fourths have been folded in half. Some of the folds created in earlier steps may be reversed during the process.m. You should have a paper folded to give eight equal-sized rectangles. Ask a successful pair to hold up their paper. Encourage successful pairs to help pairs that are still not sure what to do. If necessary repeat the verbal instructions.
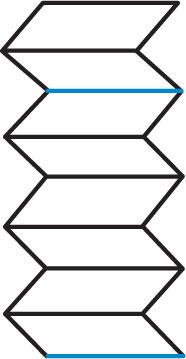
- Have pairs write the instructions for their process along with an illustration for each step on the pages of their accordion books. Provide pencils, colored markers, crayons, or another tool for drawing pictures.
- To finish the book, have students add a title and picture of the final product of the process on the back of the first page and their names on the back of the last page.
- Have pairs change partners with another pair and have them read their instructions to the new partner. The listeners try to guess what the process is. Have pairs switch partners and repeat.
- (Optional) Choose one or two processes that would be easy for the class to complete. A process that requires few materials, such as drawing a cartoon character, is usually best. Provide the class with the necessary materials for the process, and have the student pairs work together to try to follow the instructions for the process as the pair of students who created the process read the instructions out loud.
Part Three: Practicing with Linking Adverbials
- Place students in groups of three and give each group a set of pictures and linking adverbials, found below.
Next
To begin
Then
Finally
After that
Later - Have the groups work together to create a story from the pictures. They should use six of the seven pictures to make the story. When they have agreed on a story, they should put them in order and put an appropriate linking adverbial below the picture.
- The three students should take turns telling parts of the story. Each person should talk about two pictures.
- Combine two groups of three students and have them share their stories with each other.
- Repeat the previous step by having groups of three tell their story to another group.
- (Optional) Ask for groups who want to volunteer to share their stories with the class.
- (Optional) Have the groups write their stories and put them on the classroom wall.
Part Four: Exit Ticket Closing Activity
- To review sequence words have students line up at the end of class.
- Tell students you will say “beginning,” “middle,” or “end” and they have to give you a sequence word that fits that category. Students cannot leave until they give you a correct word that fits the specified category.
Extension Activities:
Illustrate a Story
Instead of writing instruction steps, have students use the accordion-style book to write and illustrate a sequence of events from a story.
How-To Presentation
For higher level and older students, have students form groups to discuss and select a project in which they will produce a how-to book on a more complex process. Tell them that the process should be of interest or value to them, such as how paper or plastic is recycled, how to start a business, or how to apply to college or a scholarship abroad. The following steps can be used in the process.
- Place students in groups of three.
- Have groups brainstorm topics of interest.
- Have groups present their ideas to six classmates for advice. They should prepare a short survey which includes questions that will help them decide if they want to select the topic and then write down responses from the six people that they survey. Some possible questions are:
a. Which of our three topics do you like best? Why?b. Which of our processes do you already know how to do?c. Do you have any suggestions for how we could make our topic interesting?
- Have the groups tabulate the responses and decide which topic they want to learn about.
- Have the groups use available resources (e.g., books, Internet, movies, YouTube, magazines) to learn more about their topic. If necessary, provide some basic advice about how to search using one of these resources. For example, if the Internet is the resource of choice, demonstrate how to use a search engine for learning about a topic.
- They should write out the steps and provide an illustration on each page of their accordion books.
- Have the students put together a three-minute presentation of their how-to process. Each person should speak for about one minute. They should assign two or three pages for each member of the group to talk about.
- They should practice their sections in their group.
- Groups of three should be paired with another group of three and practice their presentations. They should provide each other with advice.
- The groups should revise their presentations based on the feedback they received from the other groups.
- Have groups present their processes to the class. If the materials are available, the audience can try to follow the process.
- (Optional) Have the groups place their accordion book processes on the wall.
Add Accordion Book Covers
Have students make front and back book covers for their how-to accordion books with recycled cardboard or cardstock. Cut the cardboard or cardstock to fit the size of the first and last folds of the paper book. Have students decorate the back and front book covers before gluing them to the accordion book. Students can decorate them by painting them, drawing on them with markers, or using collage materials and images. The covers can then be glued to the front of the first fold and back of the last fold.
Additional Resources:
Artist Susan Kapuscinski Gaylord’s website Making Books with Children demonstrates how to make accordion books as well as many other types of books. Click on the icon of an accordion book on the homepage. It is also possible to click on the Free Activities section of the website to see examples and instructions for a variety of different types of books that can be made with students. Many activities also include a link to a video tutorial that shows how to make the book, as well as links to printable instructions.
http://www.makingbooks.com/freeprojects.shtml
http://www.makingbooks.com/freeprojects.shtml
The National Museum of Women in the Arts online interactive website about art, books, and creativity provides access to additional online resources. Visitors can also see examples of various types of books, as well as watch videos on how to create different types of artist books.
http://www.artbookscreativity.org/
http://www.artbookscreativity.org/
ACTION CARDS

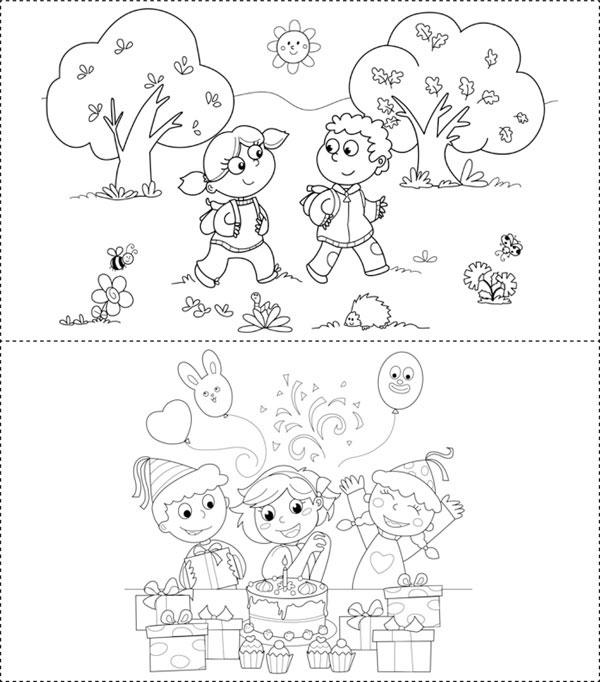
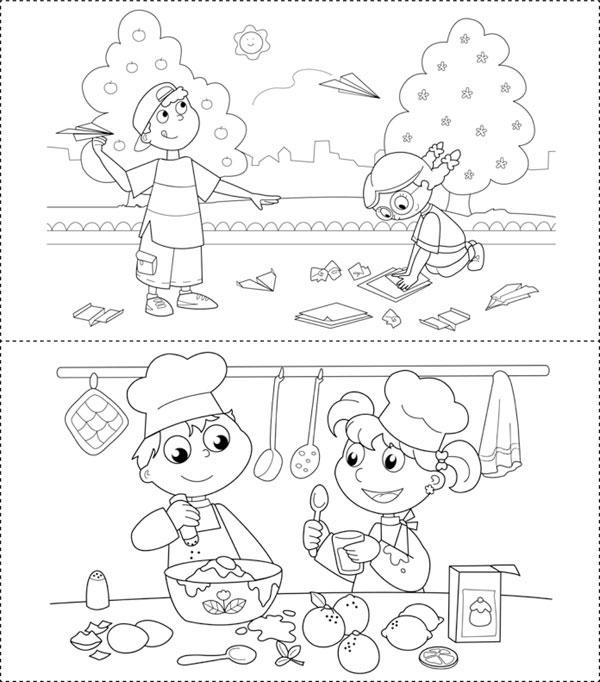
GLOSSARY
Acrostic (Word Poem)
A type of poem usually made by spelling a word or name vertically and then using each letter of the word or name to write a phrase or adjective.
Example Acrostic Poem:
Curious sights, sounds, and smells.
Interesting and fascinating buildings and places.
Tons of new things to see.
Yes! Let’s take a trip to the city!
Curious sights, sounds, and smells.
Interesting and fascinating buildings and places.
Tons of new things to see.
Yes! Let’s take a trip to the city!
Background

The part of a picture that seems the farthest away from the person viewing the picture, or the ground or scenery located behind something.
Below, the island is in the background, or back of the picture, and the boats are in the foreground, or front of the picture.
Cardstock

A type of thick, heavy paper. Cardstock is heavier and thicker than normal (computer) paper, and construction paper, but lighter than cardboard.
Cellophane

A type of transparent paper made from plastic. It can be clear or colored and is water- and oil-resistant. Cellophane is usually used to wrap candy, food, and gifts. The wrapper on this gift is cellophane.
Clear Tape
A type of adhesive used to bond paper together. It is not strong enough to bond heavier items together such as cardboard or fabric. Clear tape is usually transparent.
Colored Paper

Any kind of paper that is a color other than white. Colored paper can be used in creating a collage, for a background of a picture, or for the picture itself.
Comic Strip

Groups of pictures that tell a story. Comic strips can also have words to help tell the story. The story is usually funny, or “comic”.
Composition

The plan, organization, or arrangement of the elements in a work of art. When artists think about the composition of their artwork, they think about the arrangement of the subjects in the artwork, the size of the subjects, the colors used, and so on.
Computer Paper

A type of lightweight paper most commonly used for everyday printing or for drawing with pencils, crayons, colored pencils or markers.
Construction Paper

A type of paper thicker than computer paper, but not as stiff or thick as cardstock. Construction paper generally comes in a wide variety of colors and can be used in arts and crafts in many different ways.
Crayon Resist

An artwork that is created by using wax crayons and a water-based medium (usually paint) that will repel the crayon. The paint will not stick to the crayon, so the crayon remains visible through the paint.
Diorama

A three-dimensional picture or scene. A diorama can incorporate a wide variety of materials.
Fabrics
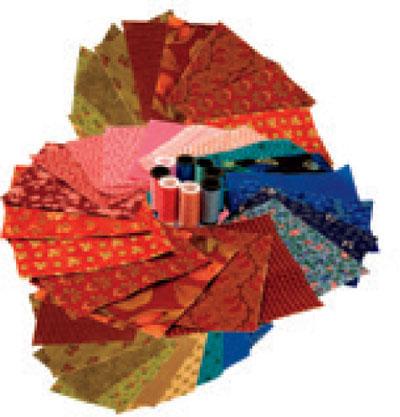
Types of cloth made by weaving, knitting, or crocheting natural or synthetic fibers together. Fabrics come in all types of textures, colors, and sizes. Common fabrics include canvas, cotton, felt, burlap, lace, nylon, and velvet.
Foreground

The part of the picture that appears to be the closest to the person viewing the picture.
Below, the boats are in the foreground, or front of the picture, and the island is in the background, or back of the picture.
Glue

A type of liquid adhesive used primarily to bond two thin objects together, such as pieces of paper.
Glue Stick
A type of adhesive. A glue stick is glue in solid form. It can be used to bond two thin objects together, such as pieces of yarn or paper.
Hot Glue

A type of adhesive used to bond different materials together, such as fabric, cardboard, or plastic. Hot glue is turned into an adhesive by melting the glue with a hot glue gun. Hot glue should be used with caution as the melted glue can burn skin when it comes into contact with it.
Hot Glue Gun
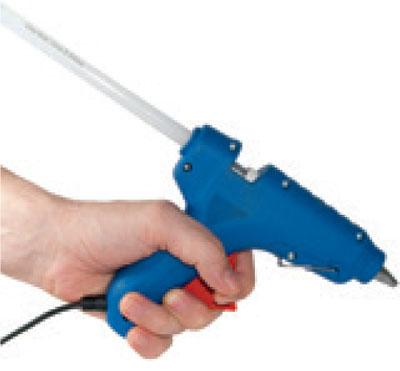
A machine that melts a solid adhesive (hot glue sticks).
Markers
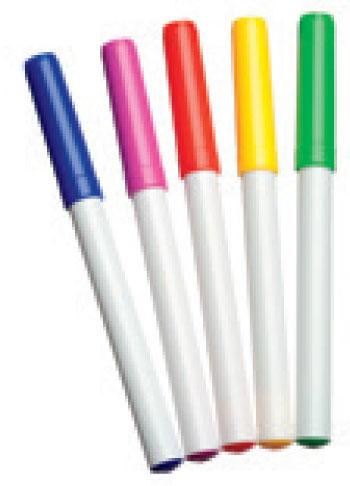
A type of drawing tool made out of colored ink. Some markers have permanent ink, which can stain hands or clothes, while other types are made with washable ink so that students do not stain their hands or clothes.
Masking Tape

A type of adhesive that is usually thin and easy to tear. It is stronger than clear tape. Masking tape can be used with paper, cardboard, or plastic.
Matte

A type of texture that is dull, not shiny or glossy.
Mind Map
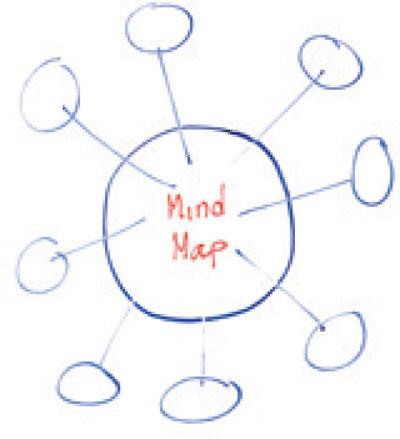
A visual graphic that is used to brainstorm and organize ideas around a certain theme or subject. Pictures and words are generally written or drawn around the central idea or theme and then linked to other ideas.
Mobile

A sculpture made by assembling objects together and balancing or arranging them in a manner in which they can move freely.
Non-Toxic

Indicates that the ingredients used in making a certain art supply are not poisonous to humans.
Overlap

When one part of one object lies on top of another object, partly covering up part of the object.
For example, the papers in this collage are overlapping one another.
Paint Roller

A tool used to apply paint or ink evenly and consistently on a surface.
Paper Fasteners

Metal objects that are used to fasten two or more pieces of paper through holes punched in the paper.
Perspective

The technique of representing items in the foreground as larger than items in the background in order to create the illusion of depth, or receding space, on a two-dimensional surface.
Pipe Cleaners
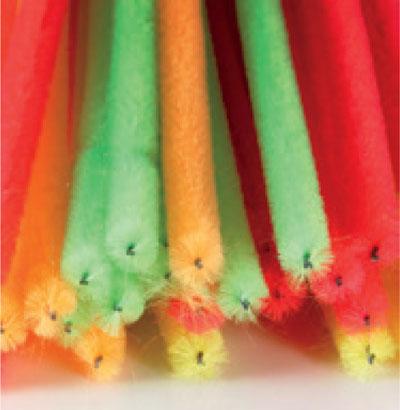
Flexible, fabric-coated wires that can be twisted and bent to create a variety of different shapes. Pipe cleaners can also be joined together by twisting the wires together.
Portrait

Any piece of art that captures the image of a person or people (usually the face). Portraits can be created with drawing, painting, photography, and even sculpture.
Poster Board
A type of paper that is generally larger and thicker than normal paper. It is similar to cardstock, but larger in size. It can be used to make large posters, projects, or signs.
Primary Colors

The three basic colors that cannot be mixed or formed by any combination of other colors. The primary colors are red, blue, and yellow. From mixing these three primary colors all other colors can be created. Refer to Appendix A for an explanation of primary, secondary, and tertiary colors and color mixing.
Recycled Materials
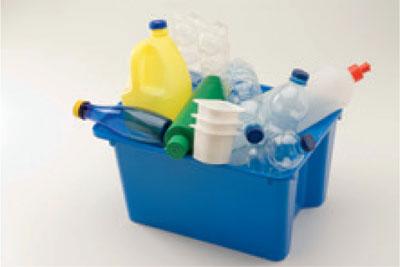
Any material that has previously been used and can be used again for an additional purpose. For art activities, recycled materials such as cardboard, magazine paper, glass jars, or metal baking sheets can be used.
Secondary Colors

The colors made from mixing two primary colors together. The secondary colors are green, purple, and orange. Refer to Appendix A for an explanation of primary, secondary, and tertiary colors and color mixing.
Shade

A color made by adding and mixing black to any color. See Appendix A for a more detailed explanation.
Silhouette

The outline of a person, animal, or object that is filled with a solid color such as black.
Sketch
A quick drawing usually done to prepare or plan a more detailed artwork.
Tempera Paint
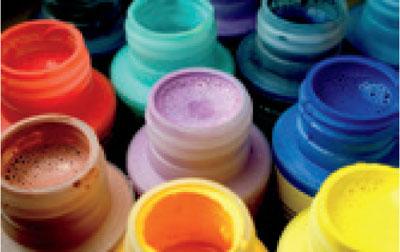
A water-based paint that dries quickly with a matte finish. Tempera paints can usually be purchased in powdered or liquid form and are appropriate for students of all ages. Make sure the label on the paint specifies it is non-toxic and safe for student use.
Tertiary Colors
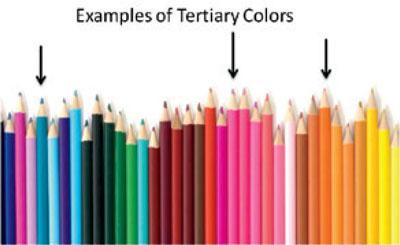
Colors that are created by mixing one primary color with one secondary color. For example, yellow mixed with orange creates yellow-orange. Refer to Appendix A for an explanation of primary, secondary, and tertiary colors and color mixing.
Texture

How something feels to the touch. Rough, smooth, and bumpy are words that describe different textures.
Timeline

A line that is drawn to represent events in sequential order. Generally a timeline represents historical accounts. The events are indicated by dots or slashes on the line.
Tint

A color made by adding and mixing white with any color. See Appendix A for a detailed explanation.
Tissue Paper

A type of very thin paper that you can see through.
Watercolor Paint

A type of water-based paint, produced by mixing water with pigments. Watercolor paints are appropriate for students of all ages. They usually come in a tray, with squares of dry color pigments. Water can then be added to the dry pigment to paint.
APPENDIX A
Adding Color
If color materials are available, students can add color to their drawing with a variety of materials. Crayons, markers, colored pencils, or paint can be used to add color, detail, and richness to the drawings students create. Color can not only enhance the artwork students create, but also provide students with increased opportunities for descriptive adjective and vocabulary use related to color.
Tips for Adding Color/Painting:
- Make sure the materials are safe and appropriate for student use.
If using markers or paint, make sure the markers or paint are non-toxic and safe for student use. - Paints for students:
- Tempera Paint — Tempera paint is appropriate for students of all ages. It is a water-based paint that dries quickly with a matte finish. Tempera paint can usually be purchased in powdered or liquid form.
- Watercolor Paint — Watercolor paint is also appropriate for students of all ages. Watercolor is a water-based paint, produced by mixing water with pigments. Watercolor paints usually come in a tray, with squares of various color pigments.
- Save time by “drawing” in color first.
If you are using crayons, colored pencils, makers, or paint, you can save time by having your students draw or paint with such materials first, rather than drawing in pencil and then adding color. - Colors can mix when combined, layered, or touched.
When colors are combined, touched, or layered they will mix. For example, when crayons or colored pencils are layered on top of one another, the two colors will show a new color. When two colors of paint are mixed together, the two colors will create a new color. It is beneficial to know about color mixing because you may have limited colors available, but by showing students how to mix or layer colors or paints, students can create other colors to use in their artwork. Basic information on mixing and creating colors is listed below.
Primary Colors: RED, BLUE, YELLOW
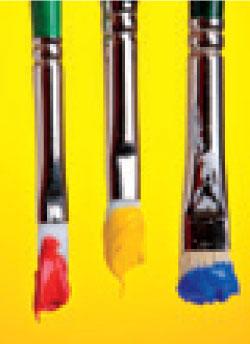
Primary colors are the three basic colors that cannot be mixed or formed by any combination of other colors. From these three primary colors you can mix and create all other colors.
Secondary Colors: ORANGE, PURPLE (Violet), GREEN
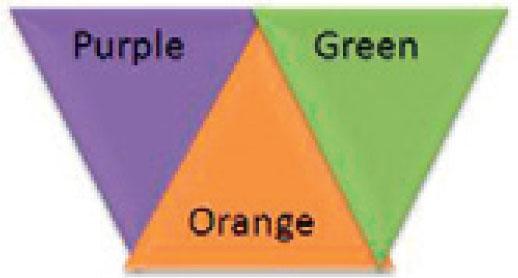
Secondary colors are created by mixing the primary colors.
- RED mixed with YELLOW creates ORANGE
- RED mixed with BLUE creates PURPLE
- BLUE mixed with YELLOW creates GREEN
Tertiary Colors: YELLOW-ORANGE, YELLOW-GREEN, RED-ORANGE, RED-PURPLE, BLUE-GREEN, BLUE-PURPLE
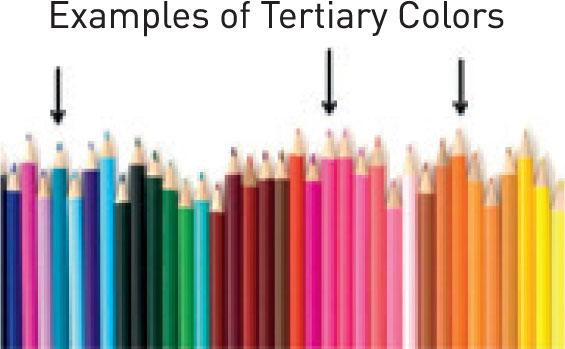
Tertiary colors are created by mixing a primary with a secondary color. The tertiary colors have two-word names which indicate the primary and secondary colors used to create them.
- YELLOW mixed with ORANGE creates YELLOW-ORANGE
- YELLOW mixed with GREEN creates YELLOW-GREEN
- RED mixed with ORANGE creates RED-ORANGE
- RED mixed with PURPLE creates RED-PURPLE
- BLUE mixed with GREEN creates BLUE-GREEN
- BLUE mixed with PURPLE creates BLUE-PURPLE
Tints and Shades

A tint can be made by adding and mixing white with any color. A shade can be made by adding black to any color.
Color Wheel
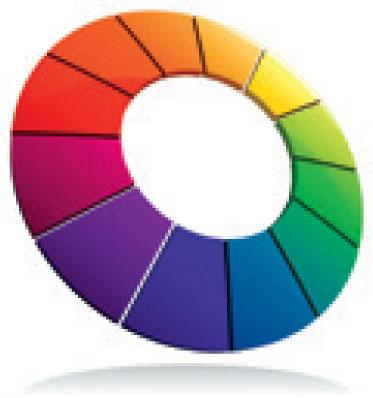
The color wheel shows the primary, secondary, and tertiary colors in relation to one another.
APPENDIX B
Printmaking
Printmaking is the process of creating a picture, shape, mark, or design by applying color (printing ink or paint) to a printing tool and then pressing the tool onto a flat surface. The picture, shape, mark, or design is transferred from the tool to the surface. Most prints can be produced repeatedly by reapplying color to the printing tool.
- Printing “tools” can vary. This activity book utilizes printing tools such as hard vegetables, like potatoes, or old sponges.
APPENDIX C
Sculpting Dough
Sculpting dough can be purchased at arts and crafts stores or made with the recipes below.
Sculpting Dough Recipe #1

Ingredients:
- 1 cup flour
- 1/2 cup salt
- 1/2 cup water
- (optional) Food coloring to give the dough color
Directions:
- Mix ingredients well until they form a ball.
- Knead the dough and add food coloring if desired.
- If the dough is too sticky, add a bit of flour. If too dry, add a few drops of water.
Sculpting Dough Recipe #2
Ingredients:
- 1 cup cold water
- 1 cup salt
- 2 teaspoons vegetable oil
- Tempera paint or food coloring
- 3 cups flour
- 2 tablespoons cornstarch
Directions:
- In a bowl, mix water, salt, oil, and enough tempera paint or food coloring to make a bright color.
- Gradually add flour and cornstarch until the mixture reaches the consistency of bread dough.
- Cover the dough to store it.
