Create To Communicate
Create To Communicate
LESSON 2
SYMBOLS
Make It “POP”! Personal Symbol
Objective: Students will create modern art posters and use these to discuss personal statements using imperatives.
Level: Intermediate
Materials: Paper, pencils, note cards, and pieces of paper. Optional: paint, paintbrushes, water containers, crayons, markers, glue, old magazines, or other collage materials.
Teacher Preparation: 1. Photocopy the symbols in the Reproducible Worksheets. Cut each symbol out and tape it to a note card or draw the symbols on note cards. Then write what each symbol expresses on a separate note card. Make sure that for every note card with a symbol there is a note card that lists what the symbol expresses. Make enough note cards so that every student in your class has one card, with either a symbol or symbol explanation on it. Add more symbols to the game if desired. 2. Read the various mixed media options for this activity in Part Two, Step Six. Choose an art option depending on the available materials and needs of your class. Prepare the materials for the activity.
Art Options: If these various art media are not available for this activity, choose one medium to use. This activity can be completed solely as a drawing, painting, or collage activity.
INSTRUCTIONS
Part One: Symbols and Imperatives, Mix-and-Match Warm-Up Activity
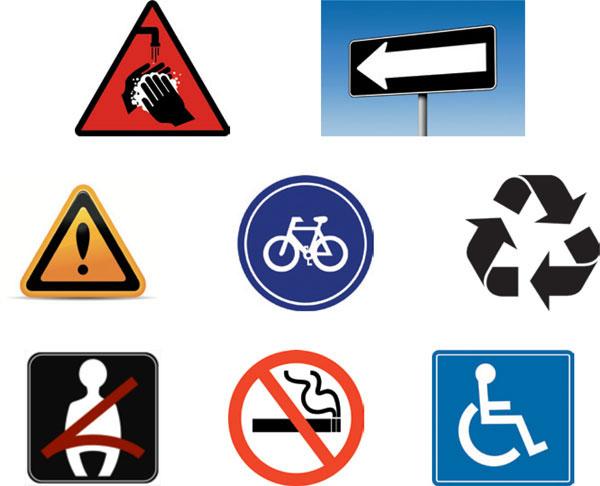
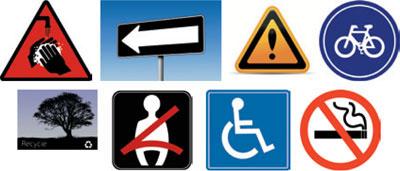
- Have students work in groups. Show groups the symbols below. The symbols are provided in a larger format in the Reproducible Worksheets section at the end of this lesson.
- Give students time to look at the symbols and discuss what the symbols express. Group members should help each other clarify symbol meanings.
- Explain the mix-and-match game to students. Tell students that everybody will get a card with either a symbol or a symbol explanation on it. When you say “Go!” students should walk around the room trading cards with each other. When you say “Stop!” students should stop trading cards and stand still. When everybody has stopped moving, call “Match,” and students have to find somebody who has the match to their card. If they have a symbol on their card, they need to find the student with the correct meaning. If they have a meaning written on their card, they have to find the student with the correct symbol. When every student has found their match call “Go!” again and the game continues.
- Mix-and-match variations: If you have an odd number of students there are different options for playing the game. One option is to have the extra student be the assistant, calling “Go,” “Stop,” and “Match.” Another option is to give all students a card. Whoever is the last person to find their match after you call “Match” is out. Each round one student should be out until there is one person left. (This option requires you to make a card for every student.)
- After playing the game, tell students to get back into their groups again. Ask the students if the symbols above differ from the symbols that represent the same actions or things in their country; if so, have groups discuss the similarities or differences between the symbols. Which symbol do they think is better? Why?
- Tell students that the ideas symbols express are often verbalized or written using imperatives (the infinitive form of the verb without to, which is used to express a request, a command, an order, or instructions).
- Emphasize to students that the symbols above are public symbols that express an order or something that you have to do. (This distinction is important because students will be using imperatives for a different function in Part Three.)
- Ask groups if they can think of any other symbols that express imperative commands. Have groups take turns coming up to the board and drawing the symbol, while other groups guess the imperative command it expresses.
Part Two: Pop Art Personal Symbol
- Show students the images at the end of this lesson. These images are examples of the Pop Art style. Examples of Pop Art can also be found online by searching for artwork of famous Pop artists such as Andy Warhol, Jasper Johns, Roy Lichtenstein, or Claes Oldenburg.
- Ask students what similarities they see in the Pop Art examples. Students may come up with answers such as bright colors and common or everyday objects.
- Explain to students that Pop Art is an art movement that started in the 1960s in the United States and the United Kingdom. Pop Art uses common objects, cultural symbols, and bright colors and lines to create a work of art.
- Tell students they will be creating a personal symbol in the Pop Art style to represent themselves.
- Have students first draw their ideas for their personal symbol. A personal symbol could be anything from a peace sign to a cell phone to a paintbrush to a soccer ball. Stress to students that their personal symbol should have personal meaning and purpose. Offer students advice on creating their symbols such as:
- Keep the symbol simple. Pop Art uses simple and easily recognizable forms.
- Design a symbol that has personal meaning. Students’ symbols should represent their interests, passions, beliefs, or personality in some way.
- Once they have a basic design for their symbol, they should think about how they can make it “Pop Art.” What colors and other design features can they use to make it stand out?
- Give students time to make their symbols. If only paper and pencils are available, students can draw their personal symbols. If other materials are available, some mixed media options for completing this activity are listed below:• Use pencil, crayons, colored pencils, or markers to draw the symbol and the background.
- Use collage materials for the background, but paint the actual symbol and then cut it out and add it to the collage background.
- Paint the background and use collage techniques and materials to make the symbol.
- Paint the symbol and the background, but use dark markers or crayons to accentuate the design or add details once the paint is dry.
Part Three: What Does Your Symbol Say?
- When students are finished creating their personal symbols, have students return to their groups.
- Collect the symbol artworks, and pass them out among the groups, making sure no group has one of their own artwork.
- Remind them of the symbols looked at earlier in the activity and the imperative commands that express each symbol.
- Tell students they need to use imperatives to describe each of their classmate’s symbol artworks. Each group should brainstorm an imperative phrase to represent each piece of artwork and write down the imperative phrase they decide upon. For the personal symbols, the imperative statements should encourage an idea or action rather than an order or command.
- Provide students with examples: If a student painted a soccer ball flying through the air as her personal symbol, another student might write “Play hard” as the imperative sentence to represent that artwork. If a student who loves to talk creates a Pop Art personal symbol like the below image, an imperative sentence could be “Talk more!”
- Make sure students understand the difference between the two uses of imperatives in this activity. When contrasting imperative statements like “Wash your hands” and “Talk more,” emphasize that the first sentence is a command while the second sentence encourages an action.
- Have groups work on creating an imperative statement for each piece of artwork they have and then have groups switch artwork. They should do the same again. Groups should continue switching until several imperative phrases have been generated for each artwork. The imperative phrases should vary depending on different reactions and interpretations of the symbol artwork.
- Hold up one piece of artwork at a time. Have each group read the imperative phrase they wrote to represent that artwork. The artist of the artwork can choose the phrase he or she likes the best.
- Have students write the imperative statement they chose for their symbol with large words and display the artwork together with the imperative statement in the classroom or school.
Part Four: 3-2-1 Closing Activity
- To wrap up this activity, have students do a 3-2-1 closing activity.
- Tell students to write the following in their journals or on a separate sheet of paper:
- Three things they learned. (The three items can relate to any component of the activity; for instance, symbols and their meanings, imperative words or statements, or Pop Art.)
- Two things they liked about this activity.
- One thing they disliked about this activity.
Extension Activity:
Community Pop Art
Have students create Pop Art symbols on a theme of improving their community. Students might come up with themes such as “keep the streets clean,” “obey traffic rules,” “be nice to the environment,” or themes that are related to an upcoming event or important community topic. Students should also write English statements or slogans to accompany their symbols. If possible, have the students display their community Pop Art symbols around the school or other public location in the community.
Additional Resources:
Keith Haring is a famous contemporary American artist. His artwork transforms everyday images into bold symbols and statements. See examples of his artwork, as well as browse online activities and an online database of lesson plans, on his children’s website.
www.haringkids.com
www.haringkids.com
Art Lex is an online art dictionary with great art definitions, images and quotations. Search “Pop Art” for a definition and examples of Pop Art and Pop Artists.
www.artlex.com
www.artlex.com
MAKE IT POP!

THE SIGN SAYS
Directions: Look at the images below. What do you think they mean? What do you call these images?