Create To Communicate
LESSON 5
SHELTERS
Community Lessons
Objective: Students will use a community collage to give and follow directions using imperatives and prepositions of place.
Level: Beginner to Intermediate
Materials: Old magazines or images of community buildings, tape, glue, paper, pencils, crayons, or colored pencils. Optional: tempera paint, paintbrushes, or markers.
Teacher Preparation: 1. Collect magazine images of community buildings. 2. Find a large, flat surface to use for as a base. Cover the surface with paper. 3. Draw streets of the neighborhood on the paper, or have students draw the streets. Be sure to draw the streets so that students can place their building collages inside the map and along the streets. Also, make sure to give the streets names; students will use the street names to give directions later in the activity.
Art Options: If the materials above are unavailable, students can make a collaborative drawing instead. To make a collaborative drawing you will need a large sheet of paper or several small sheets of paper taped together. Hang the paper on the board or classroom wall. Draw streets on the paper and have each student contribute by drawing a building in the community. Students can then use the collaborative drawing to practice giving and listening to directions.
INSTRUCTIONS
Part One: Name that Place! Warm-Up Activity
- Brainstorm with students what makes up a community and create a list on the board of the different types of buildings, public offices, and businesses that can be found in a neighbor-hood or community. The list might include a school, grocery store or market, post office, hospital, police station, fire station, library, bank, town hall, gas station, stores, apartment buildings, houses, and office buildings.
- Break students up into groups.
- Have one student from each group write each place from the list on a strip of paper and then fold the strips in half.
- Put all of the strips of paper in the middle of the group.
- One group member should then choose a strip of paper and describe that place or building to the group without saying its name.
- Whoever guesses the place correctly gets to choose a strip of paper next.
- “Guess that Sketch” is a variation for this activity. Have students draw — instead of describe — the places that they chose. The first group member to correctly guess the place gets to draw next.
Part Two: Community Collage
- Tell students they will be creating a collaborative community collage. Each student will draw or construct a building to include in the collage.
- Have each student choose a different building to create from the neighborhood list. If your class is small, students may need to make two or three places from the neighborhood list.
- Help students find the right photos for their collages.
- After students complete the basic forms, have them add details such as doors, windows, and signs. These details can be added with crayons, markers, or paint and will help distinguish what types of buildings the sculptures are.
- When students’ collages are completed, have them place their buildings within the map along a street or on a street corner. (See the instructions for creating the map in the Teacher Preparation section of this activity.)
- Help students organize the buildings so that they are spaced evenly within the map.
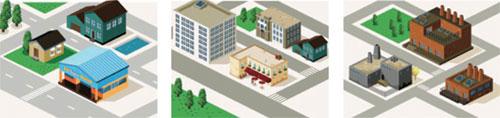
- Once every sculpture has been added to the map, have students draw or paint any extra de-tails on the map. Extra details may include a park, trees or bushes, stop signs or traffic lights, or any other features of a neighborhood that students can think of. See the illustrations of neighborhood blocks below as examples of how the collaborative community might look.
Part Three: Prepositions of Place and Imperative Statements with Directions
- When the community collage is complete, review prepositions of place that are associated with giving directions.
- Write a list of prepositions on the board. Add or modify the list as needed to suit the ability level of your class.
across
at
behind
beside
between
near
next to
on
opposite
far - Use the community collage to demonstrate prepositions of place by describing the location of one of the buildings. For example: “The grocery store is across from the post office.”
- Have students work in their groups and choose five prepositions. For each preposition, students should use the community sculpture to write statements and questions to ask another group. For example, “This building is located behind the post office and across from the market. What is it?”
- Groups should then exchange their statements and questions with another group.
- Groups then read the statements and questions and try to locate the correct building in the community sculpture.
- Next, review imperative commands that are used to give directions with a physical response activity.
- Have students stand up. Tell students you will say commands. Students must listen to what you say and then do it. For example, if you say “Turn left,” students should turn to their left.
- Use imperative commands such as turn left, turn right, go straight, or stop.
Part Four: Giving and Listening to Directions
- To practice listening to and giving directions, break students up into pairs.
- Write the names of the buildings in the community sculpture on strips of paper. Make two sets or use the strips of paper used from Part One.
- Tell each pair to pick two strips of paper. Make sure they do not pick the same place twice.
- Students must then use the community sculpture to give directions from one place to an-other. For example, if they picked grocery store and library, they might say:
To get from the library to the grocery store turn left on _______ street and go two blocks. Then, turn right on __________ street, and the grocery store is on the corner of ________ and ___________ streets.
- Have the pairs of students continue to pick two different locations and give directions from one place to another place.
- Once all students have practiced, have them take turns presenting their community maps to the class.
Part Five: Exit Ticket
- Have students write three sentences on a small piece of paper using the prepositions learned in this lesson to turn in before they leave the class.
Extension Activity:
Community Pamphlet and Tour
Have each student design a pamphlet and tour for people visiting the imaginary neighborhood. A pamphlet is a piece of paper or small book that gives information about something. To create a pamphlet, fold a sheet of paper in half. Tell students to make up a name for the community and write it on the cover. On another side of the pamphlet students can create imaginary facts about the community, such as the population, the year the community was established, or what the weather is generally like. On the third side of the pamphlet students can draw pictures depicting various aspects of the community. Finally, on the last side of the pamphlet have students write directions for a walking tour around the community, including the various landmarks that will be seen on the tour (such as the market, post office, or school). The directions should match the locations in the community sculpture. If appropriate, have students exchange pamphlets and follow the directions of their partner’s tour to ensure the directions are accurate. The completed pamphlets can be displayed with the community sculpture.
Additional Resources:
Visit the Housing and Urban Development Kids Next Door website to visit places virtually, get ideas for volunteering in your community, participate in online scavenger hunts, play interactive puzzles, and build virtual communities.
http://www.hud.gov/kids/
http://www.hud.gov/kids/
Visit the EL Civics for ESL site to learn more about housing in the United States.
http://www.elcivics.com/housing_lesson_1.html
http://www.elcivics.com/housing_lesson_1.html
Visit the Internet TESL Journal site for conversation questions about communities.
http://iteslj.org/questions/home.html and http://iteslj.org/questions/community.html
http://iteslj.org/questions/home.html and http://iteslj.org/questions/community.html